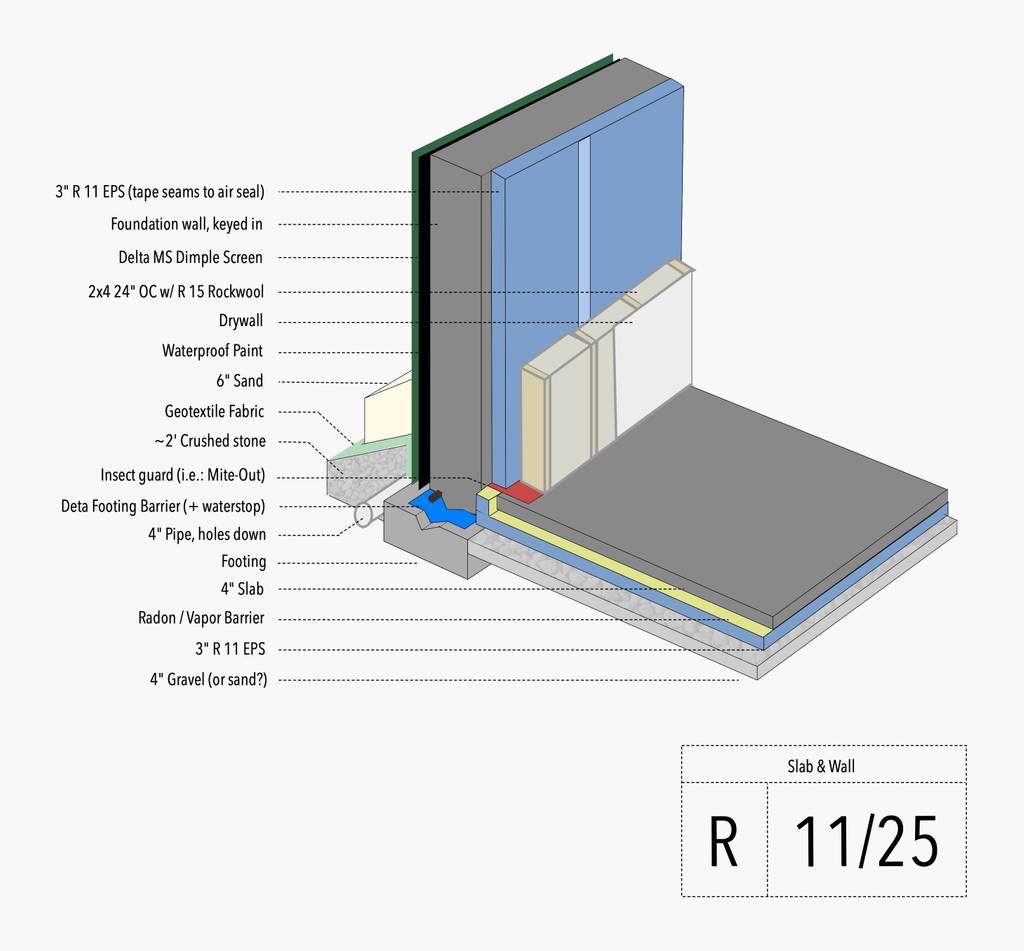
Exciting times! We’re now ready to begin working on the foundation for the workshop. This will be our first time working with Stego, Polyguard, and under slab insulation. Even though it’s a sort of trial run for the main house, we’re aiming to hit close to passive standards with this build. The plan is to catch any hiccups and learn from our mistakes now so we can step up our game for the big build. To get started, we had to have plans in hand.
Upgraded Plans
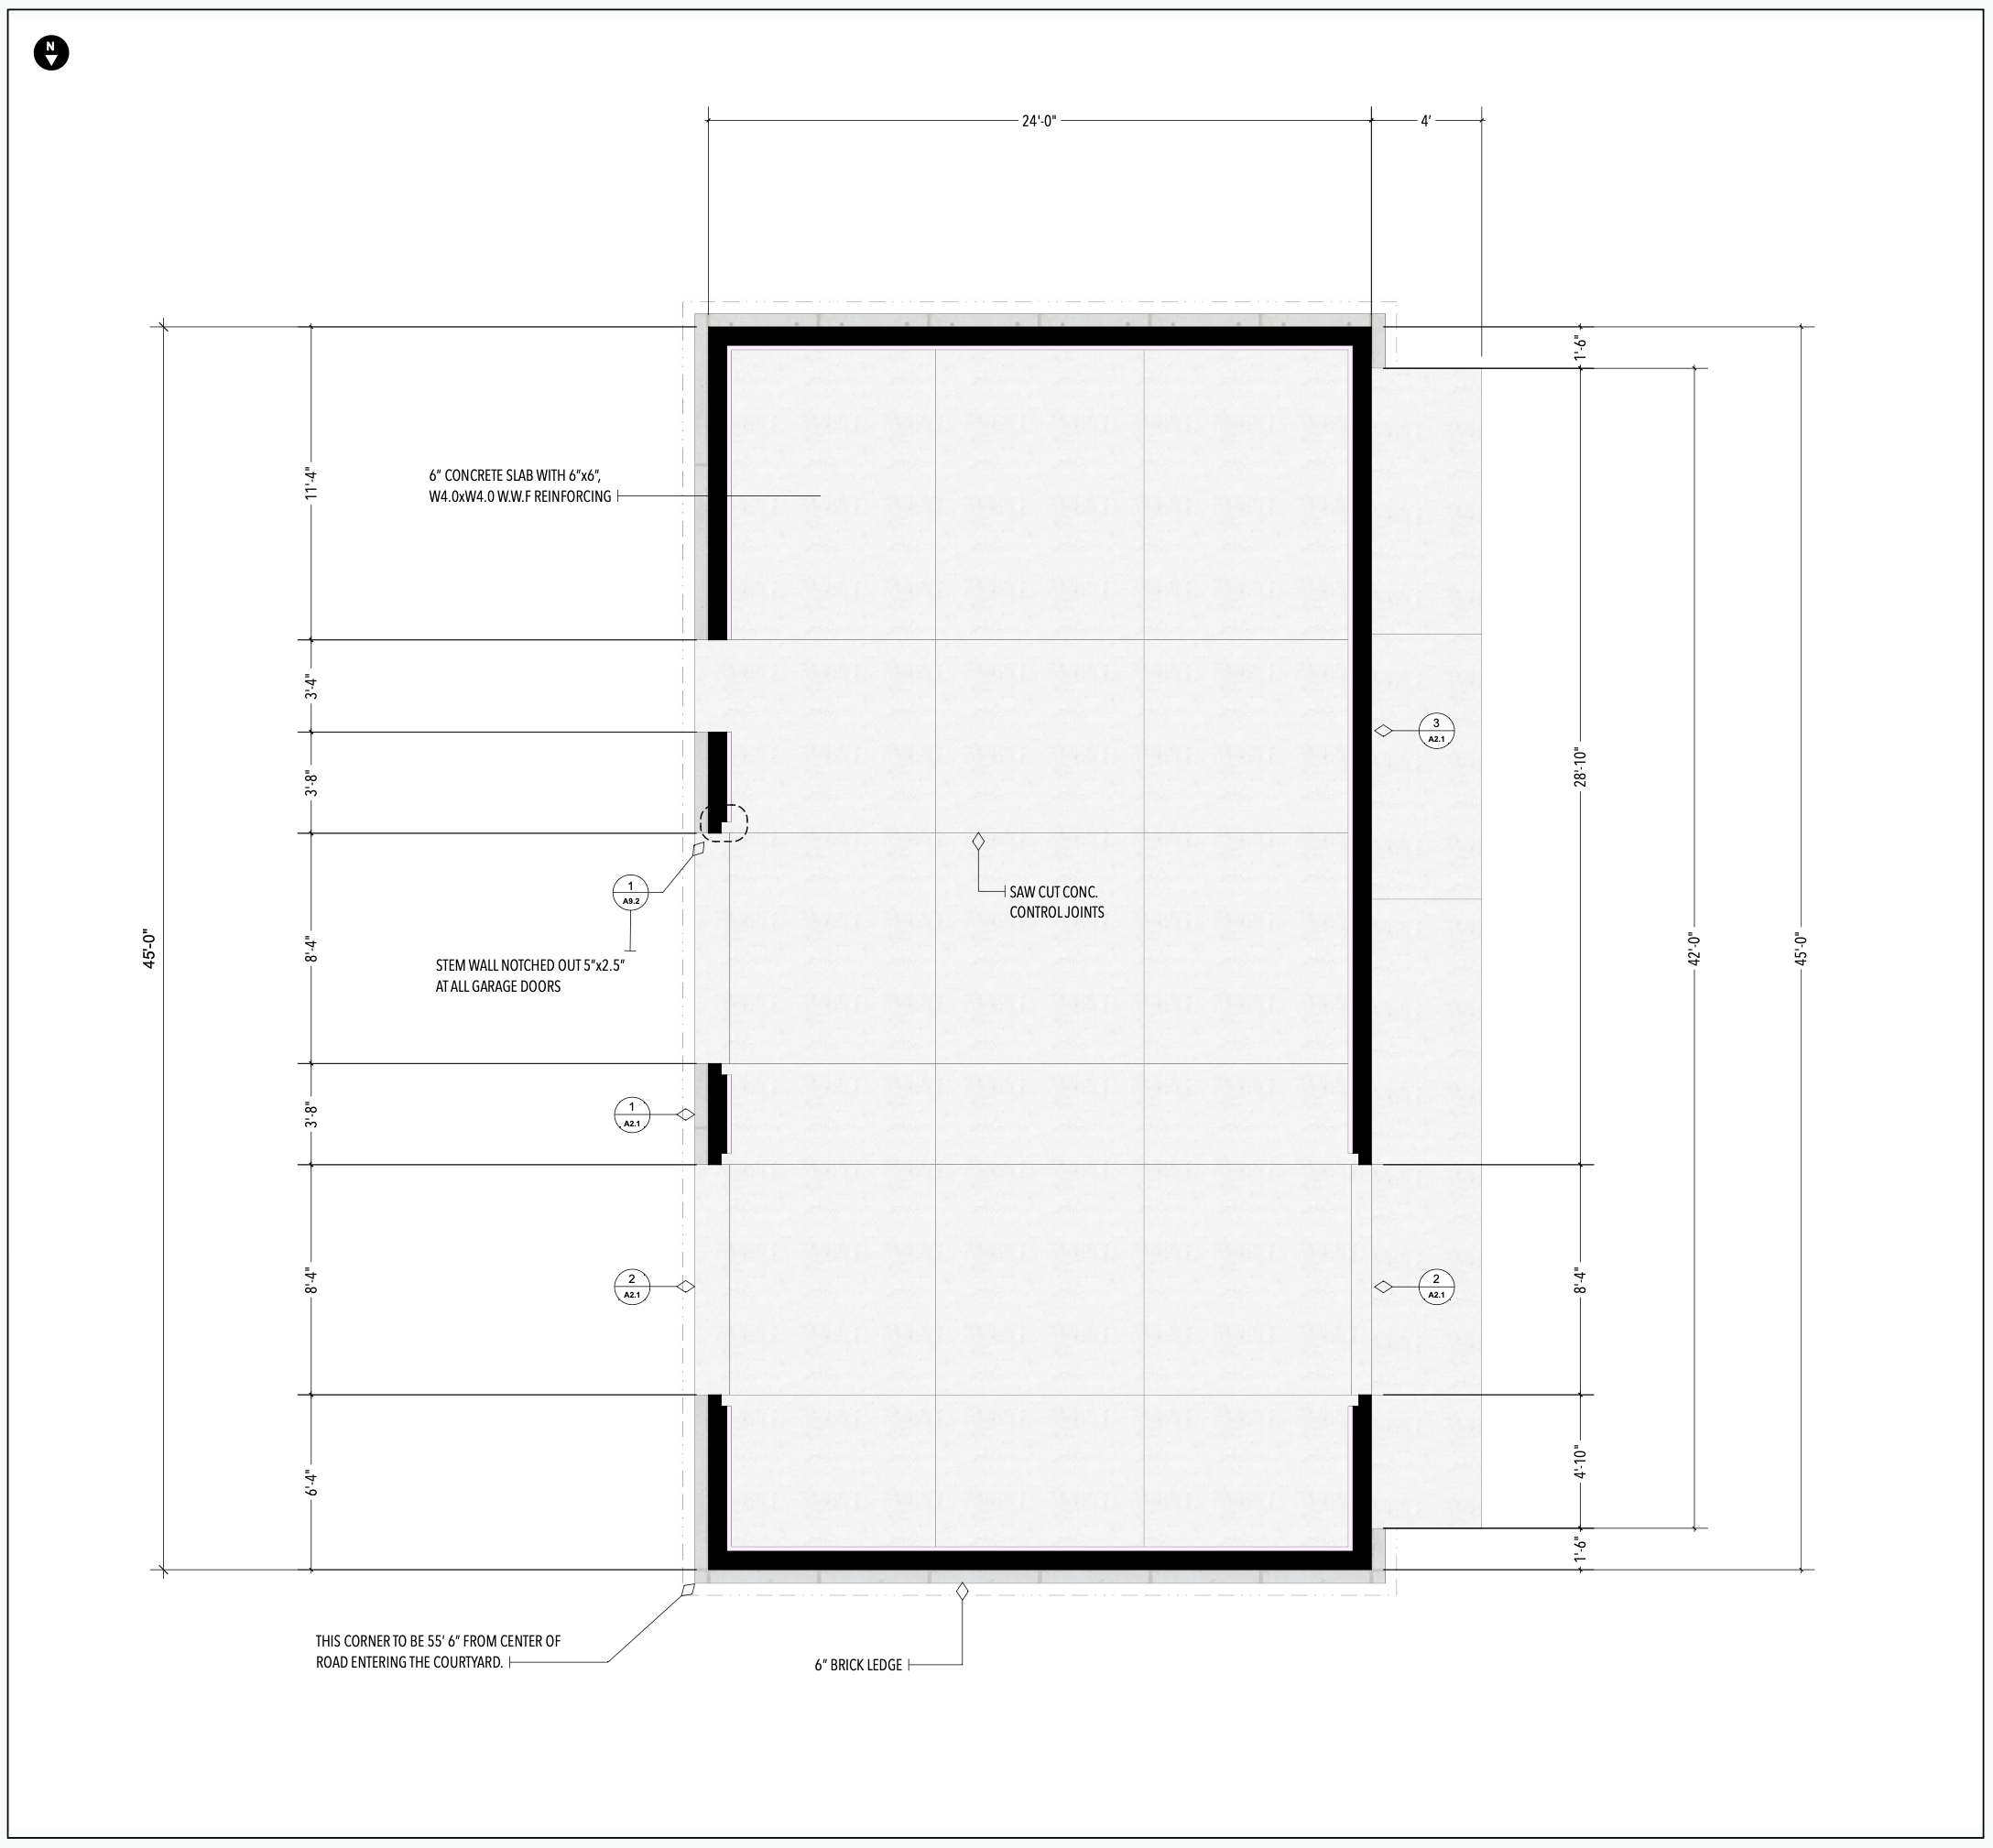
Workshop Floorplan
We brought in an architect to draw plans for the city – not entirely sure if it was a must, but it definitely eased our minds. Now, what makes this an “upgraded foundation”? Based on our conversations with local contractors, our final plan is a bit different than a standard residential build in following ways:
- 2” under slab insulation instead of no insulation
- 10mil vapor barrier instead of 6mil (or none at all)
- W4.0 Remesh / Welded wire reinforcement versus as low as W1.4
- 6” slab instead of a 4” slab
With plans in hand, we were able to reach out to foundation contractors. We had previous names from the house we built in the area. We also asked the crew that did our road work if they recommend anyone. Foruntately, we found the perfect company that’s fine with letting us take on waterproofing, insulation, and vapor barrier.
Quick Take Finding a crew on board with our DIY ambitions made this process a joy.
Footings & Stemwall
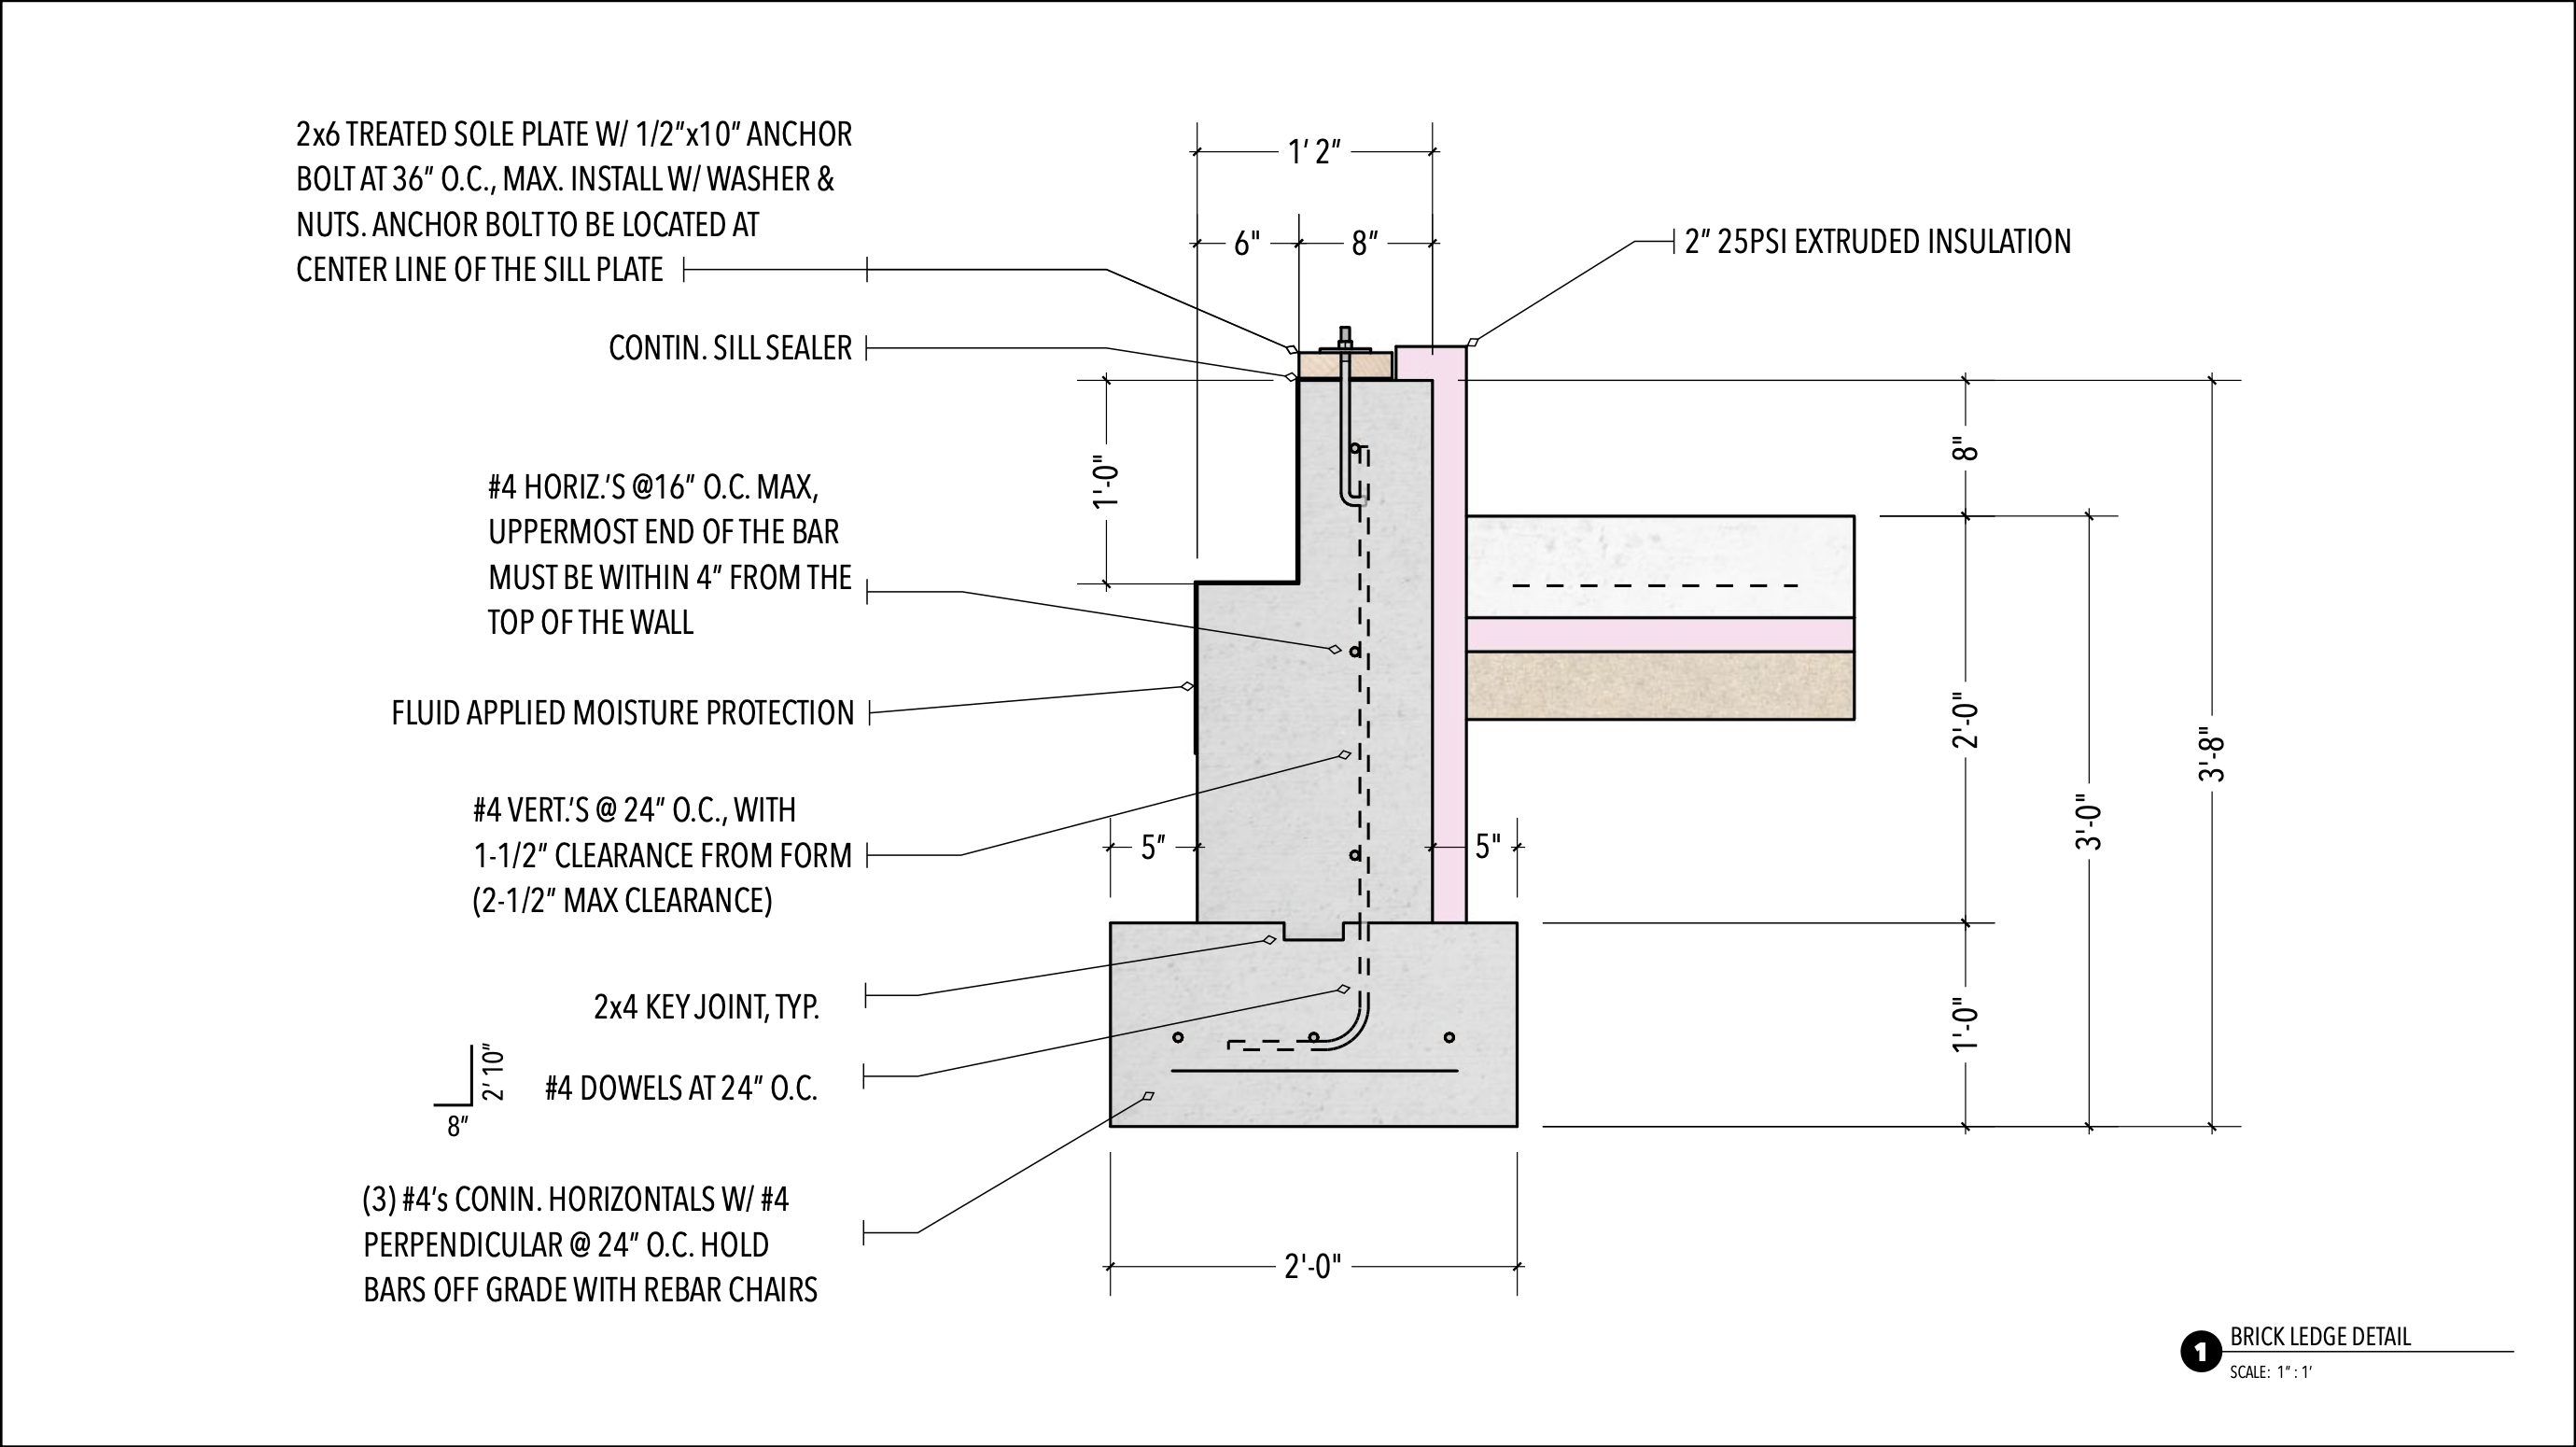
Stemwall Detail
Frost lines vary considerably across the United States, so make sure you check your local codes to see where yours us. Our frost line is 2’ deep, so that’s where our footings start. From there, we went with footings 1’ deep x 2’ wide, keyed in.
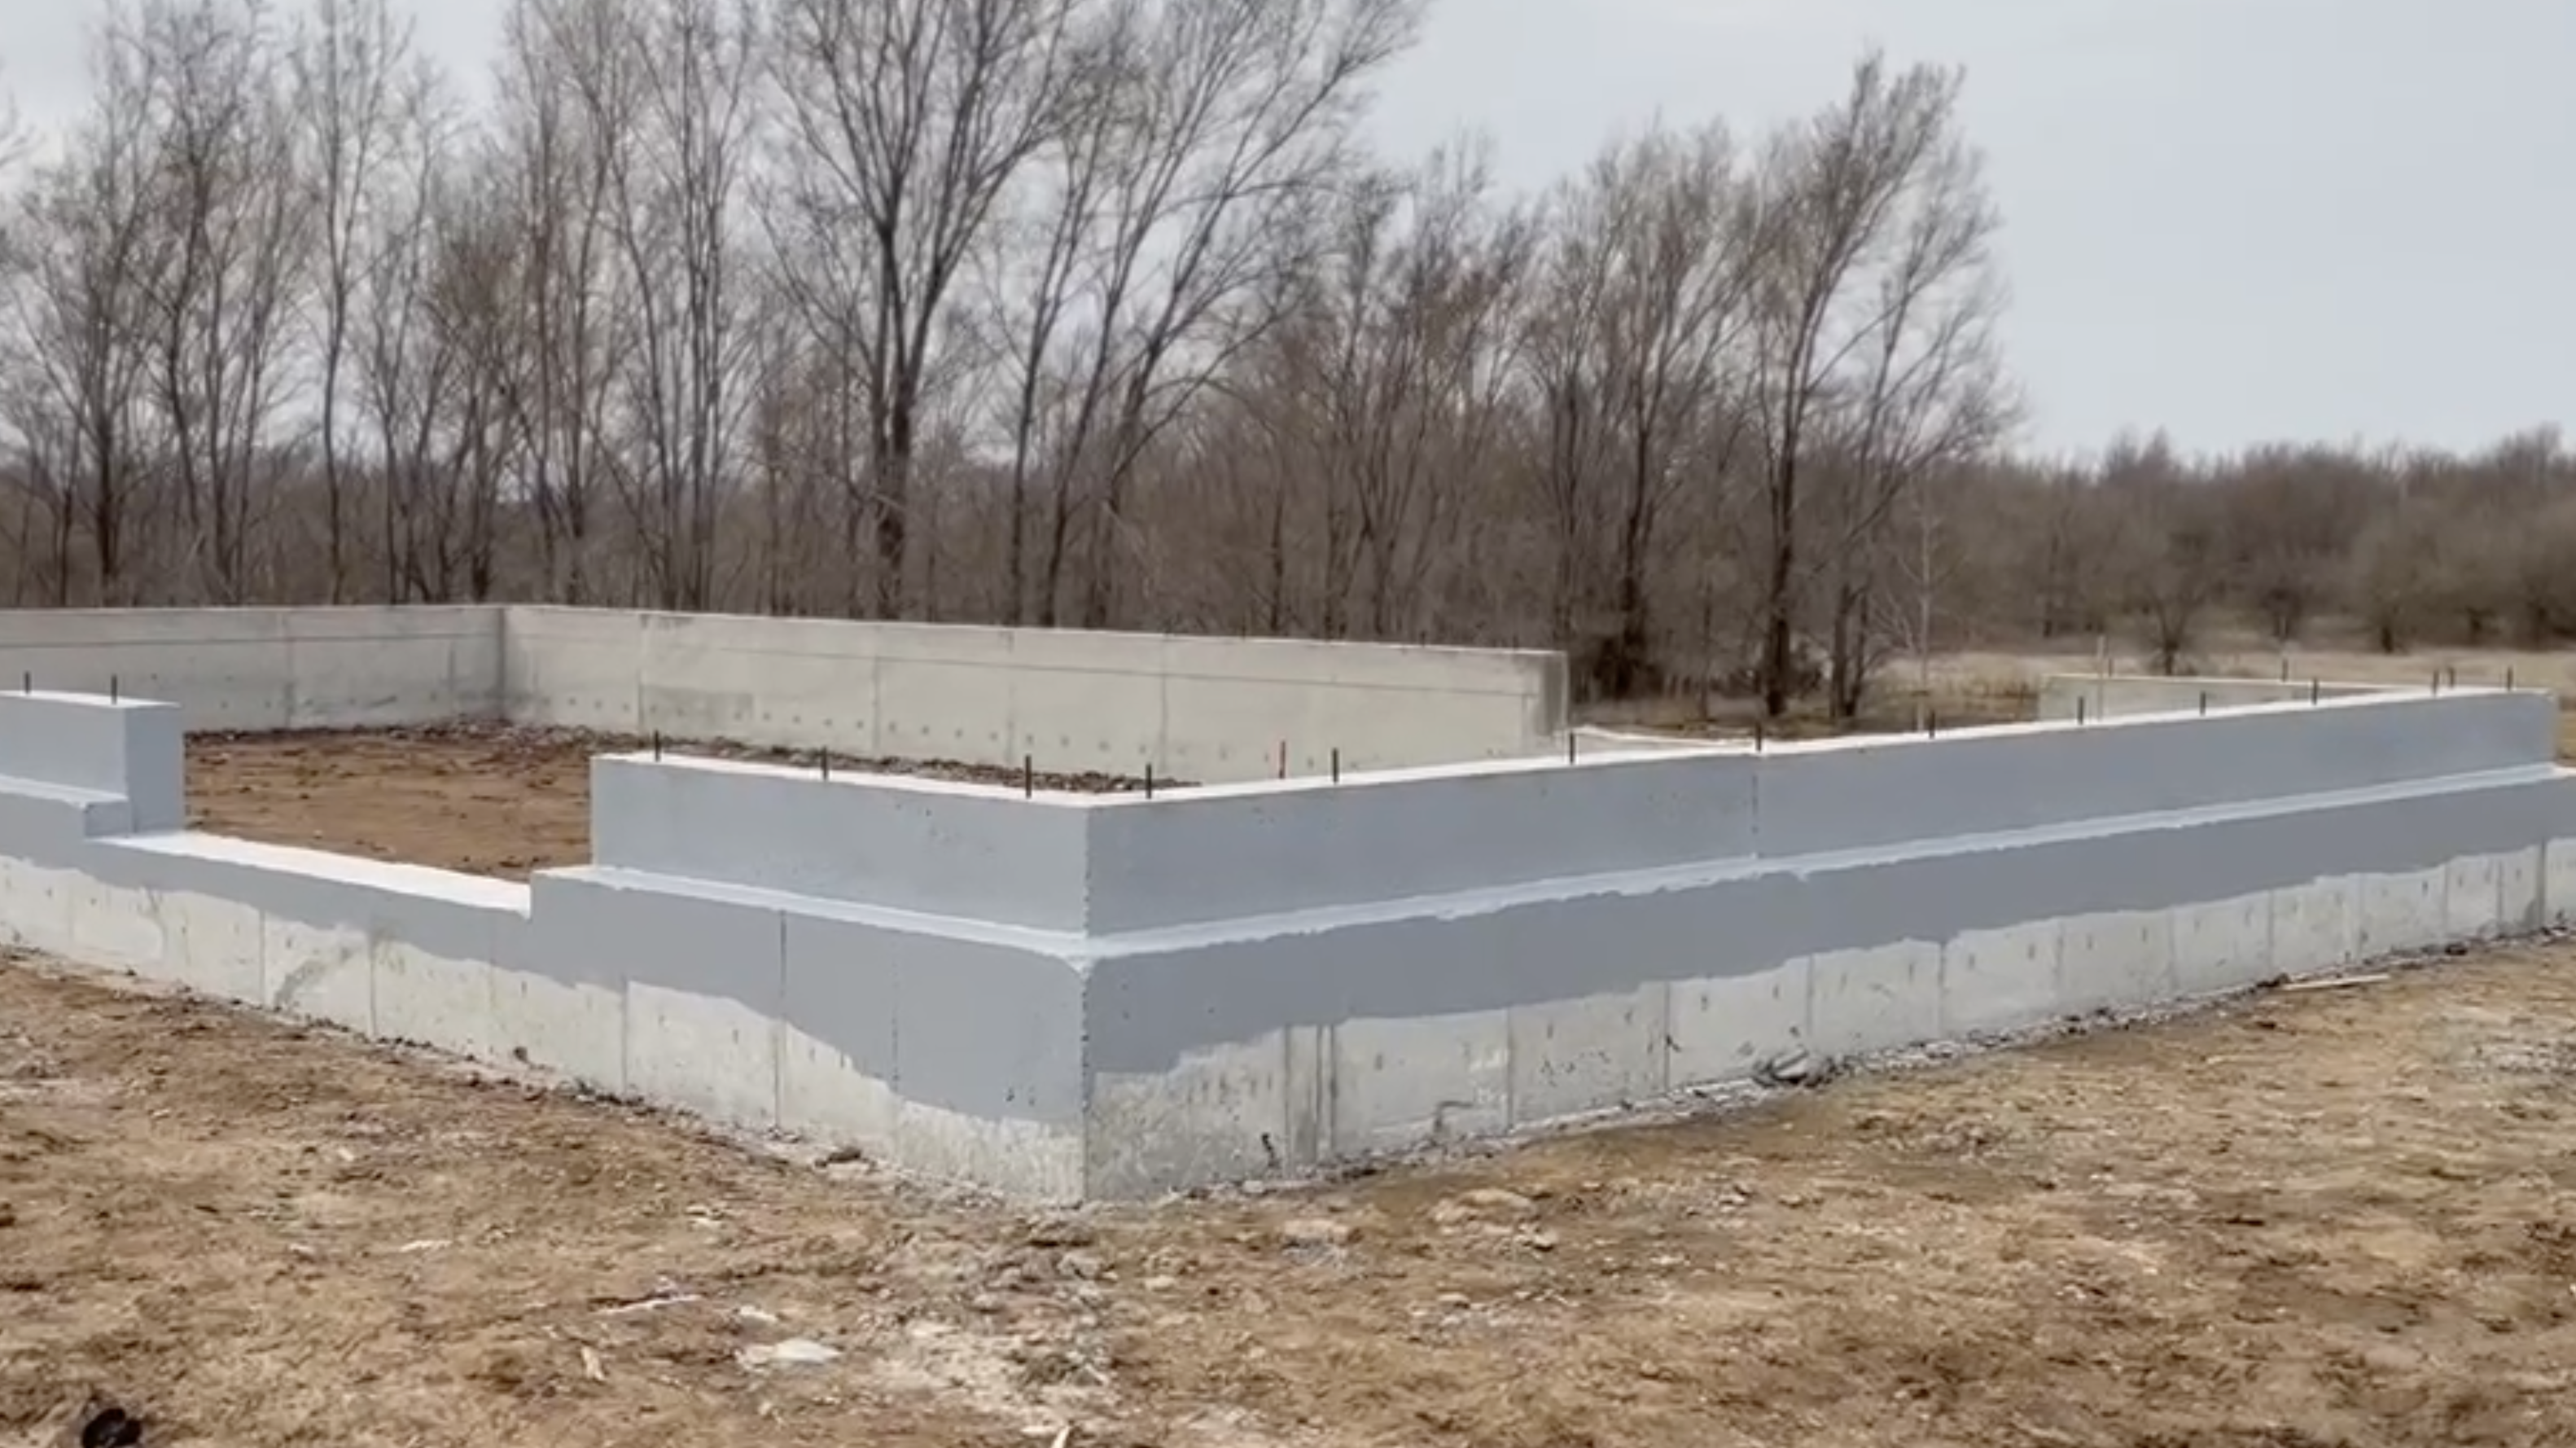
The stemwall is quite beefy at 14” wide up until the brick ledge. Our brick ledge is 6 1/4” to support a larger stone base that is part of the design. Then, the wall continues 8” above grade. The standard in our area could have a garage stemwall just a few inches above grade, and only 8" total width. Our main thinking with these upgrades is to make a 100 year building. The thick wall combined with the above grade protection should go a long way.
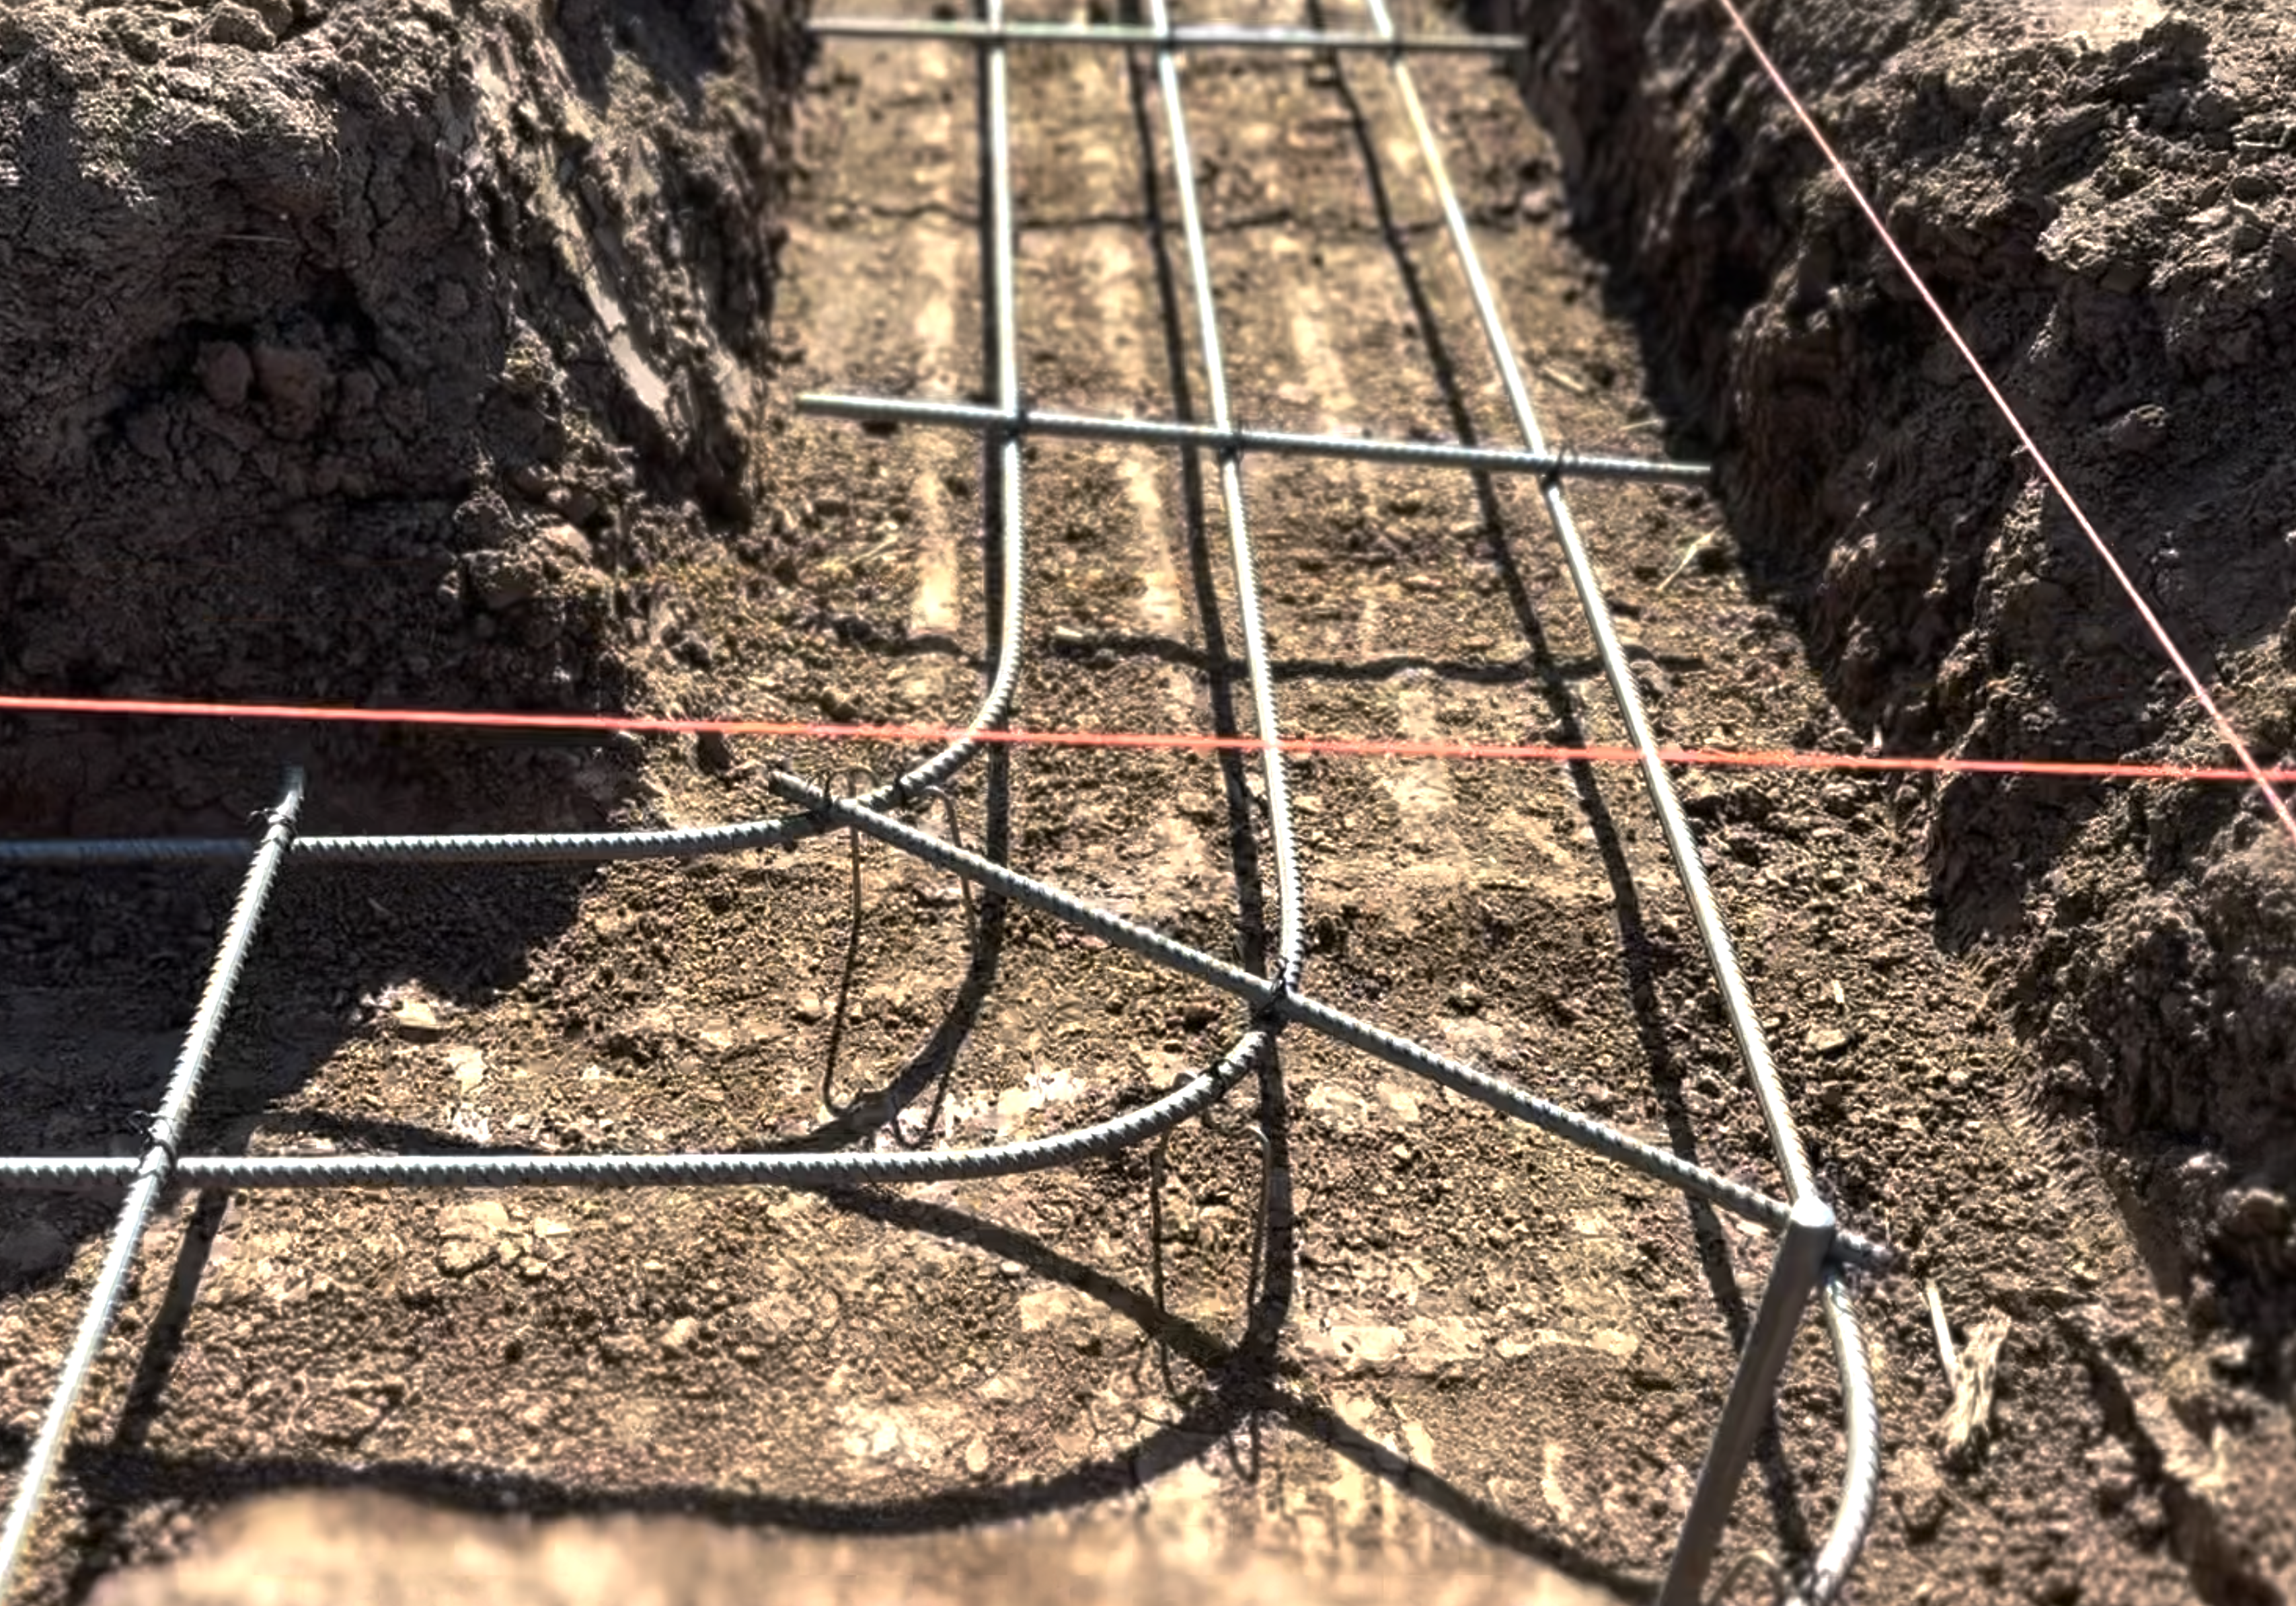
Rebar in footing.
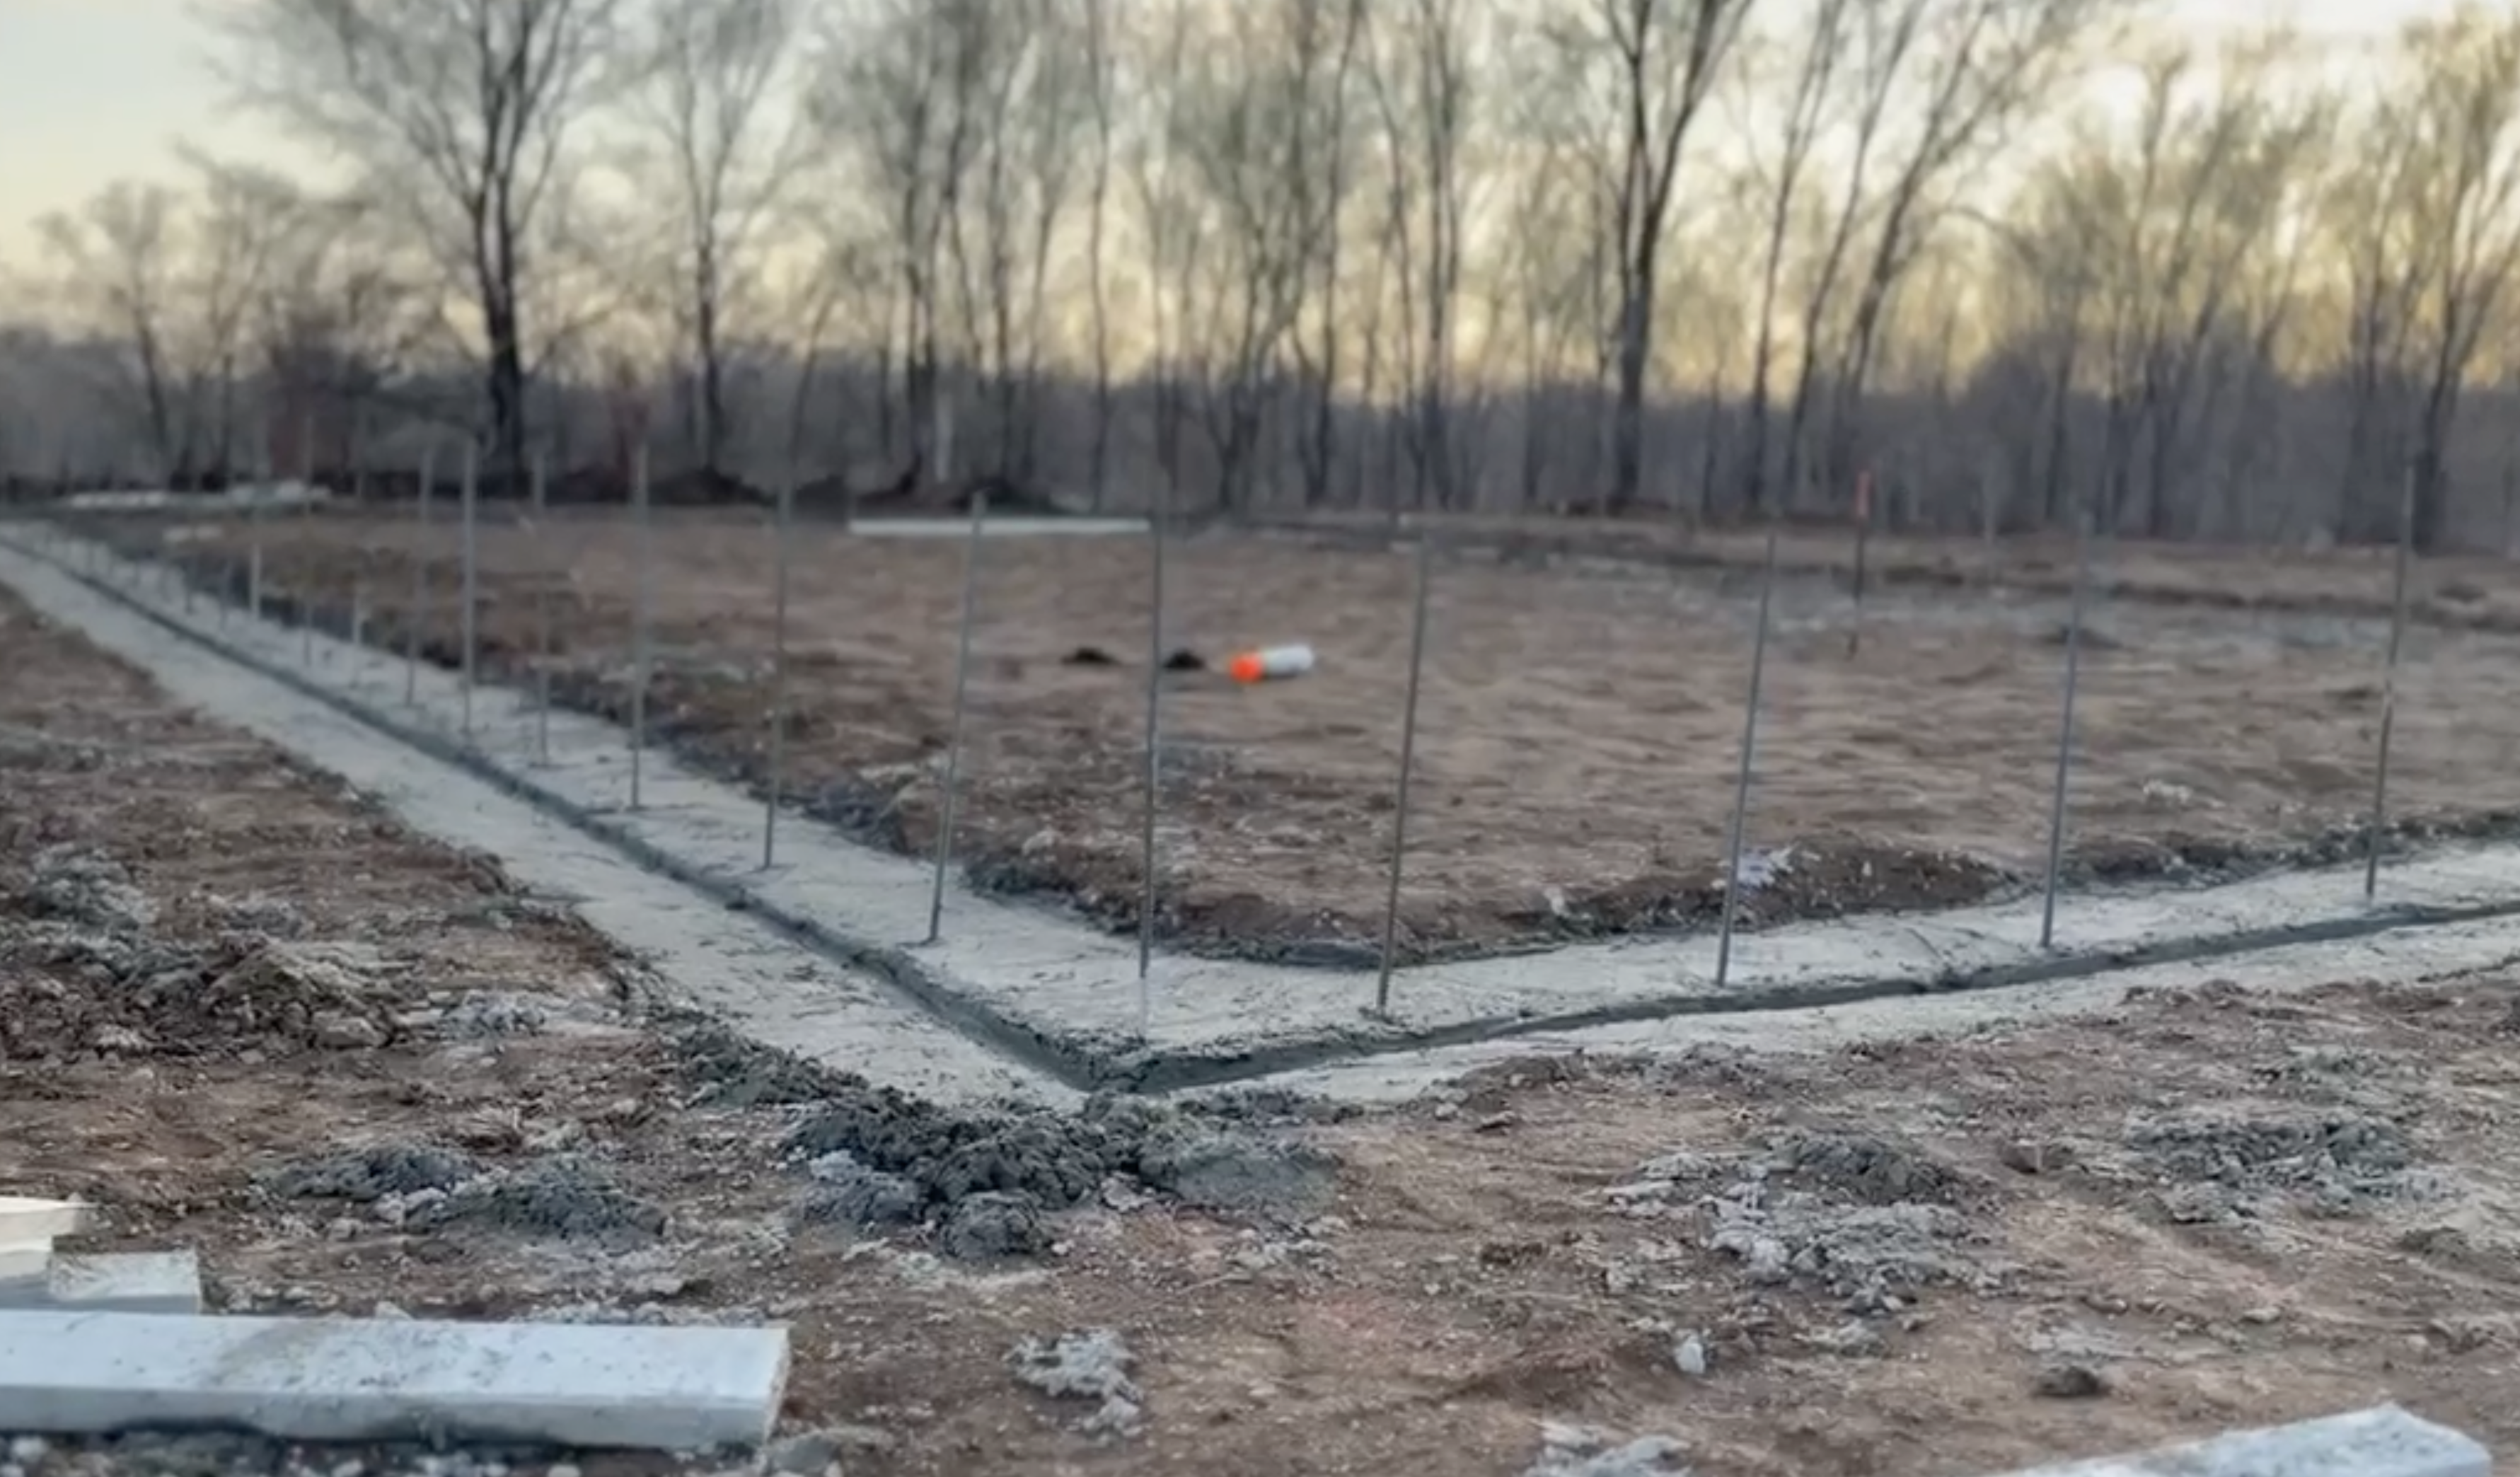
After the footing pour.
Waterproofing
A foundation like this does not need too much in the form of water proofing. According to Polyguard, “To optimize protection, apply waterproofing systems to all foundation walls with earth on one side and usable space on the other (including crawl spaces). For added effectiveness, extend waterproofing at least 12 inches onto intersecting walls.”
After confirming with the architect, we decided that the small area where the brick ledge is equal to or above slab level could benefit from it. We also wanted an excuse to try out waterproofing products from Polyguard because we knew that we would need them for the main house.
Homestretch applied.
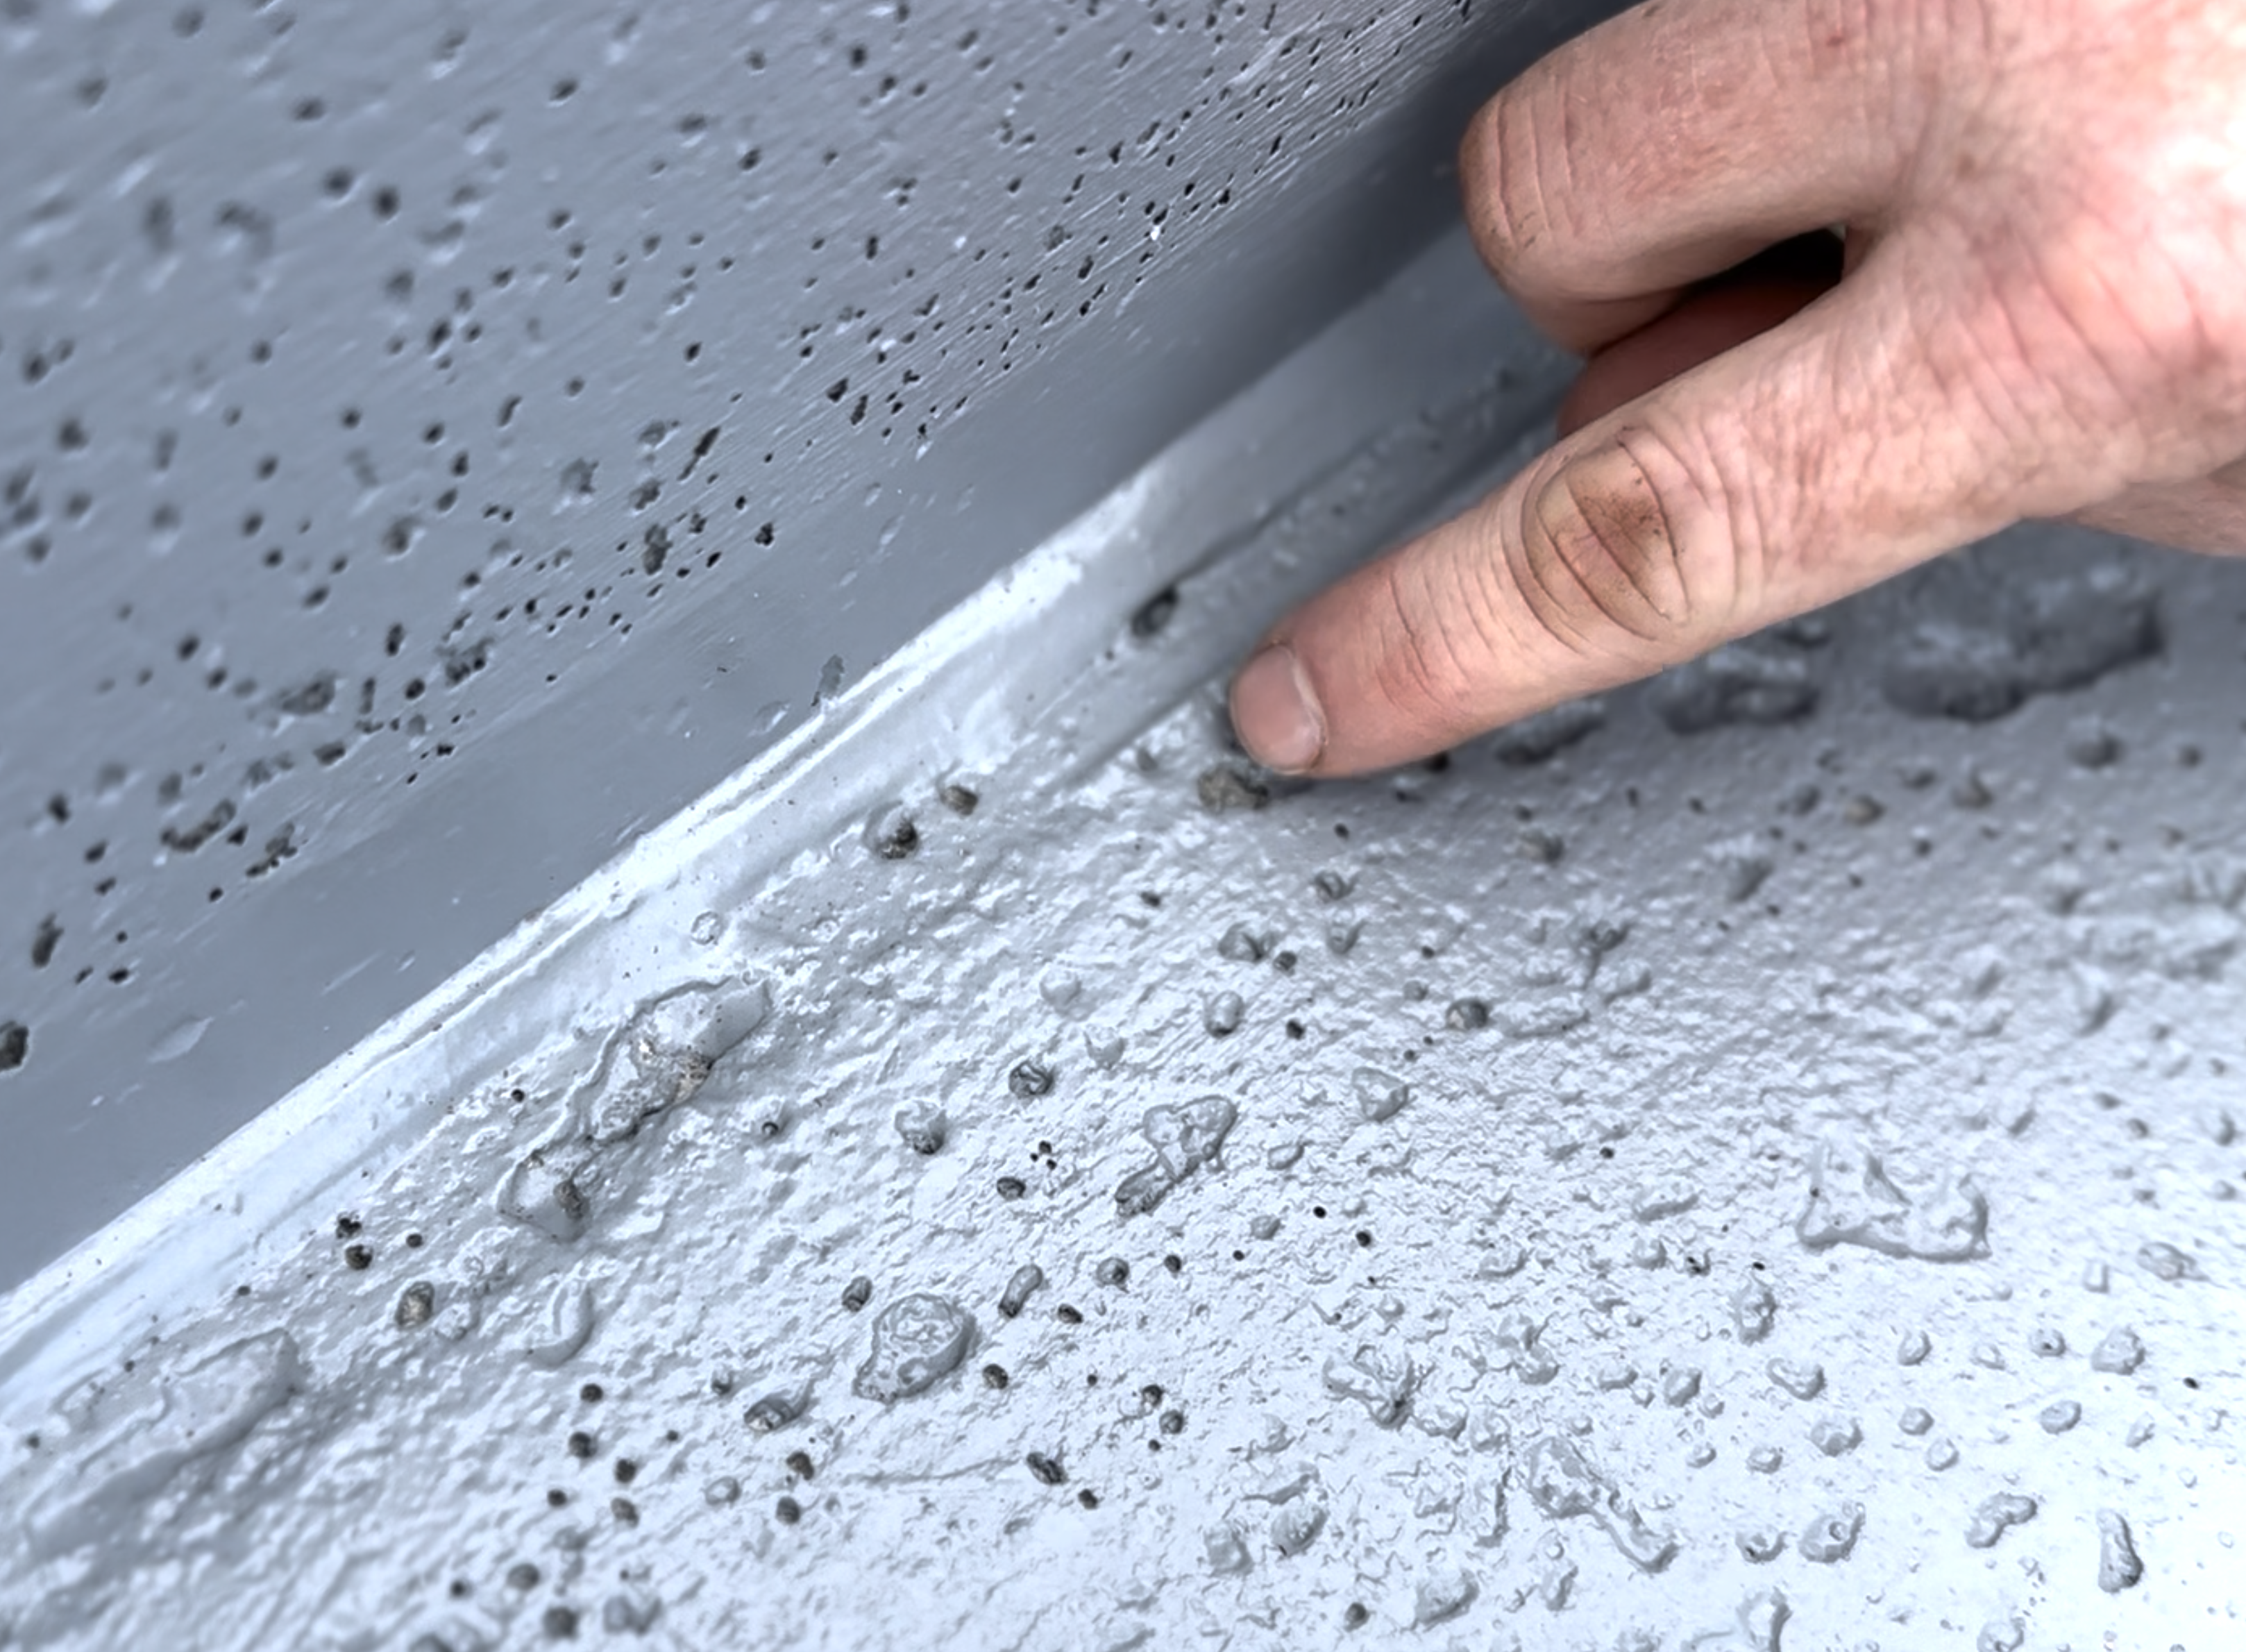
Dimples in concrete.
We decided on a fluid applied approach, so we ordered Homestretch and BlueBarrier Joint Filler. The joint filler was straightforward enough, but we did have trouble with Homestretch. Even after using the advised 3/4” nap roller, we had trouble filling imprefections in the concrete with multiple coats. It appears we should have used more Joint Filler in the larger dimples, but that would have been quite time consuming. For the main house, we still plan on sticking with PolyGuard, but we’ll be using the sheet membrane instead of a fluid applied. If we were to do a fluid applied again, we would buy the spray gun to go with it.
Perimeter Insulation
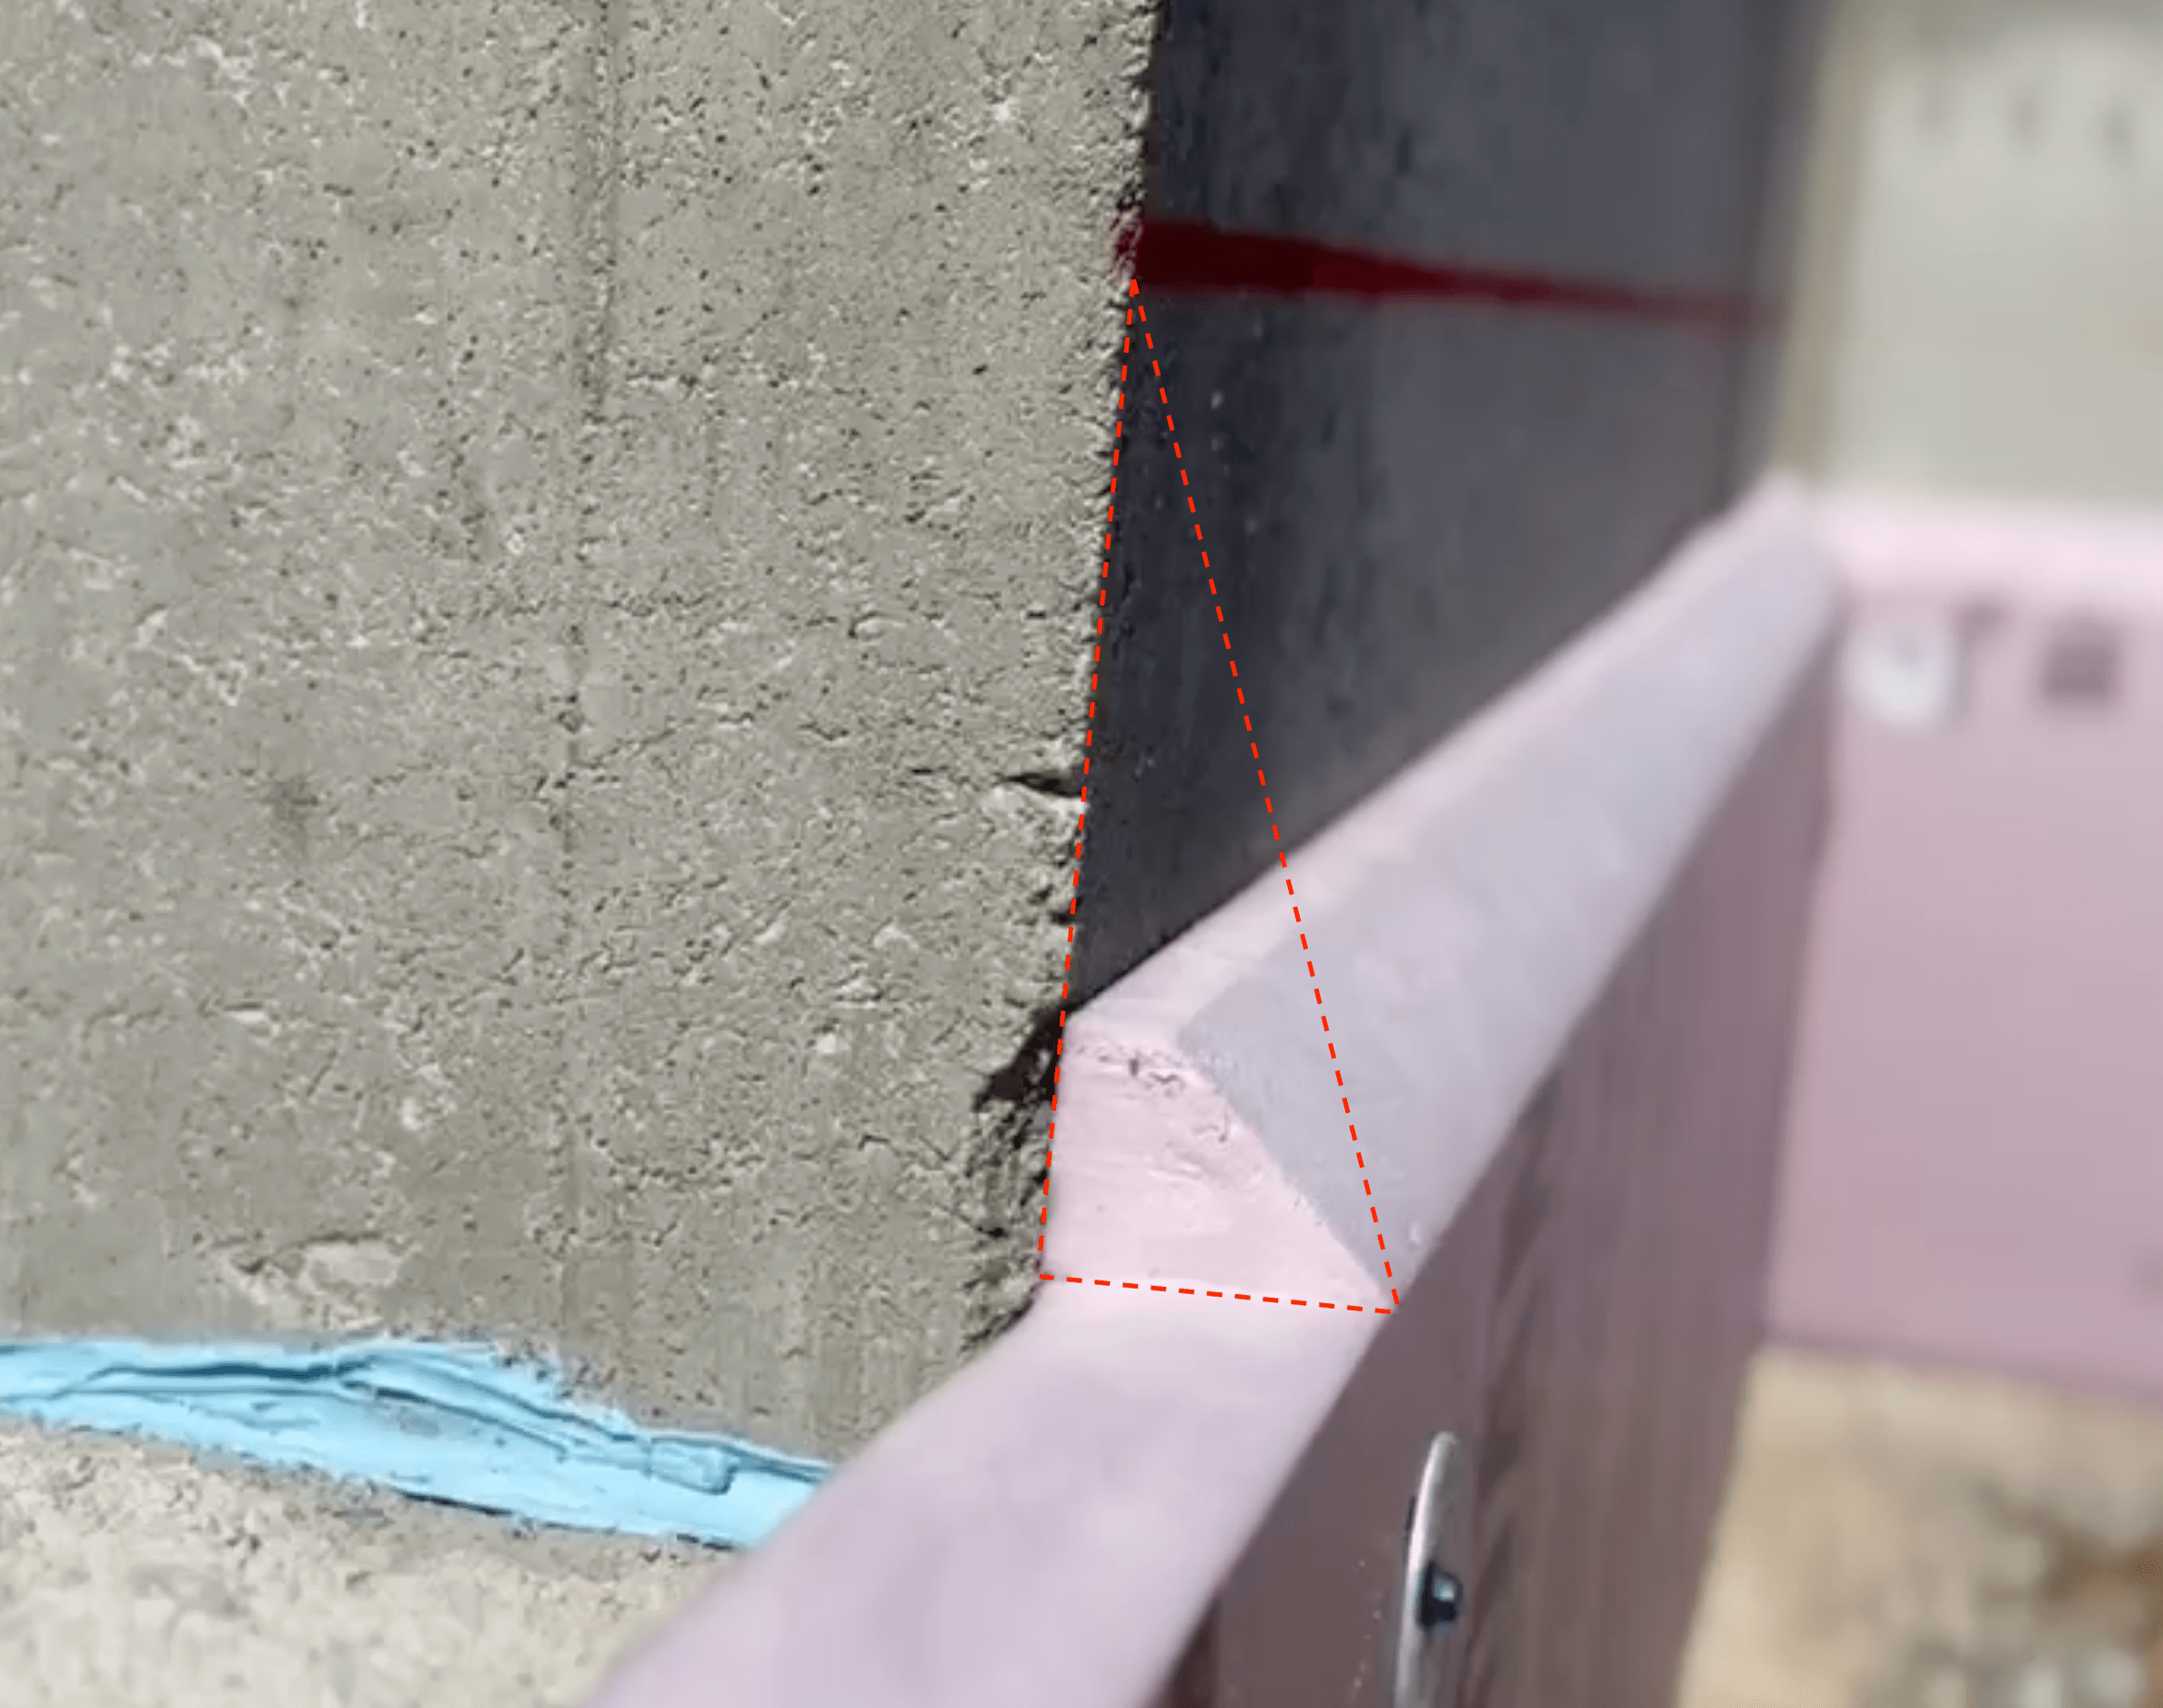
Next task on the list is perimeter insulation that extends from the slab edge down to the top of the footing. This has to be done before backfill. Our original plans had the insulation going to the top of the stem wall. We went back and forth on this quite a bit, but could not find a slab edge insulation detail that we loved. For slab on grade, you either go up the entire slab edge and have 2” of foam to deal with on the finished interior, or you taper the insulation just before grade. Had this been our house, we would need to figure out how to insulate the entire slab edge. But for this workshop, we decided the taper was enough.
Our slab edge detail.
This discussion talks about the taper, and suggests a gradual taper from the bottom of the slab to avoid cracking. I couldn’t figure out a way to make such a long cut, so we settled on a simple 45° for the bottom two inches. This sacrifices a bit of insulation, but since out exterior insulation comes down to the brick ledge, the thermal bridge is lessened.
Quick Take Have your concrete contractor come in and snap a final grade reference line around the inside of the stem wall.
Install was quite easy. Just make the cuts and place them against the stem wall. We used tapcons with nylon washers to temporarily hold the boards up during backfill.
I did wonder why frost protection went down to the footing, and I couldn’t find a definitive answer. My guess is that by extending to the frost line, it keeps the soil beneath the slab warmer? The best reference I came across was from FineHomebuilding: “In cold climates (climate zones 4 and higher), it’s important to install vertical insulation on the interior side of the stemwall all the way down to the footing.”
Finished perimeter.
Backfill
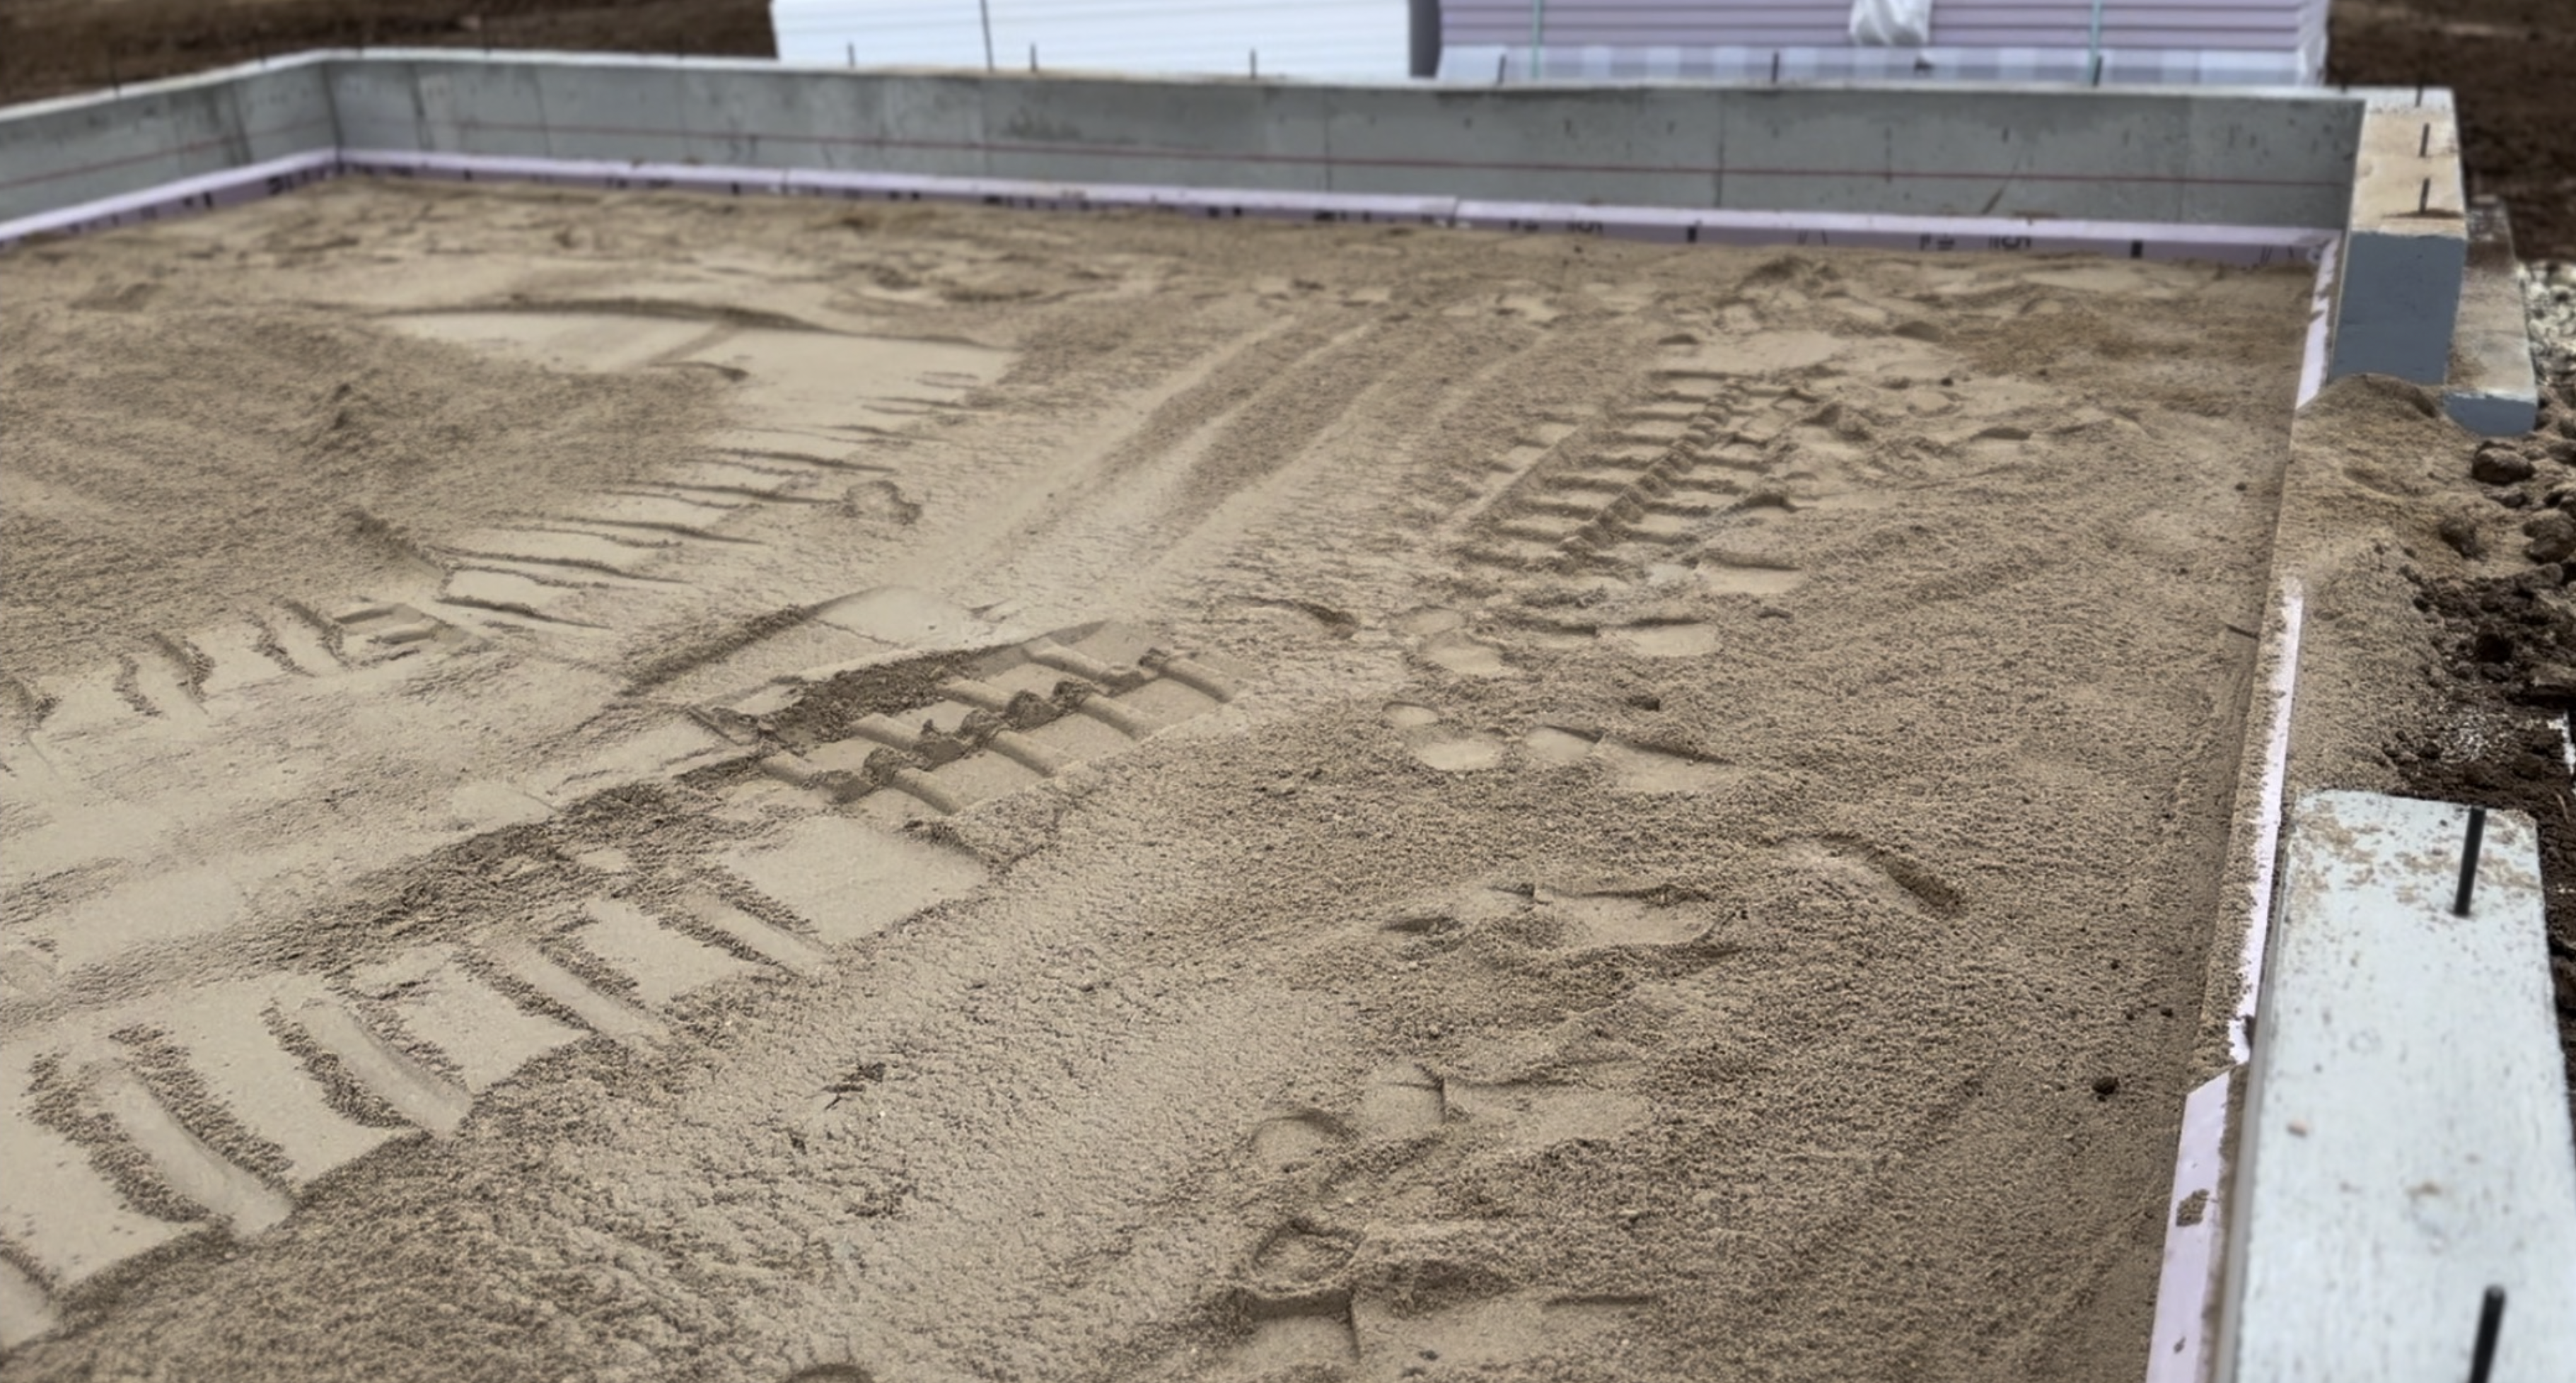
The main question to ask before backfill is whether or not you should use sand or gravel? We went with sand, and it seems that we’ve made a mistake. You can find all sorts of posts advising gravel over sand. It also appears that 3/4 gravel is preferred over other options like pea gravel.
Sand backfill.
This is one area where our inexperience made us less confident. When every builder in your area does things a certain way, it can get a bit frustrating asking to do everything differently. Because foundations are not something we do every day, we just decided to go with the standard in the area.
Turns out gravel would not have been an issue at all. After the build, we spoke with the concrete contractor and he has no problem at all doing gravel. I’m still not sure why I didn’t bring it up earlier. Just make sure you talk through everything, even if your unsure. Lesson learned for the main house pour – do it as shown in this video:
Compacted sand with 4” compacted gravel under slab.
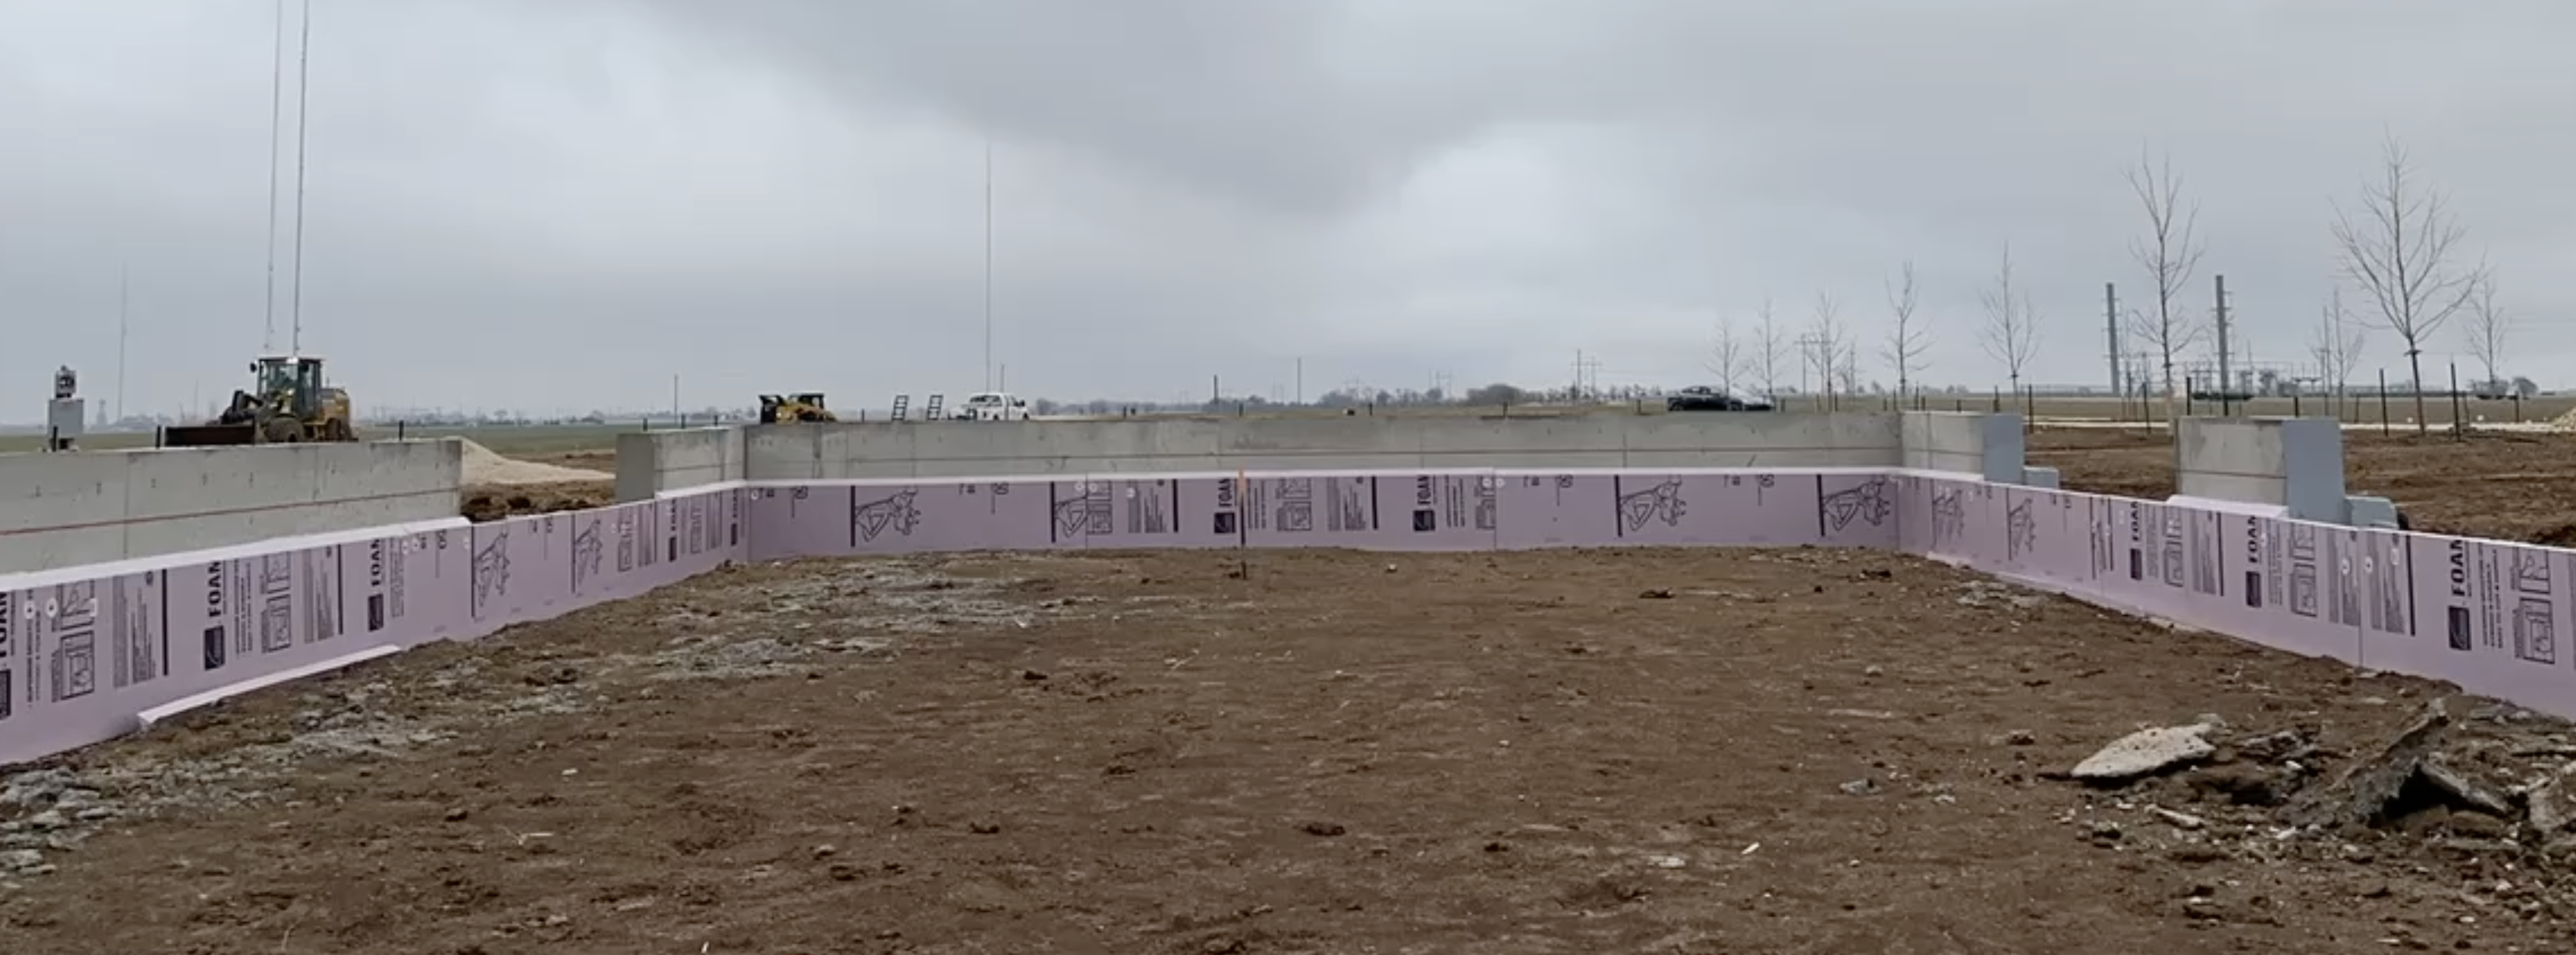
Under-slab Insulation
Important Order or source your EPS in advance.
With backfill in place, we began to lay down the 2", 4’x8’ foam boards. Usually, Menards carries 2”, high density (25psi) EPS. They did not have enough in stock for us, so we had to supplement with a bunch of XPS. To avoid our frustrations, plan ahead and order in advance.
Other than that, actual install is quite easy. We cut the insulation with a track saw, and placed it down. We used small pavers to hold them down from the wind.
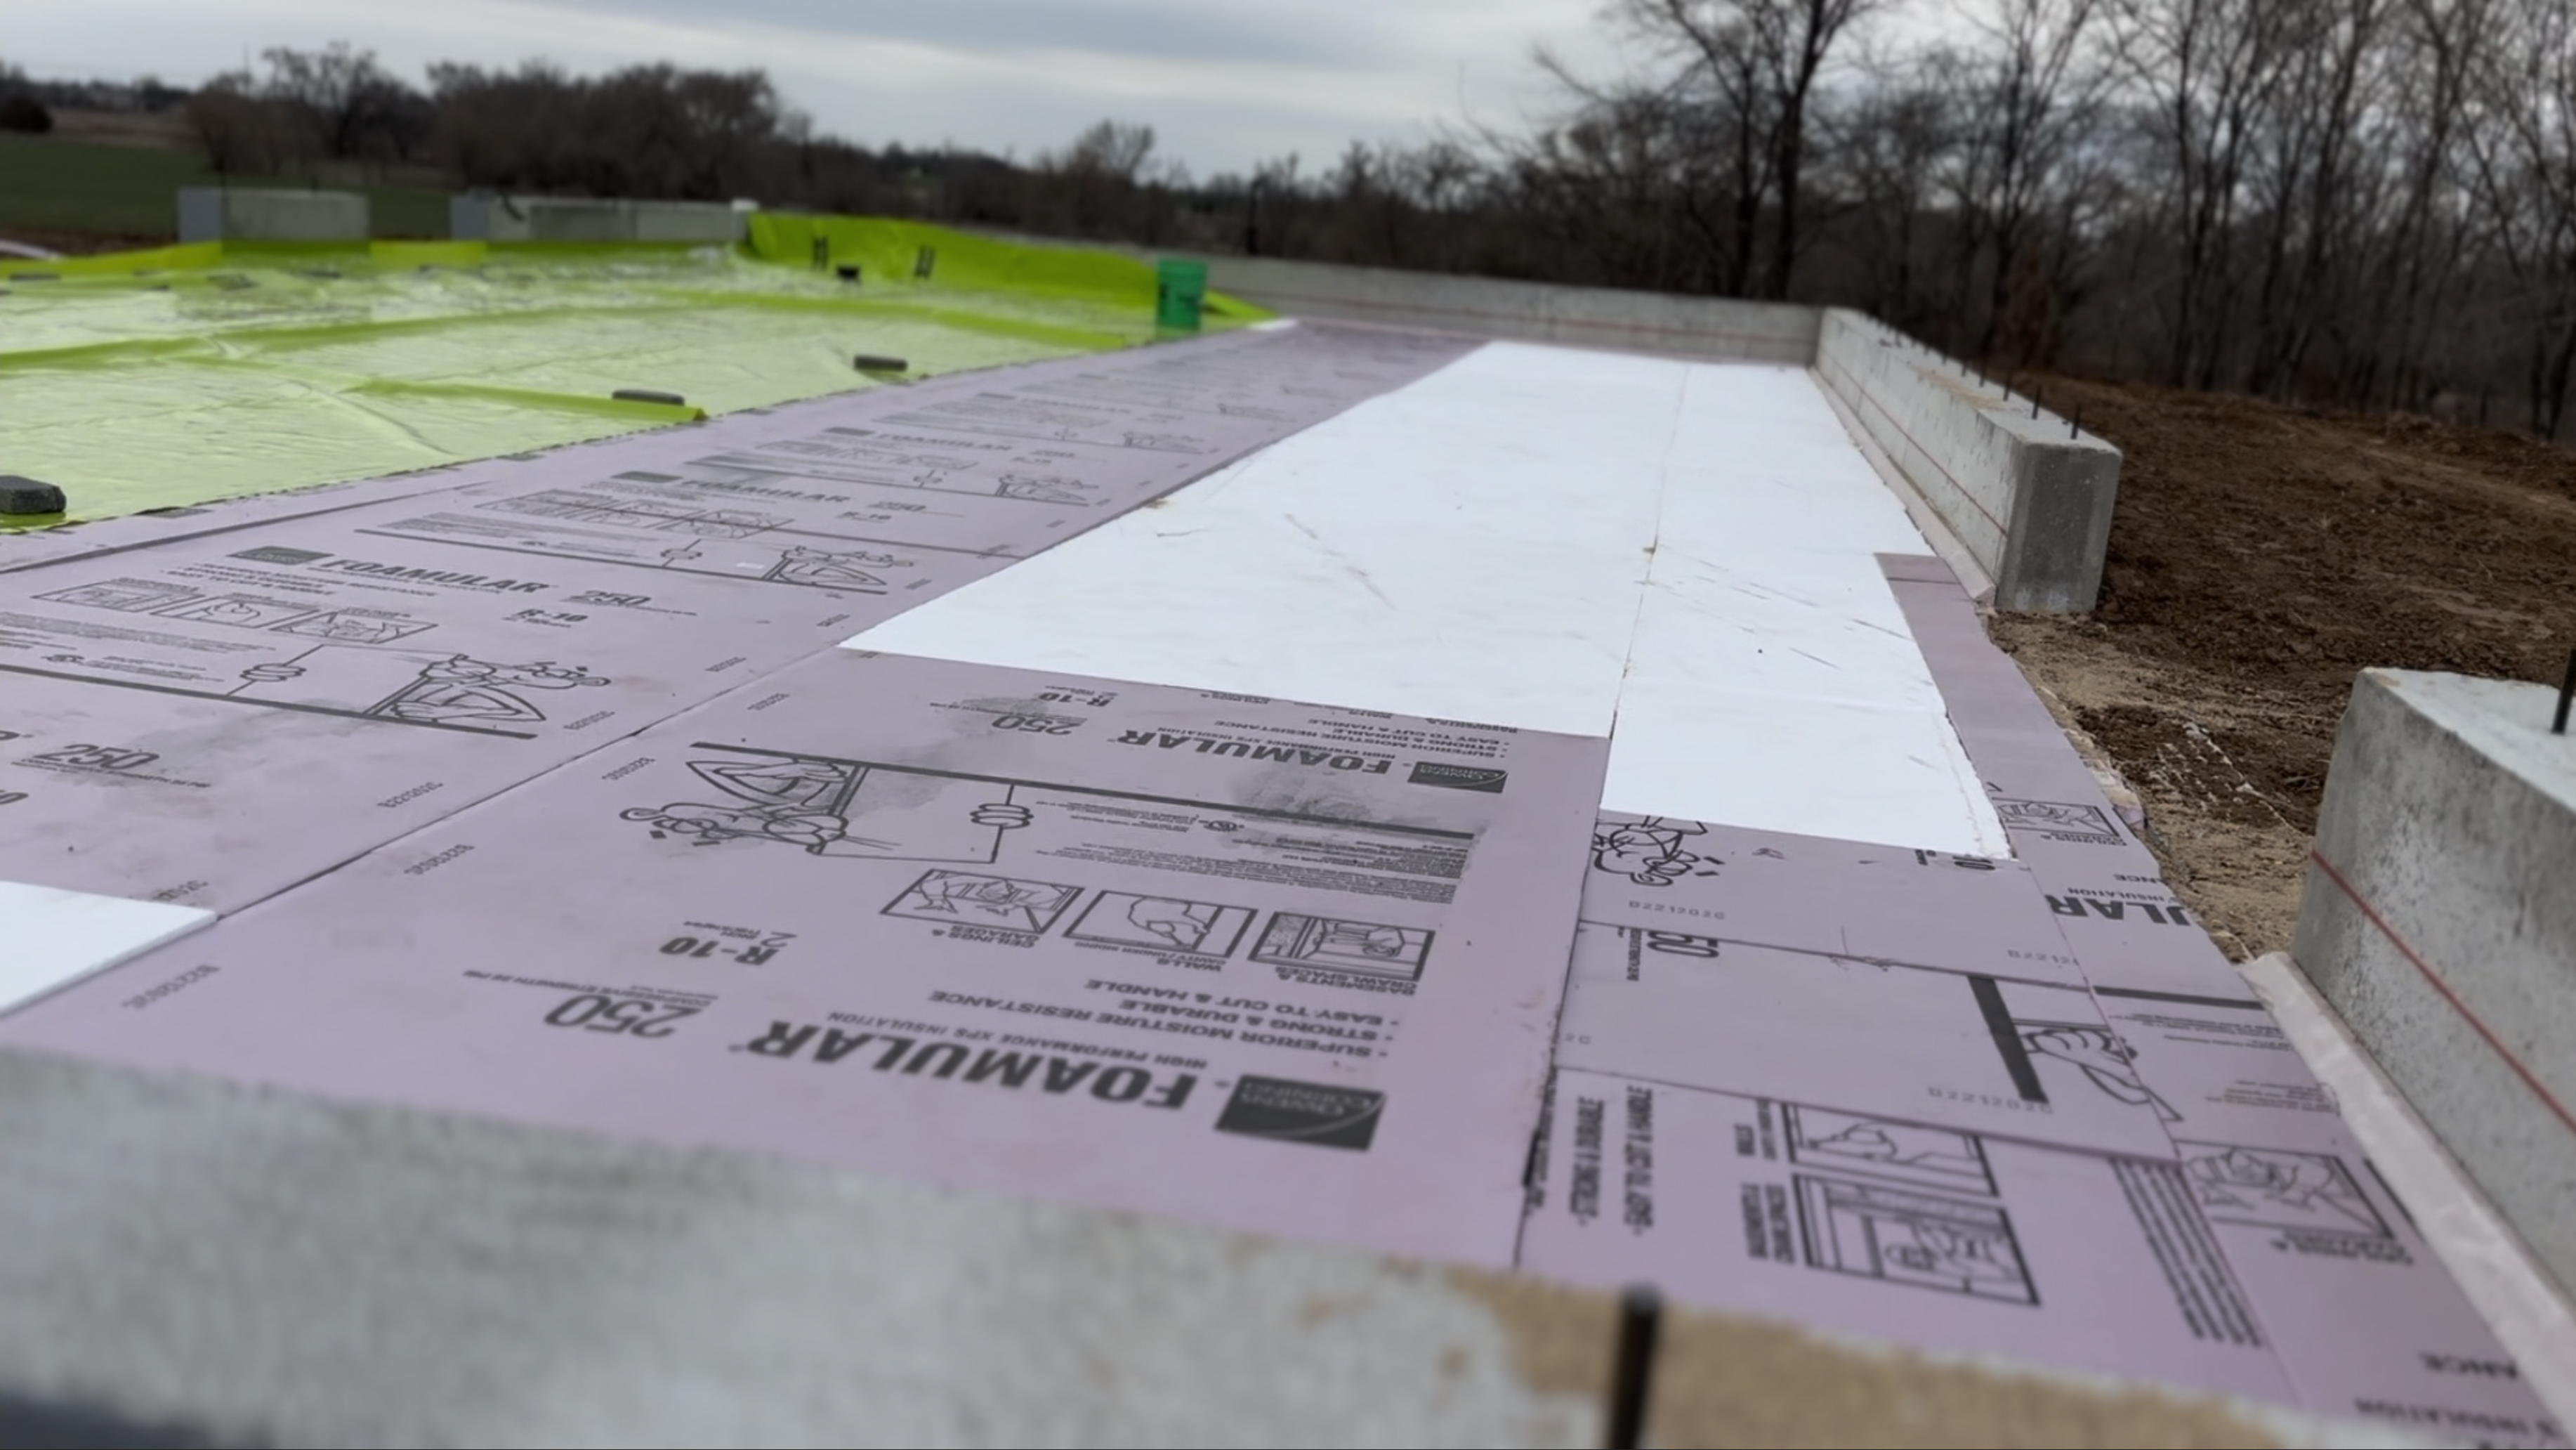
2” under slab rigid insulation.
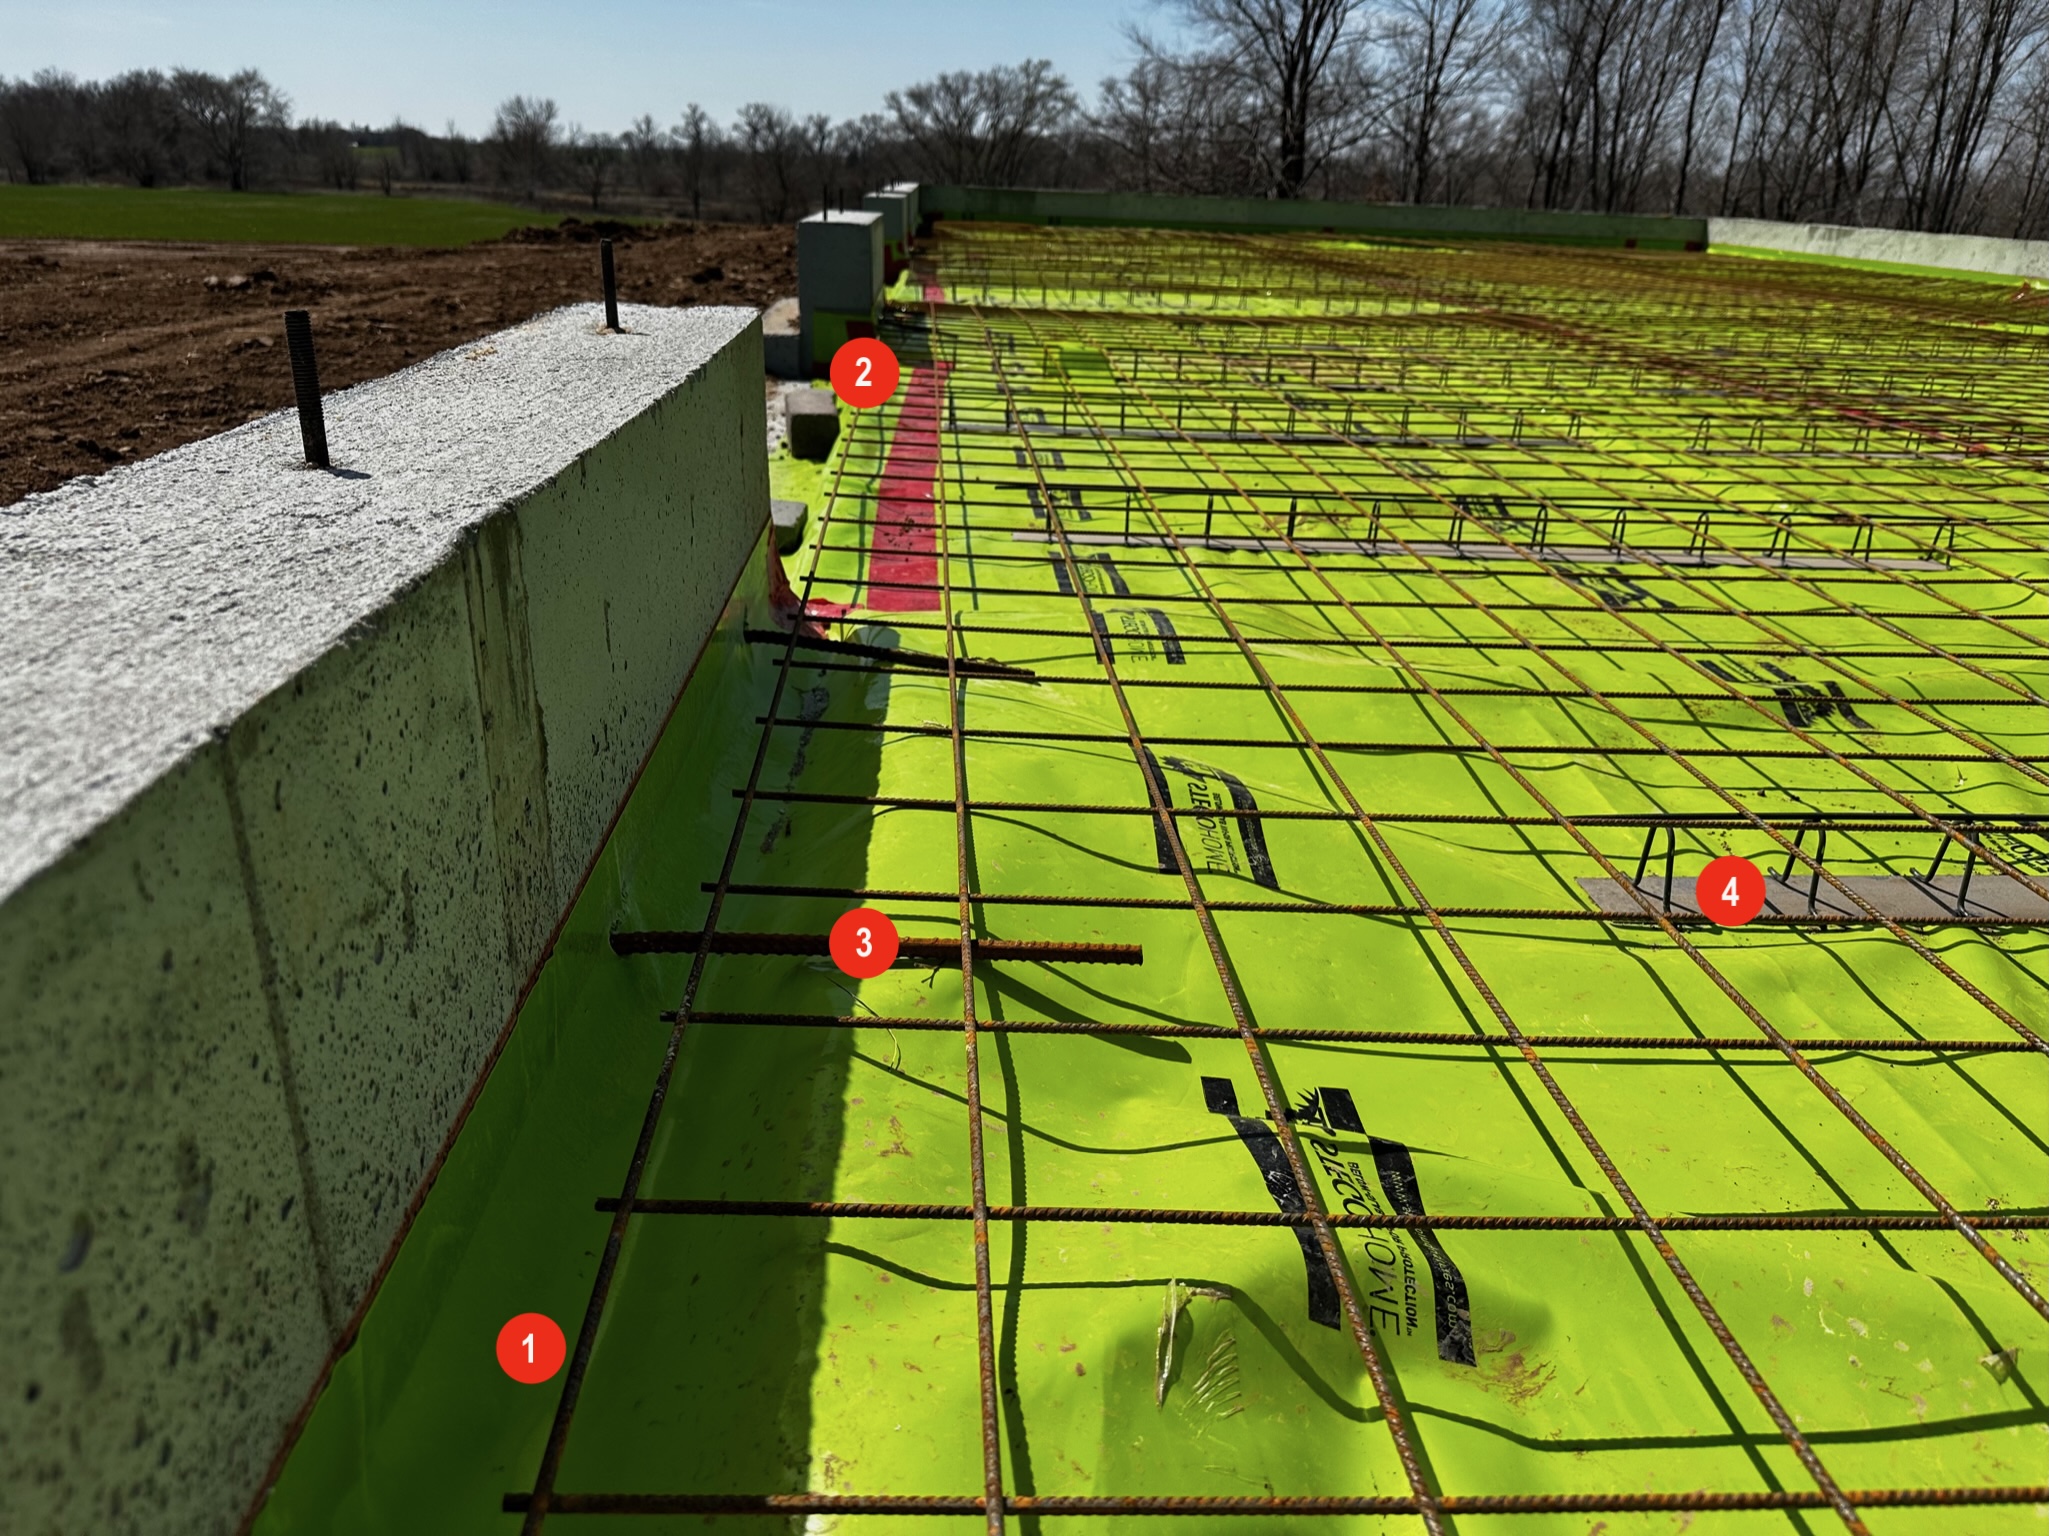
Vapor Barrier
While 6 mil vapor barriers are common in our area, we decided to upgrade to 10 mil StegoHome. The full array of supporting products and documentation was the main appeal of Stego. The majority of the install was as easy as you would expect – roll out the wrap, overlap seams, and then tape them. That said, we did encounter four confusing situations.
Our 4 Vapor Barrier Questions
1.
The first question we came across was how high to attach the edges of the vapor barrier on the stem wall. Stego recommends that you install all the way up to the top of the slab and attach with StegoTack. For basement applications, I’ve seen installs that rest on top of the footing instead of turning up the wall to the top of the slab. We ended up following Stego’s advice, and went to the slab. This worked out fine, but it was a bit troublesome to leave the right amount slack at the corner transition from horizontal to vertical
2.
On the same note, the second unknown was what to do at garage door exits? As you can see in the picture, we used StegoTack to seal it down just as you would do if it was the top of a footing. Is this the right thing do to? We’re still not sure, so any clarity is welcome.
3.
After the concrete crew came in and placed down the remesh and dowels, a third problem was introduced. The rebar dowels puncture through along the perimeter. I often see videos where the vapor barrier is fully detailed like an air barrier. In that case, we could have followed up with mastic and sealed each hole. However, guidance shows that concrete is the air barrier, and a vapor barrier with holes in it is still effective at limiting vapor.
4.
And finally, our fourth item is just a tip – ask your concrete crew to use chairs for remesh instead of pulling up during the pour. This will make sure they don’t sink back down and stay where they’re intended to stay.
Slab
Finally, the slab install is here. Not much for us to do on this one. They came in, they poured, and it dried. The final step we took is worth mentioning – air sealing the joint between slab and stem wall. After seeing how Kimchi & Kraut handled their basement, we tried using AirDam as well. It is easy to apply, and it is super durable. After months of exposure the elements, it is still holding strong.
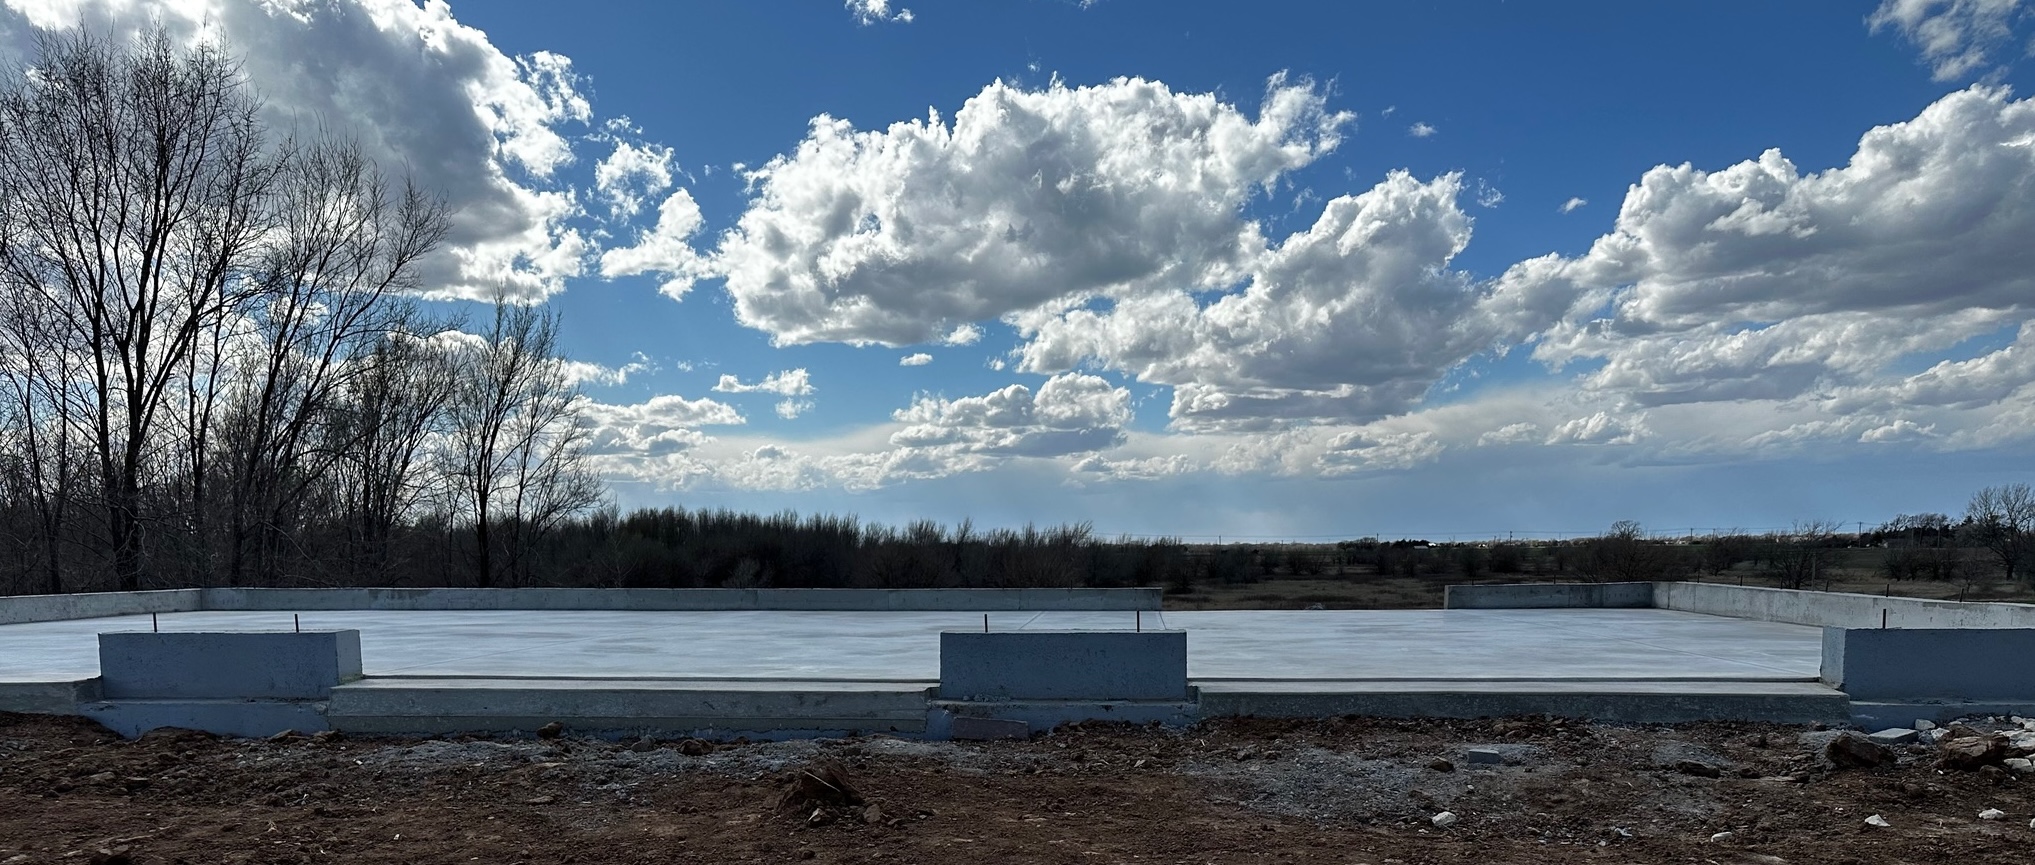
Finished foundation.