Work has finally begun on the new property! A road and electricity are a must before anything can be accomplished. We breifly looked into costs and considerations a few years ago, and now those are becoming a reality. Even though a long road adds to the expense and complexity of a project, we ultimately went for it, so that we could be tucked back in the trees on the highest point of the land.
It Starts With A Survey
Important Give yourself plenty of time to complete this process.
To get the ball rolling, the county required a survey. From our perspective, it looked like they wanted four things:
- Make sure the culvert was sized and installed appropriately.
- Make sure the easements all checked out.
- Make sure the site elevation was higher than a 100 year flood.
- Make sure fire code requirements were being met.
In our area, there are a handful of surveyors, and they are all swamped. Like really busy. From the day we reached out, it took about 5 months to get the survey back. Then, to make matters worse, the land description in the survey did not match up with the county records. It took another 4 months to get the county to agree with out surveyor, update the records, and allow us to open a construction permit on the land.
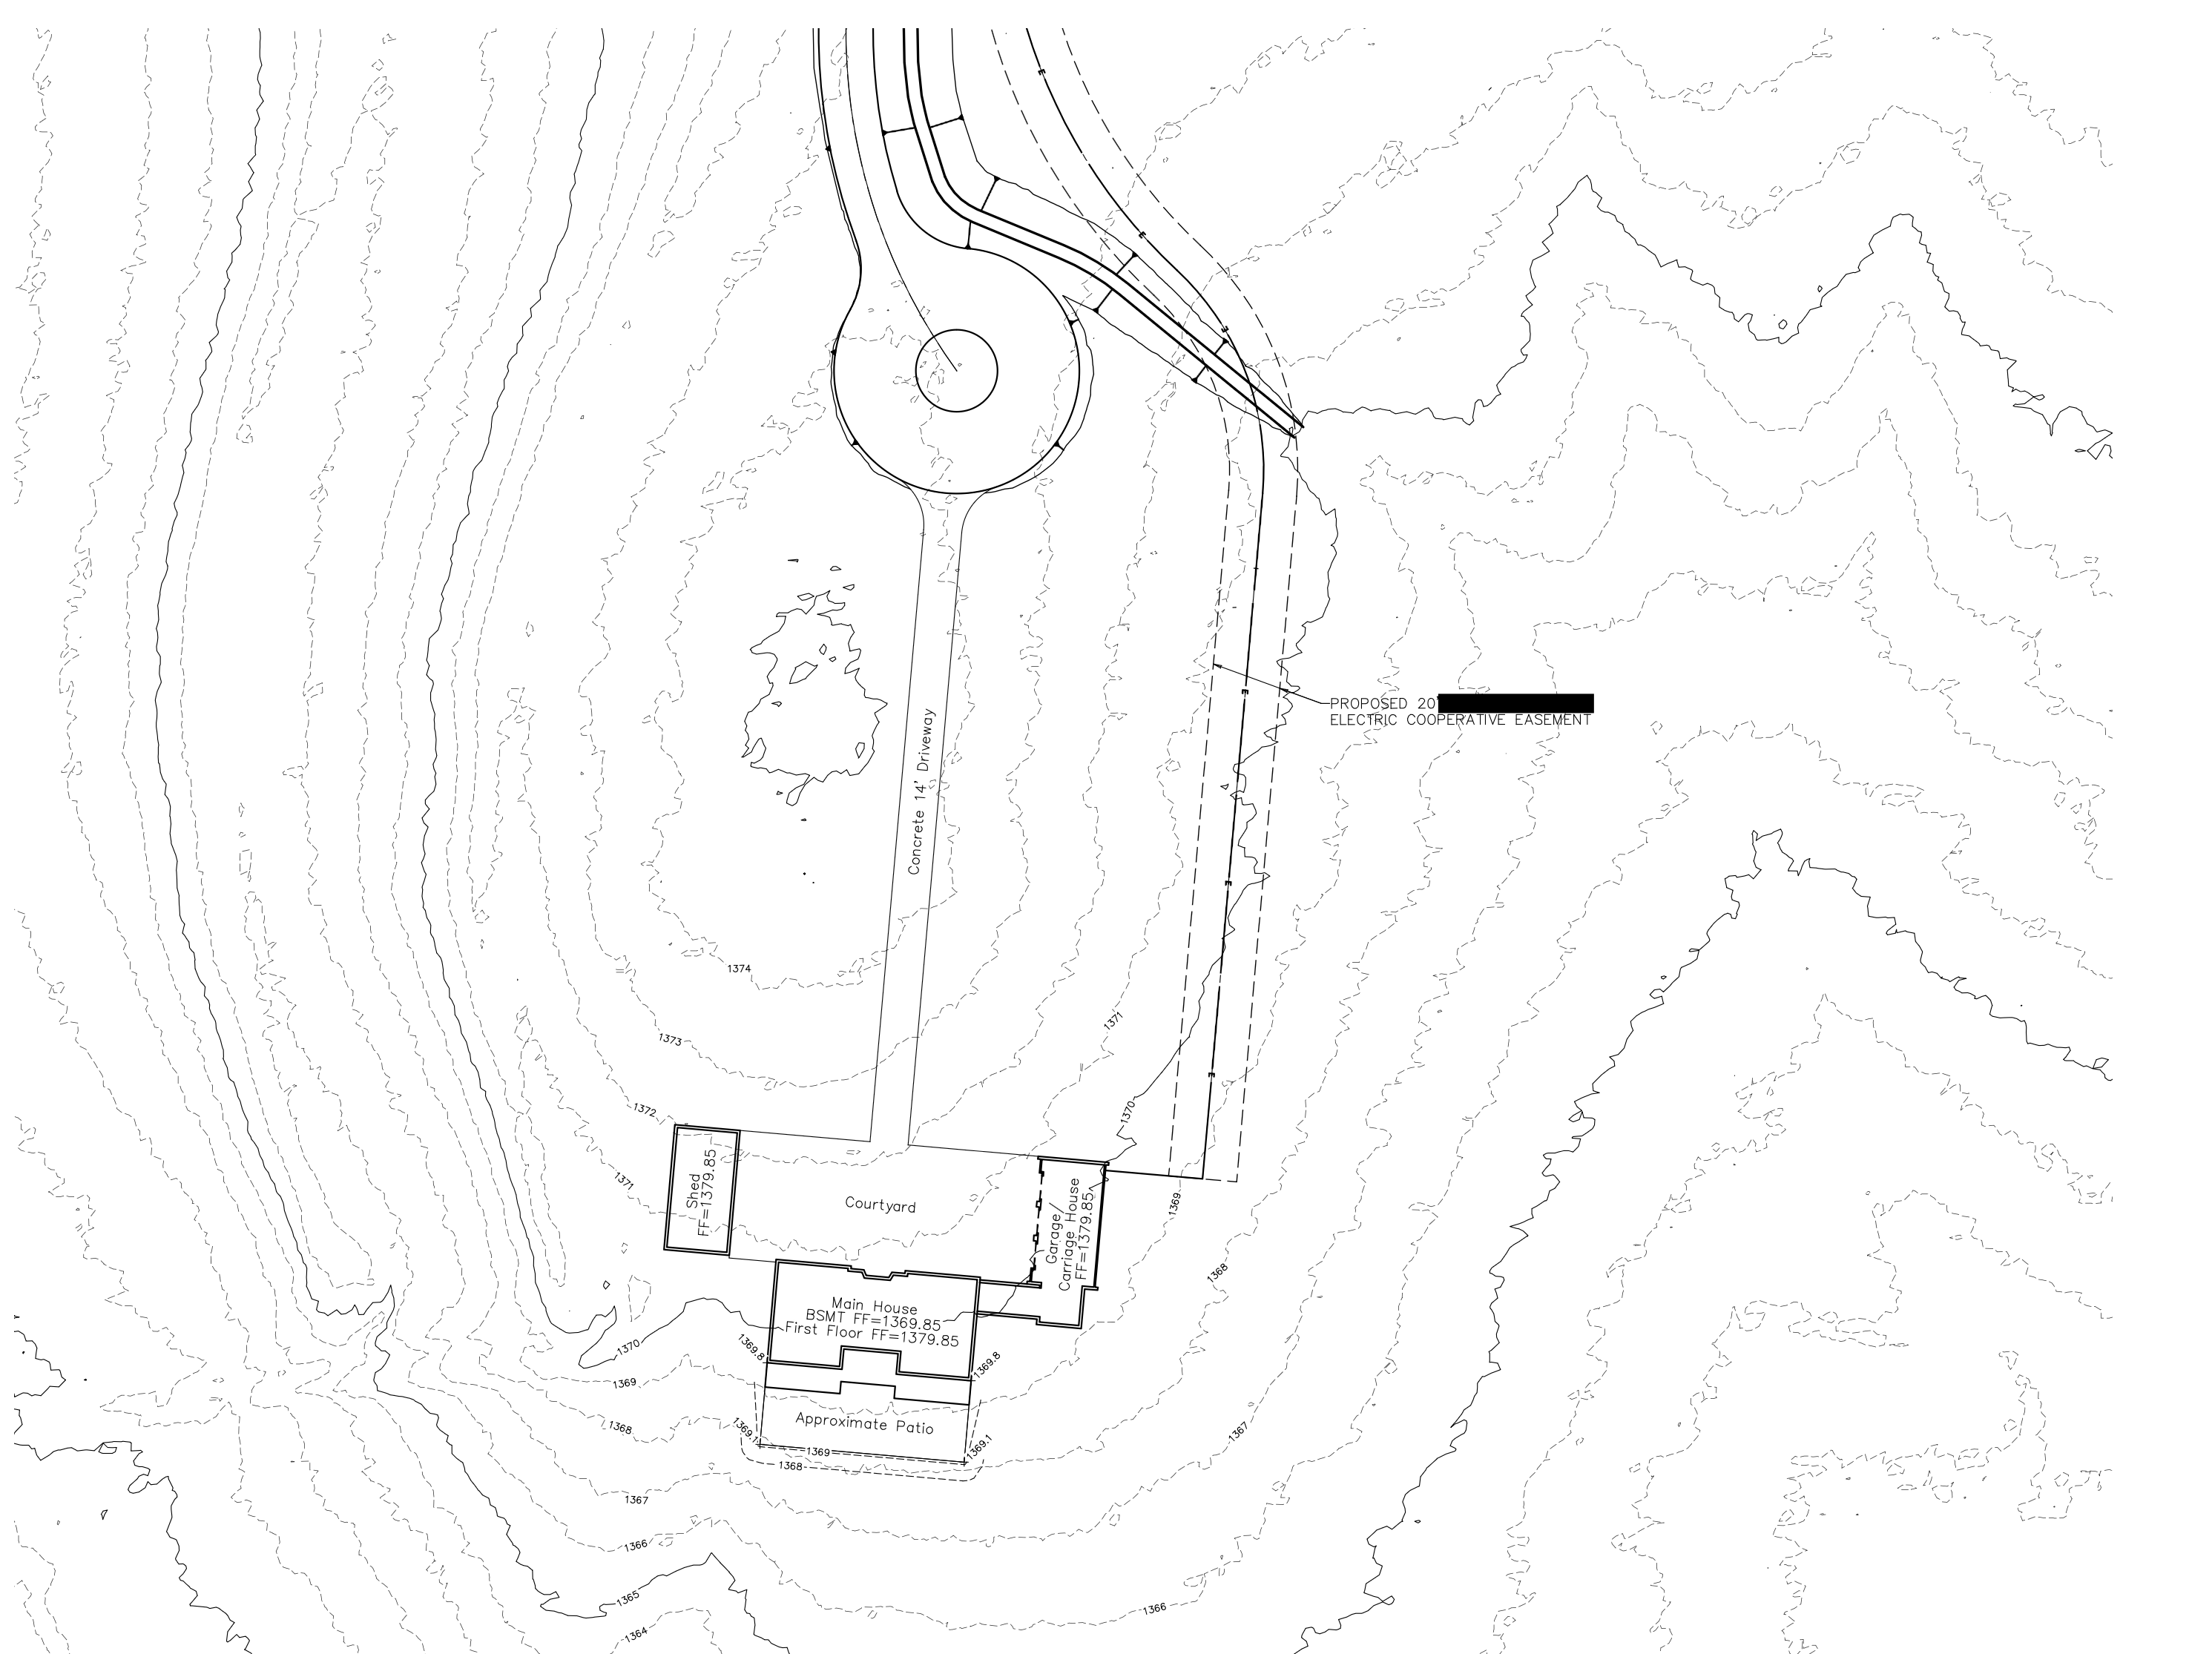
Our site survey.
Fire Code
Fire code in our area is quite strict with new roads. Roads have to be 20’ wide the enitre way, or be 14’ wide with an apporoved turn around every 500’. We weren’t allowed to open our permit without the plan being approved by the county first. The dimensions of the turn around are quite large, so it really does have to be factored into the design of the house. We finally settled on a 20’ road the entire way, with the last 250’ narrowing down to 14’ to provide a more charming, tree lined approach.
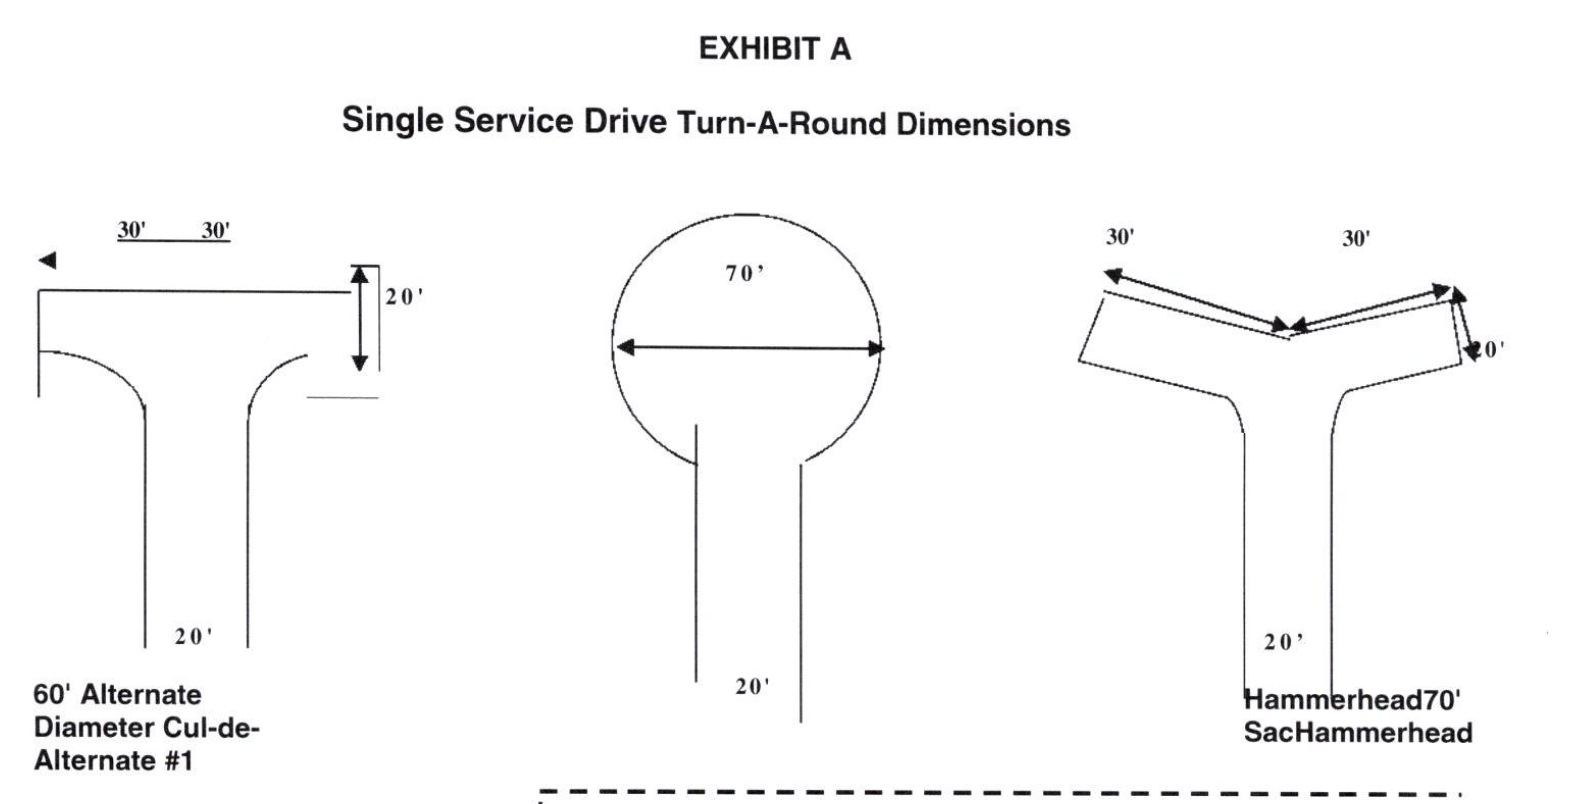
Approved fire code turn arounds.
Culvert and Conduit
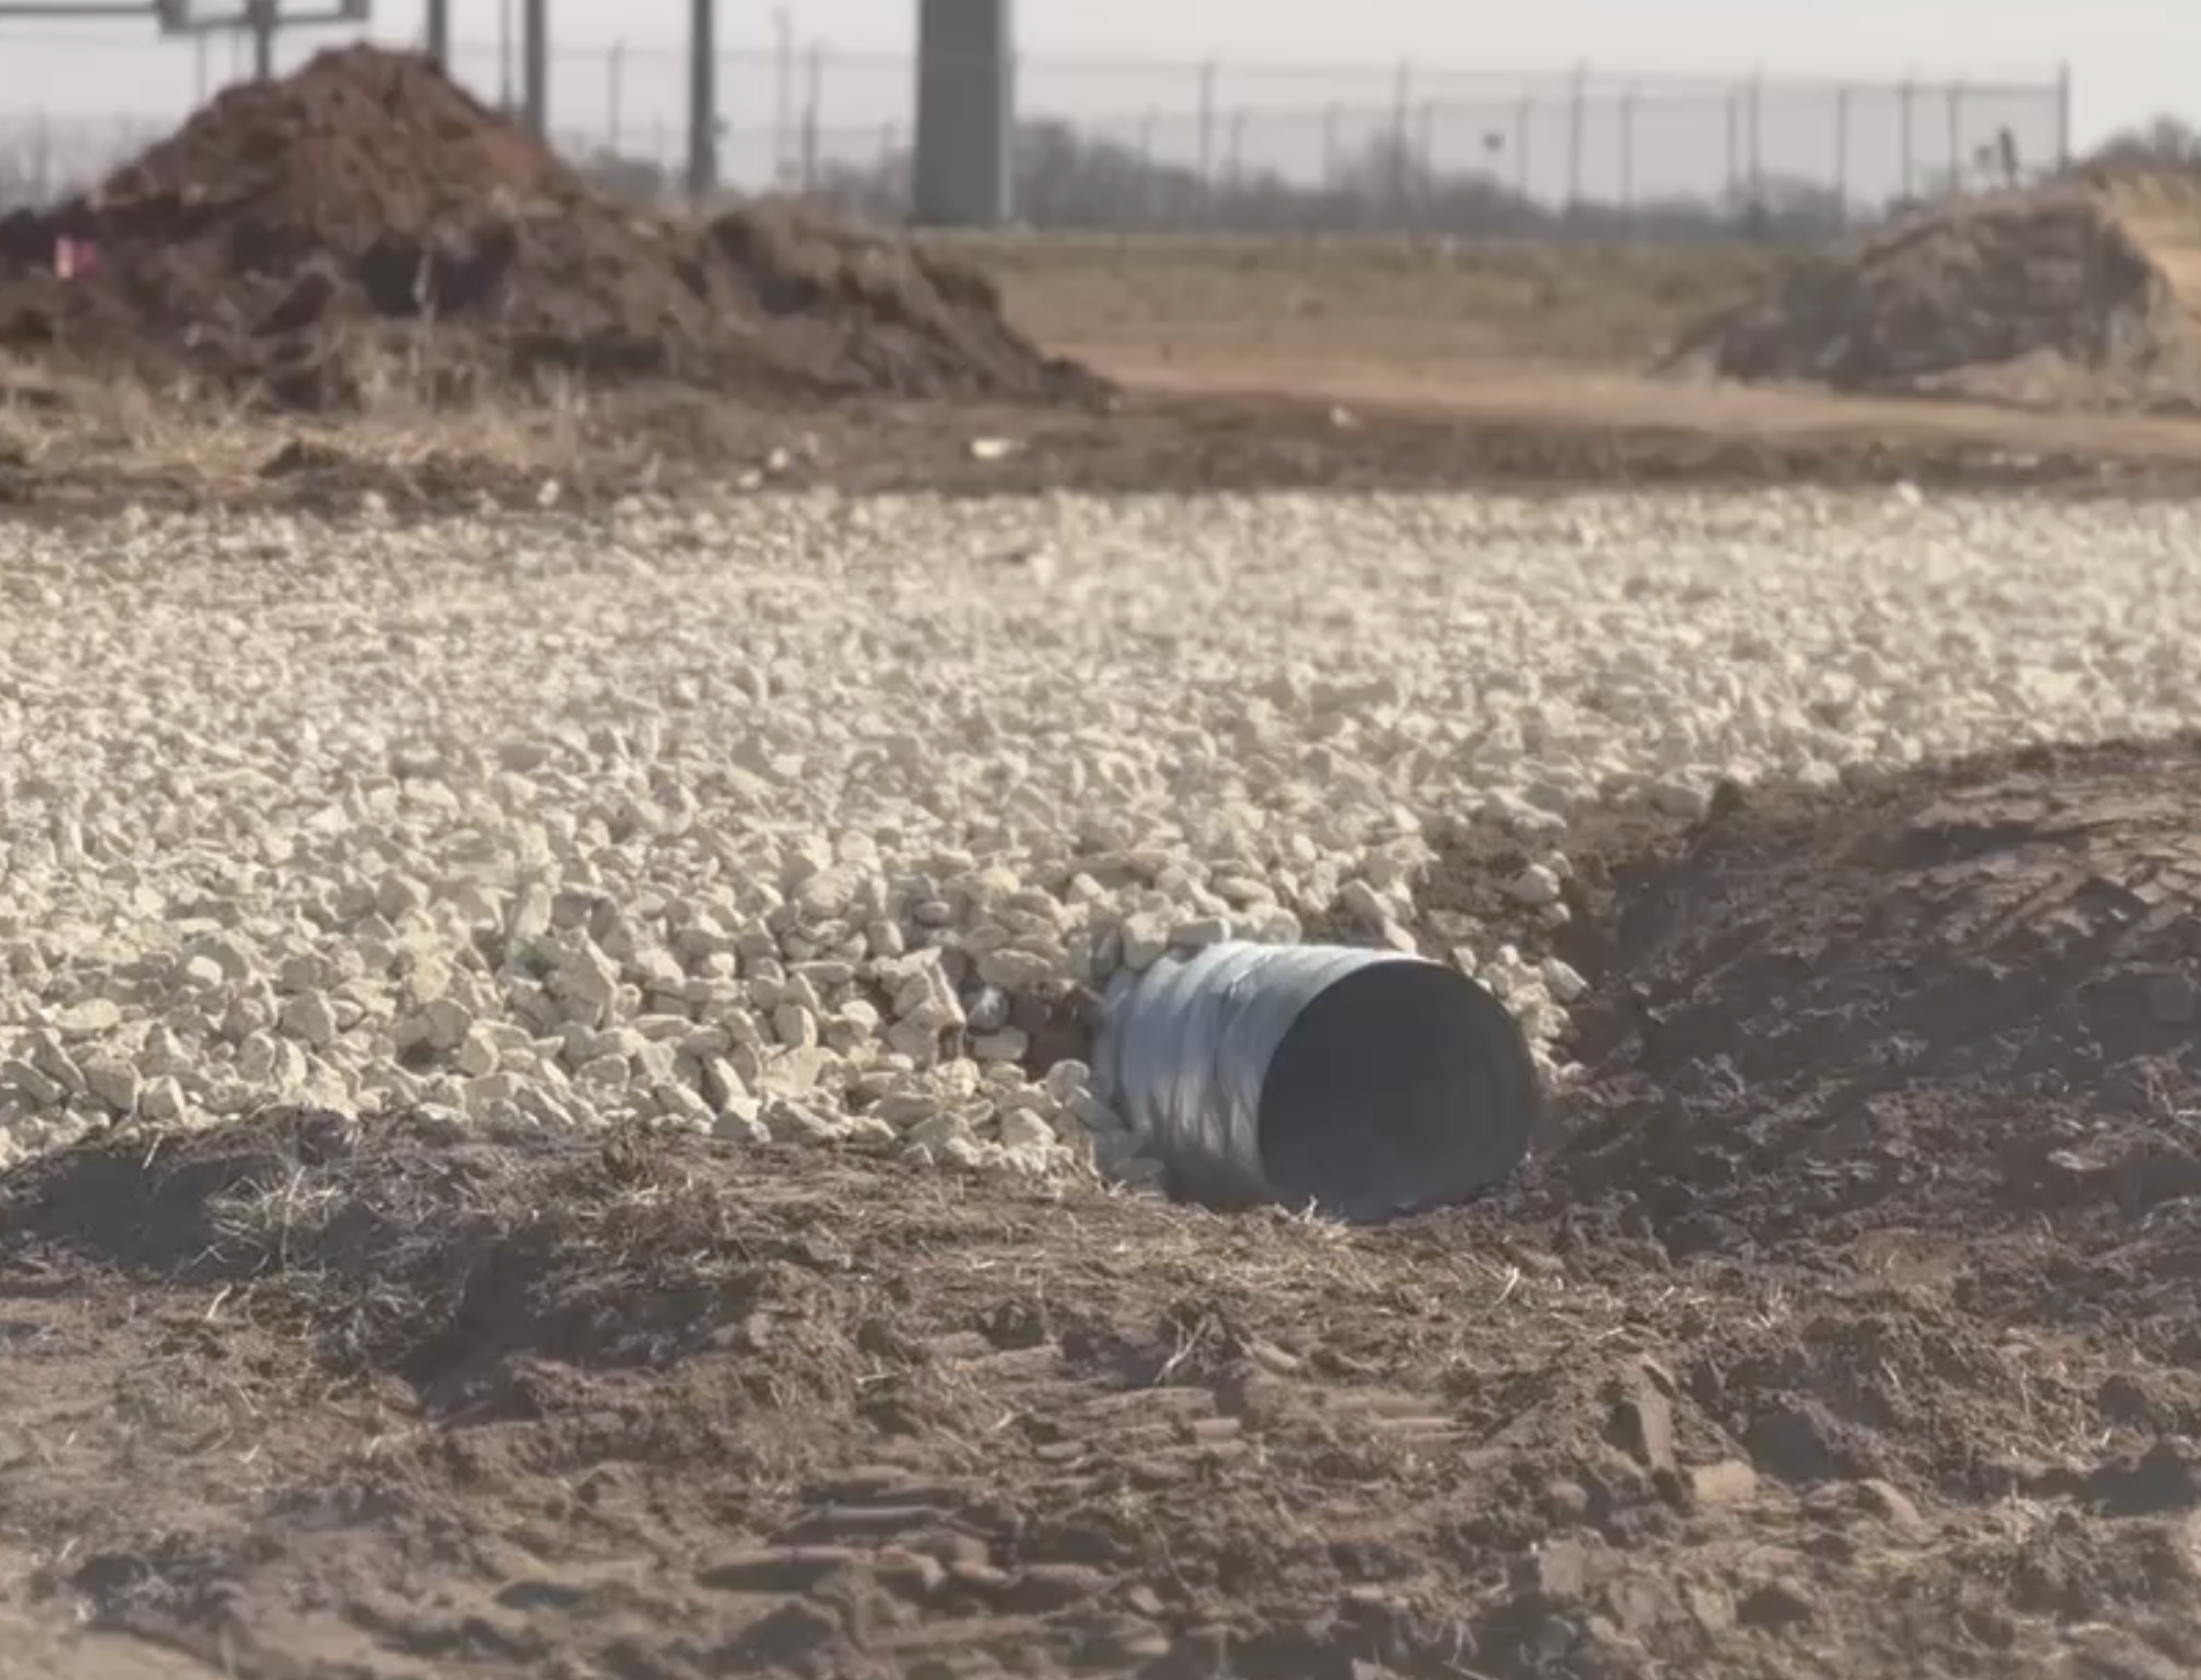
Final culvert installed.
Our county does require a separate permit for the culvert. After opening the permit, they came out and recommended the final size of the culvert, and then did another inspection after it was installed. Our surveyor speced a much larger, 24" reinforced concrete culvert. Fortunately, we were able to use a much cheaper, 21"x15" squashed, corrugated pipe.
On a similar note, we did notify our road contractor of the locations for conduit. We wanted to run 2, 2" pipes into the middle of the round-about, so that we would have electric and water for future designs. This is much easier to do while they have the big equipment out there. After backfill, they can mark the location with stakes or cones to be dug up at a future date.
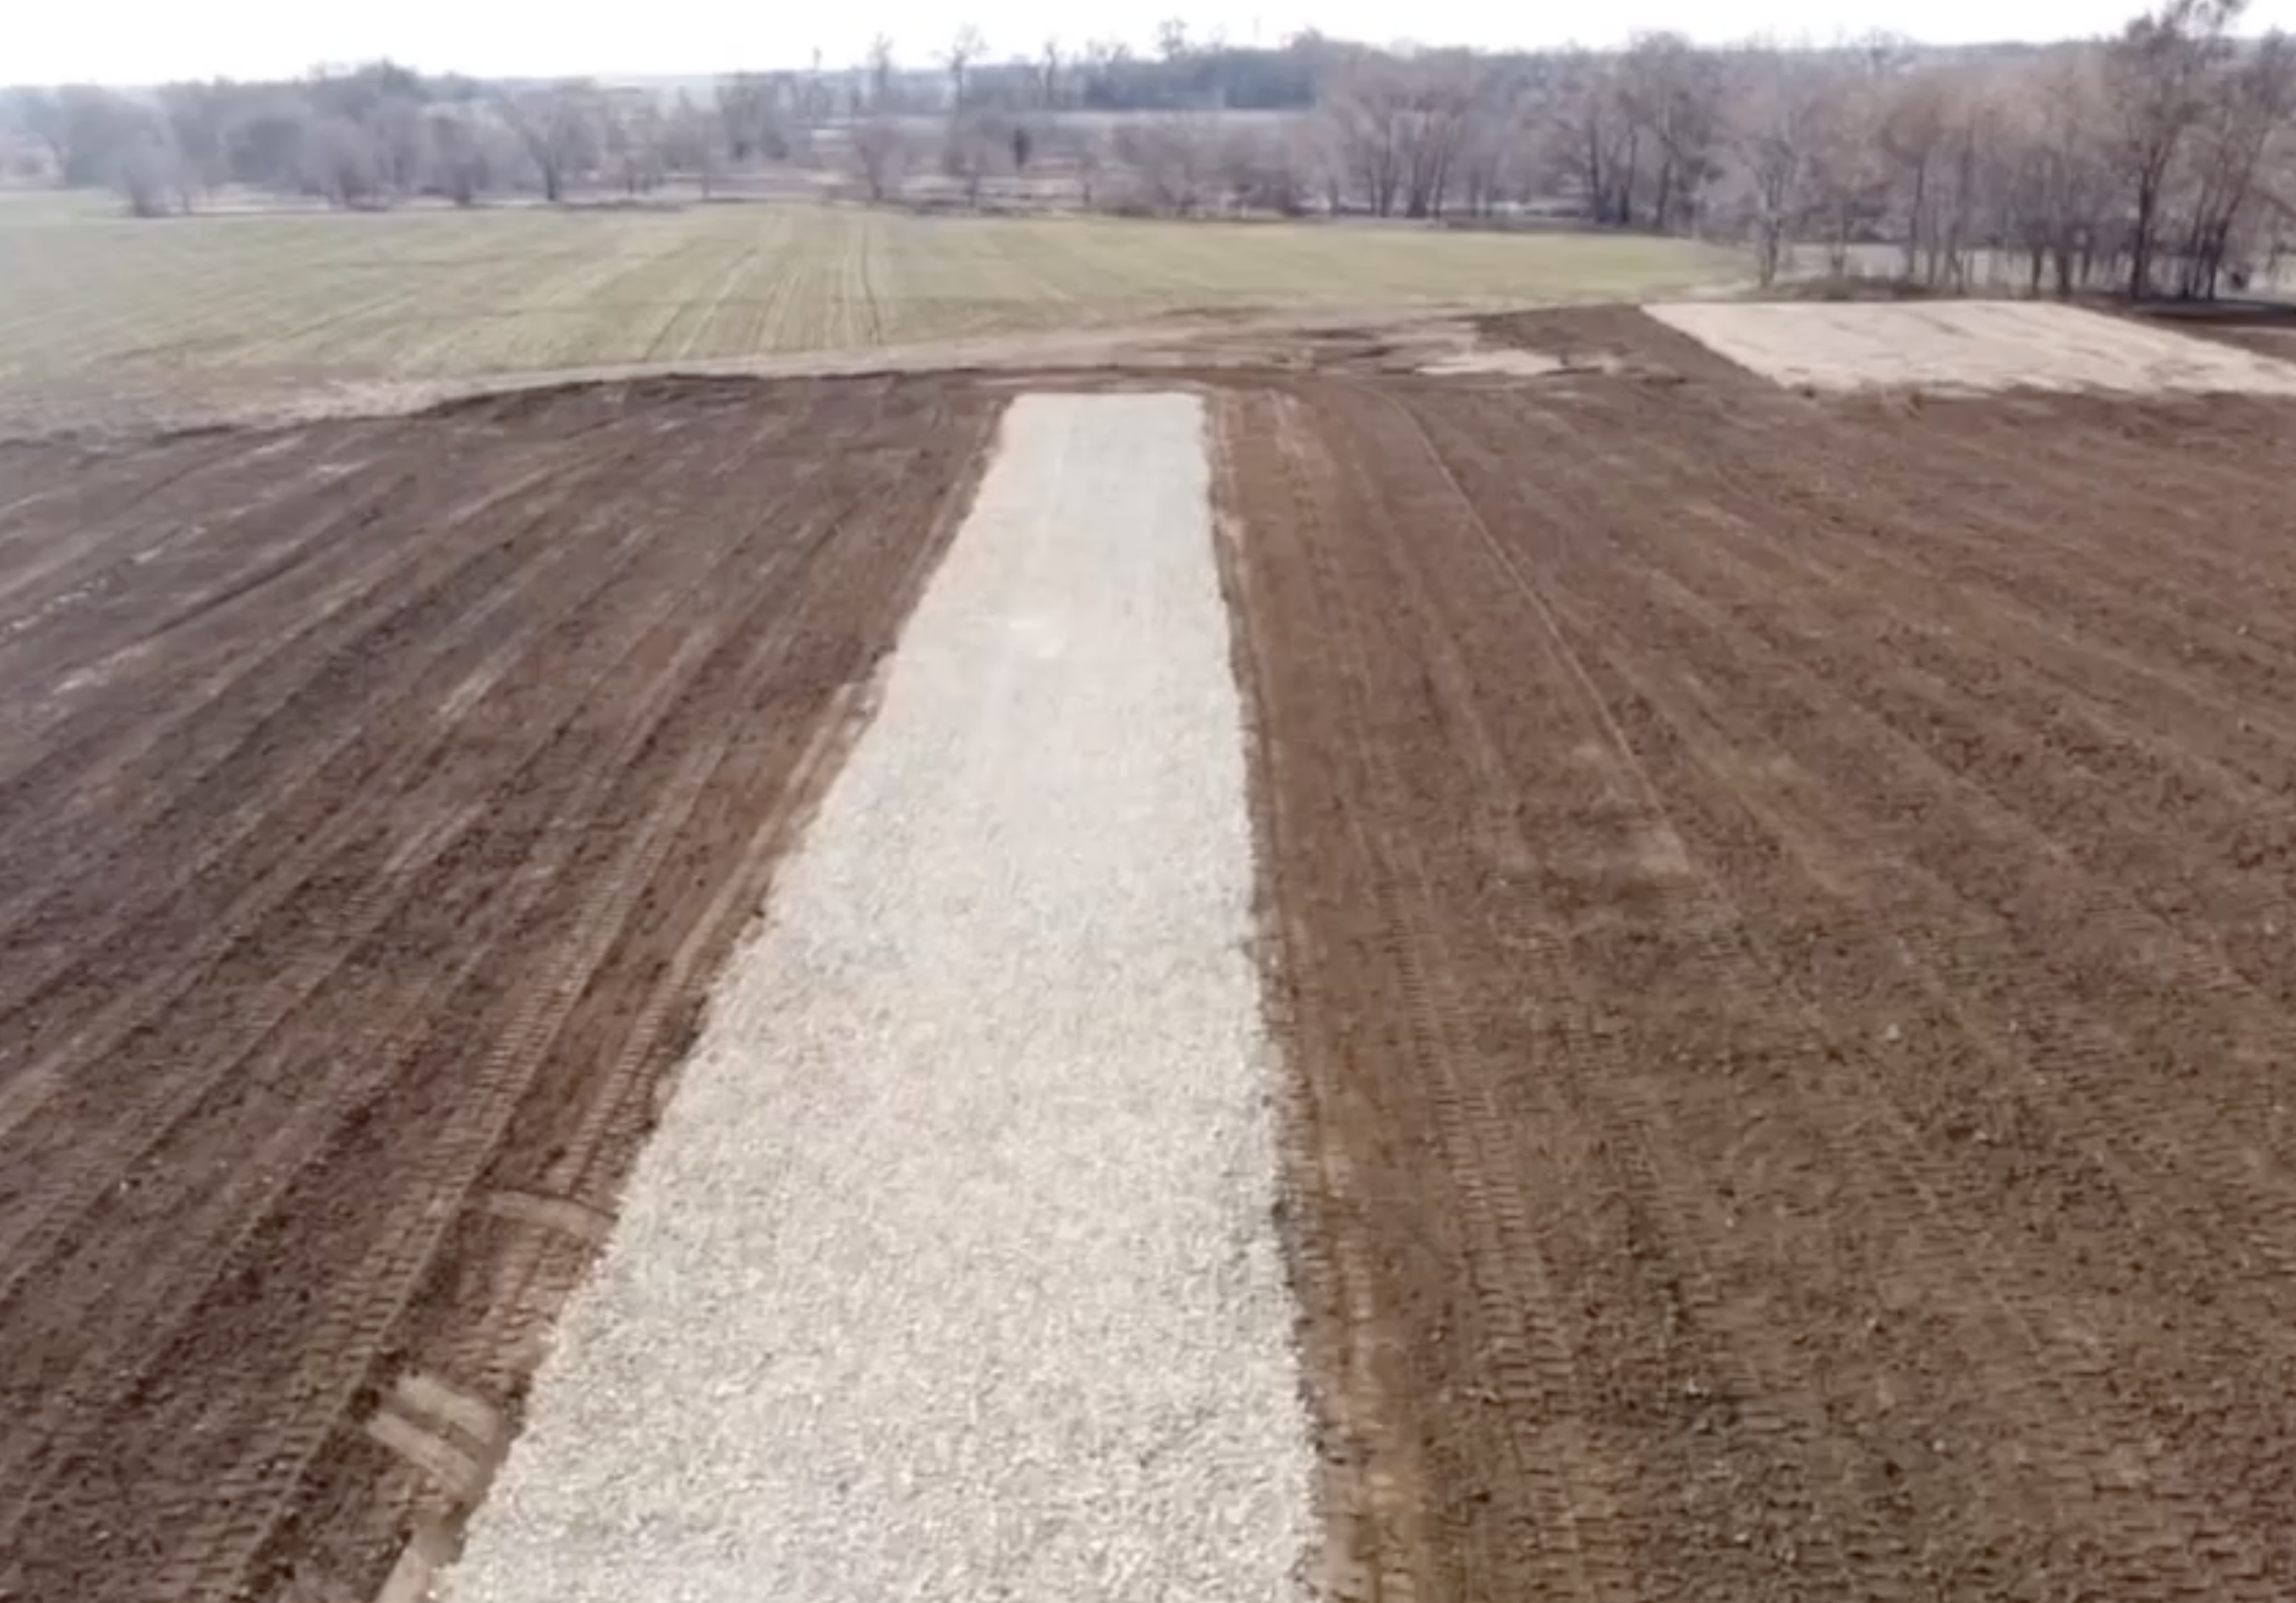
Breaking Ground
With survey and permit in hand, we began to look for a contractor that could build a road. We relied on word of mouth, but ultimately discovered that companies who install septic takes usually go hand in hand with building roads – they have the large equipment.
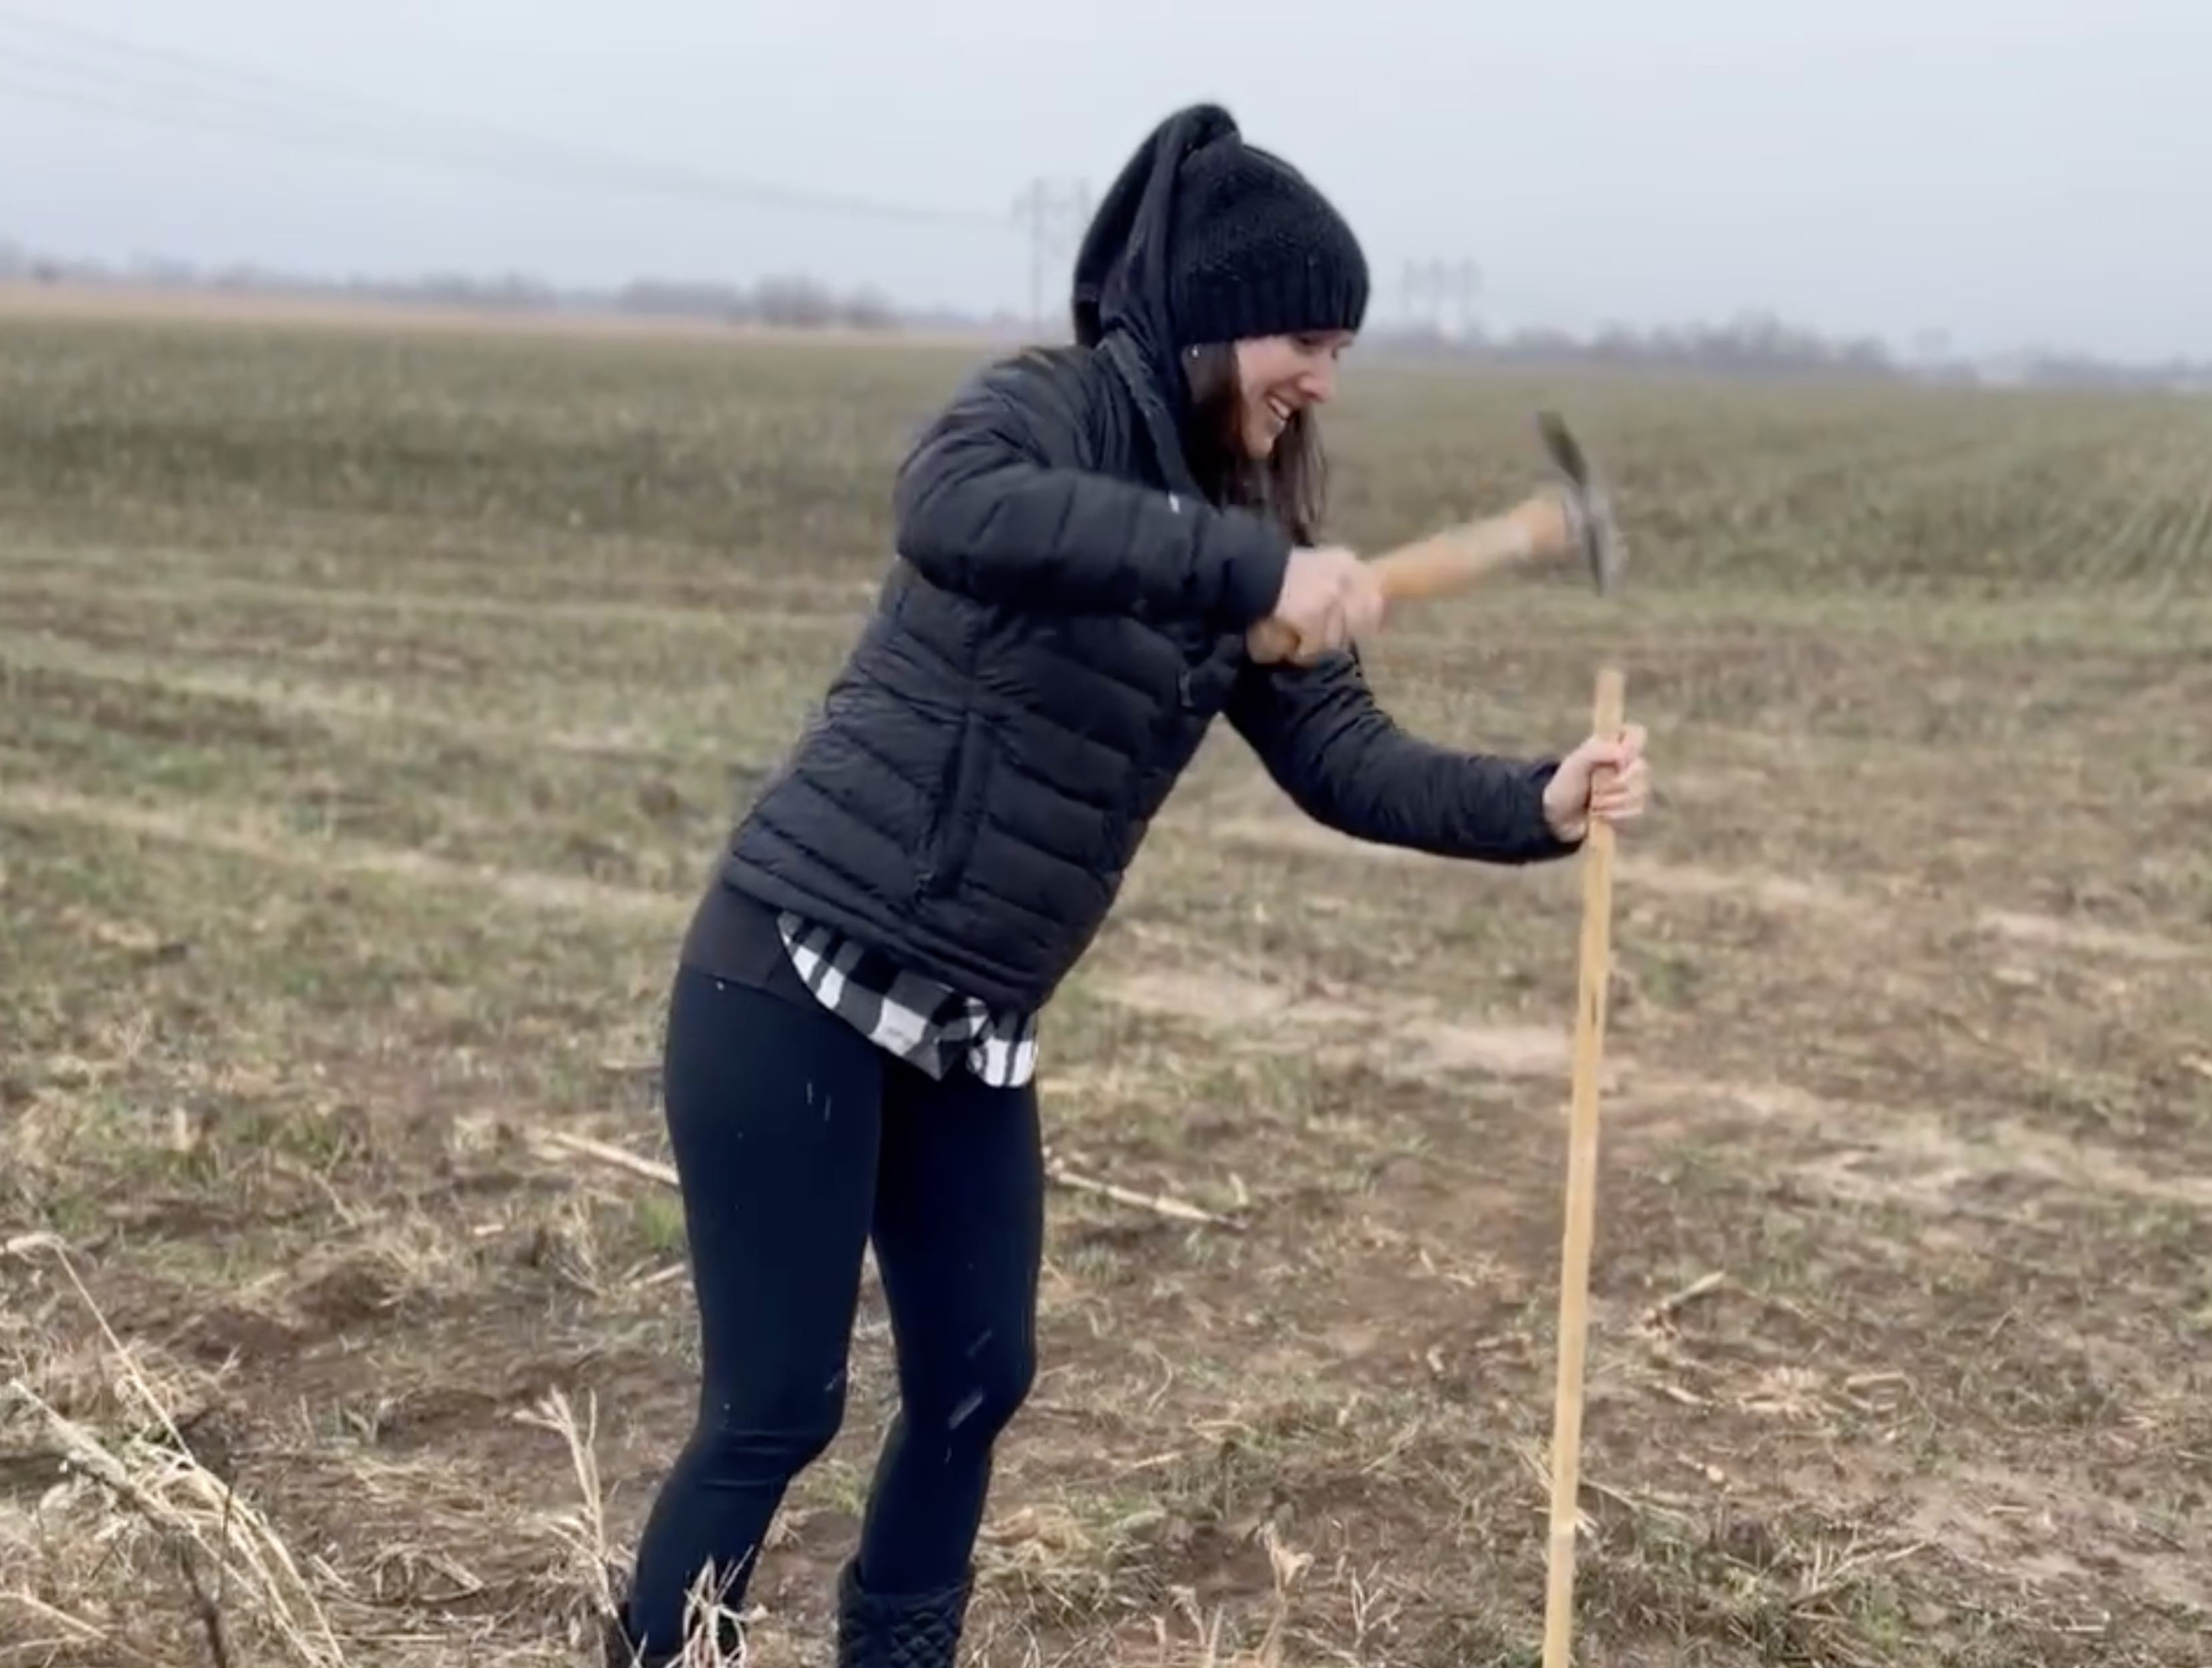
Staking out the road.
We could have used professionals to mark out the road and final house location, but we decided to try and do it ourselves. While 100% precision might be required in tight city lots, it did not seem to matter too much here. Our final position of the house and road is close to what is shown on the survey, but not exact. Most importantly, we’re not near any easements or flood zones. The actual process of staking was just buying stakes, a measuring wheel and some spray paint. From there, use the compass app on your phone to line up the next target point and pound the stake in.
The last thing to be decided before breaking ground was whether or not an underlayment would be used. You’ll see it often recommended around the internet. The crews we spoke to who make shorter driveways were fine using it, but the company we went with suggested that removing the top soil and a thick, well compacted base will be enough. Time will tell if we’ve made a mistake here.
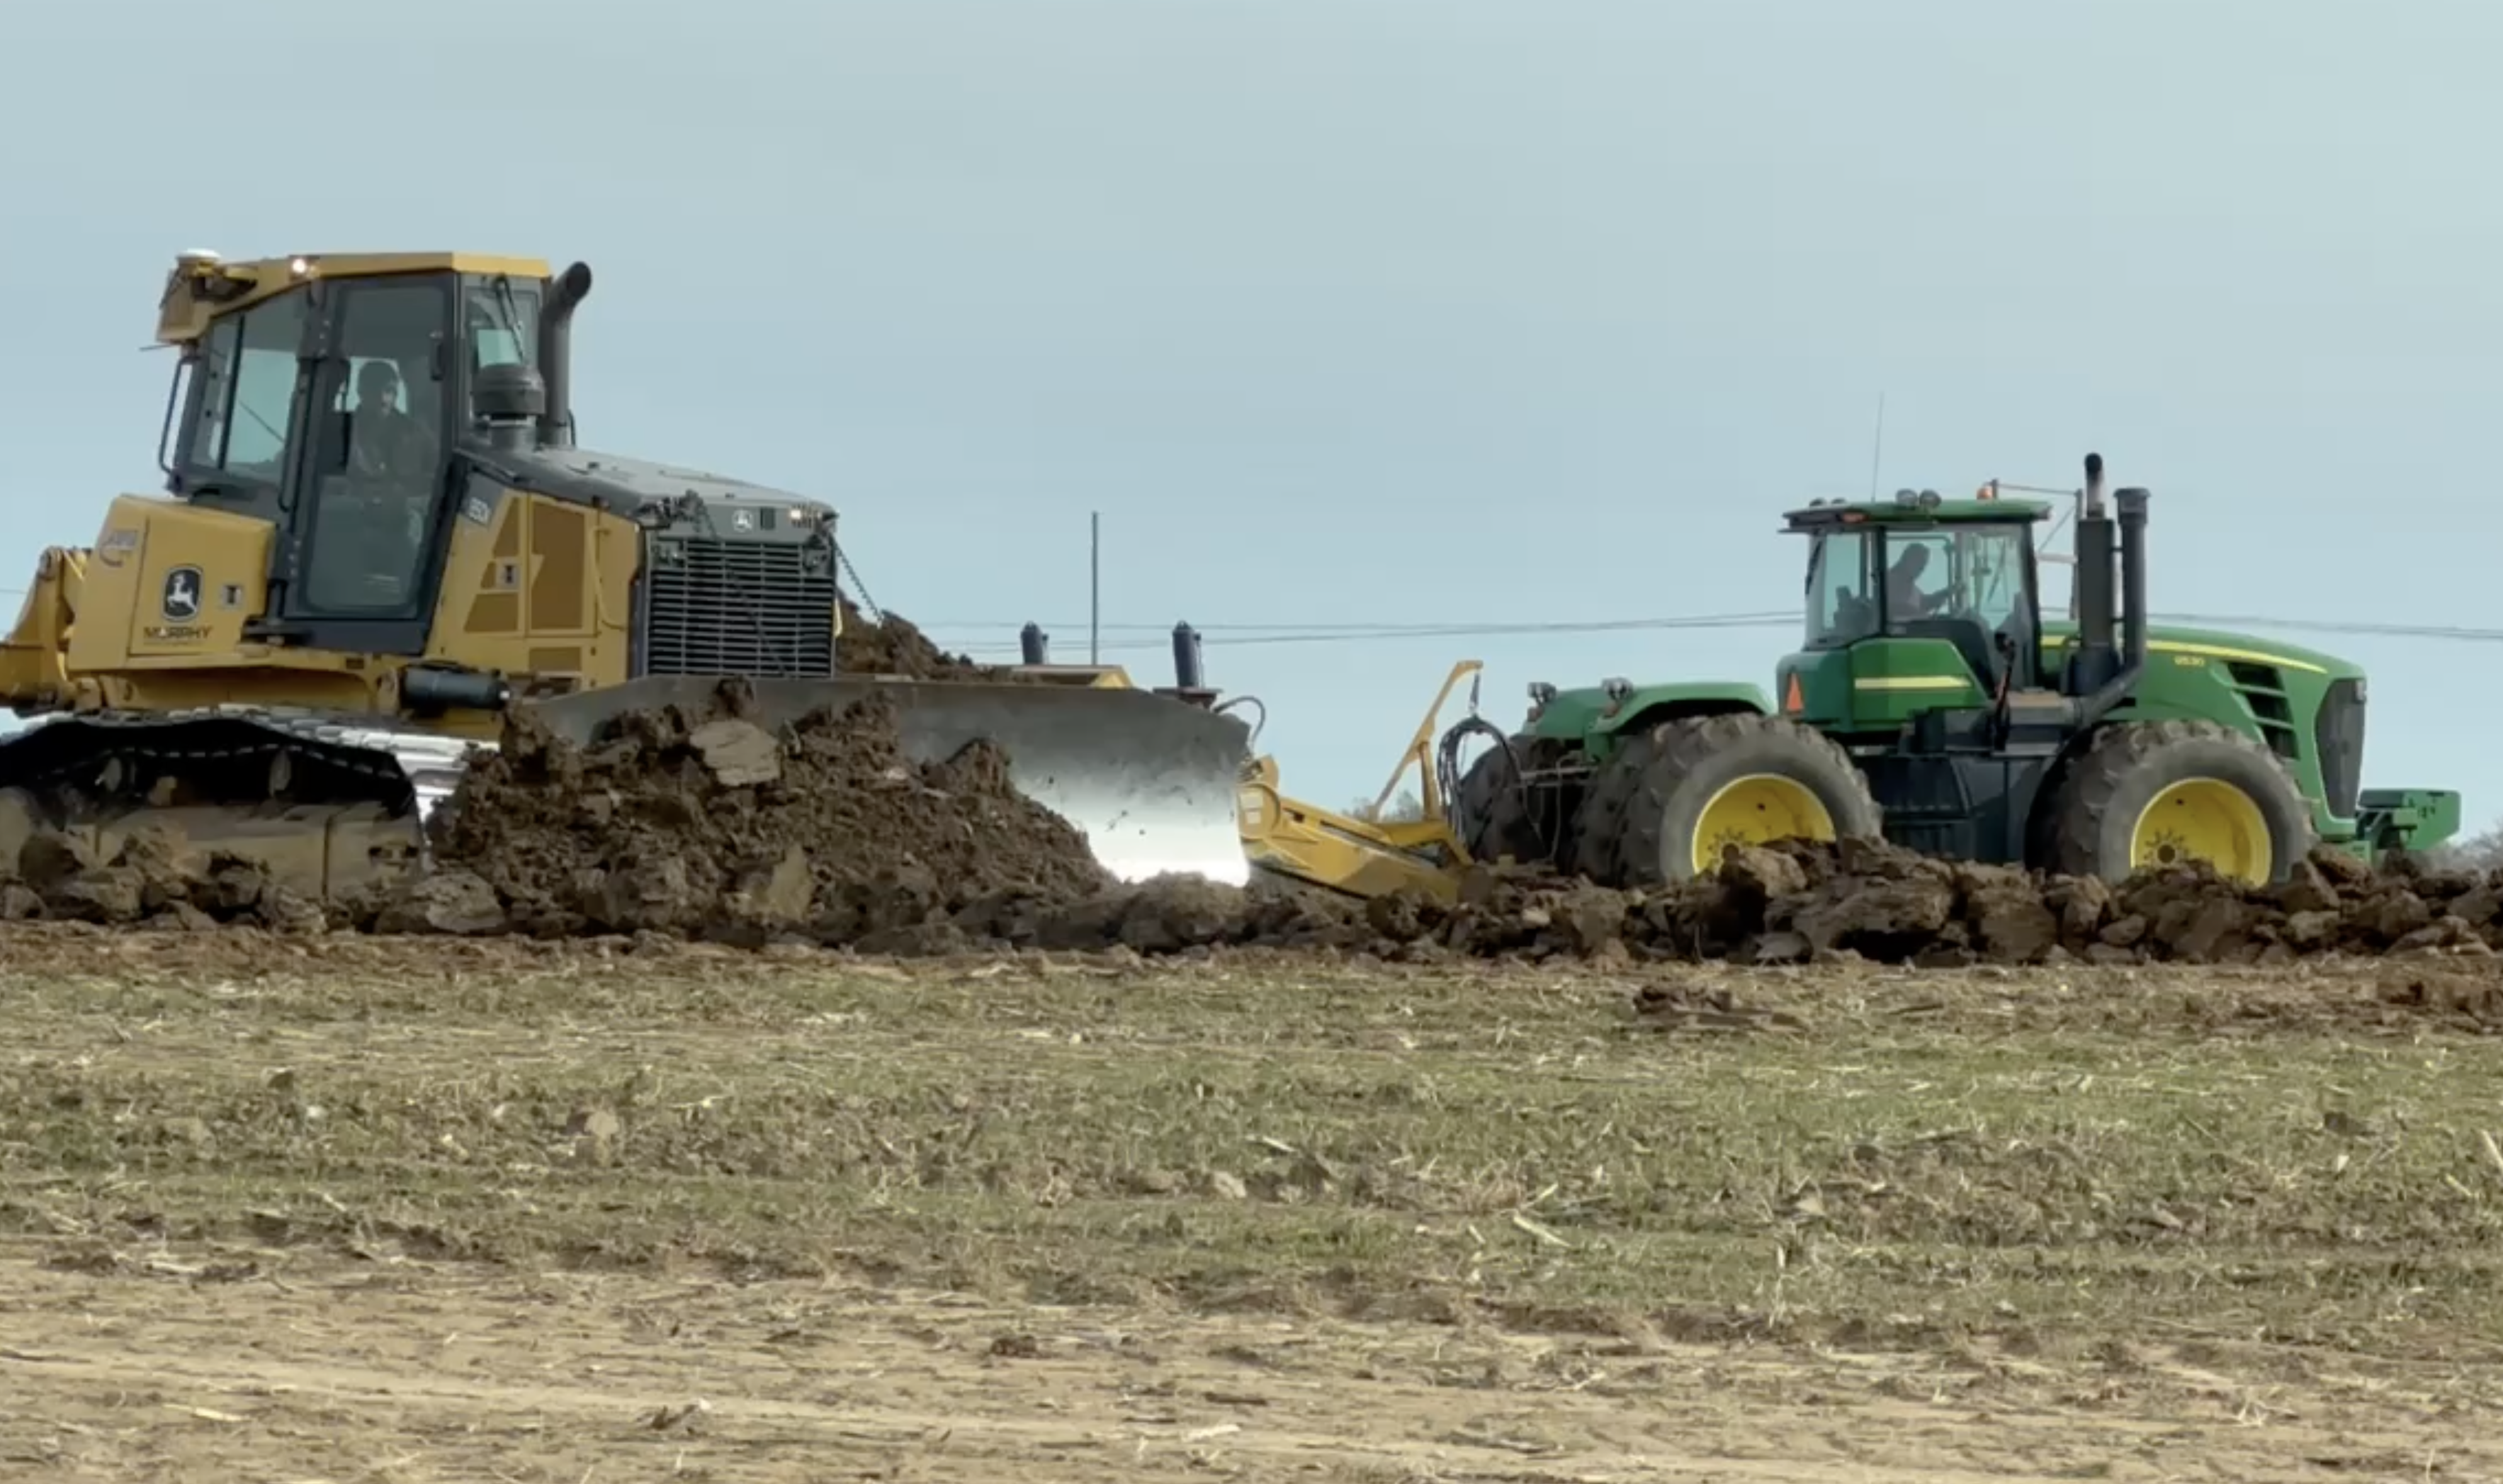
The big boys.

After the first pass.
Costs & Considerations
Imagine your house sitting at the perfect location on your property. Sweeping views, a pond around the corner, and privacy. Now think about what you’re going to remove from the house design to be able to afford the infrastructure needed to get to that location. Here is how the costs start to approach $100,000:
- Surveyor – $6,588
- Road – $52,527
- Trenches for Electrical – $8,025
- Electrical Service – $24,159
There weren’t too many levers we could pull to reduce costs. Most of them were with electrical. First, you can save a few thousand by going with above ground poles. If you decide to go underground like us, an expensive junction box is required every 500ft or so. Planning your road design around this can shave off a few thousand as well.
Final Road
A few pics to show off the end product!
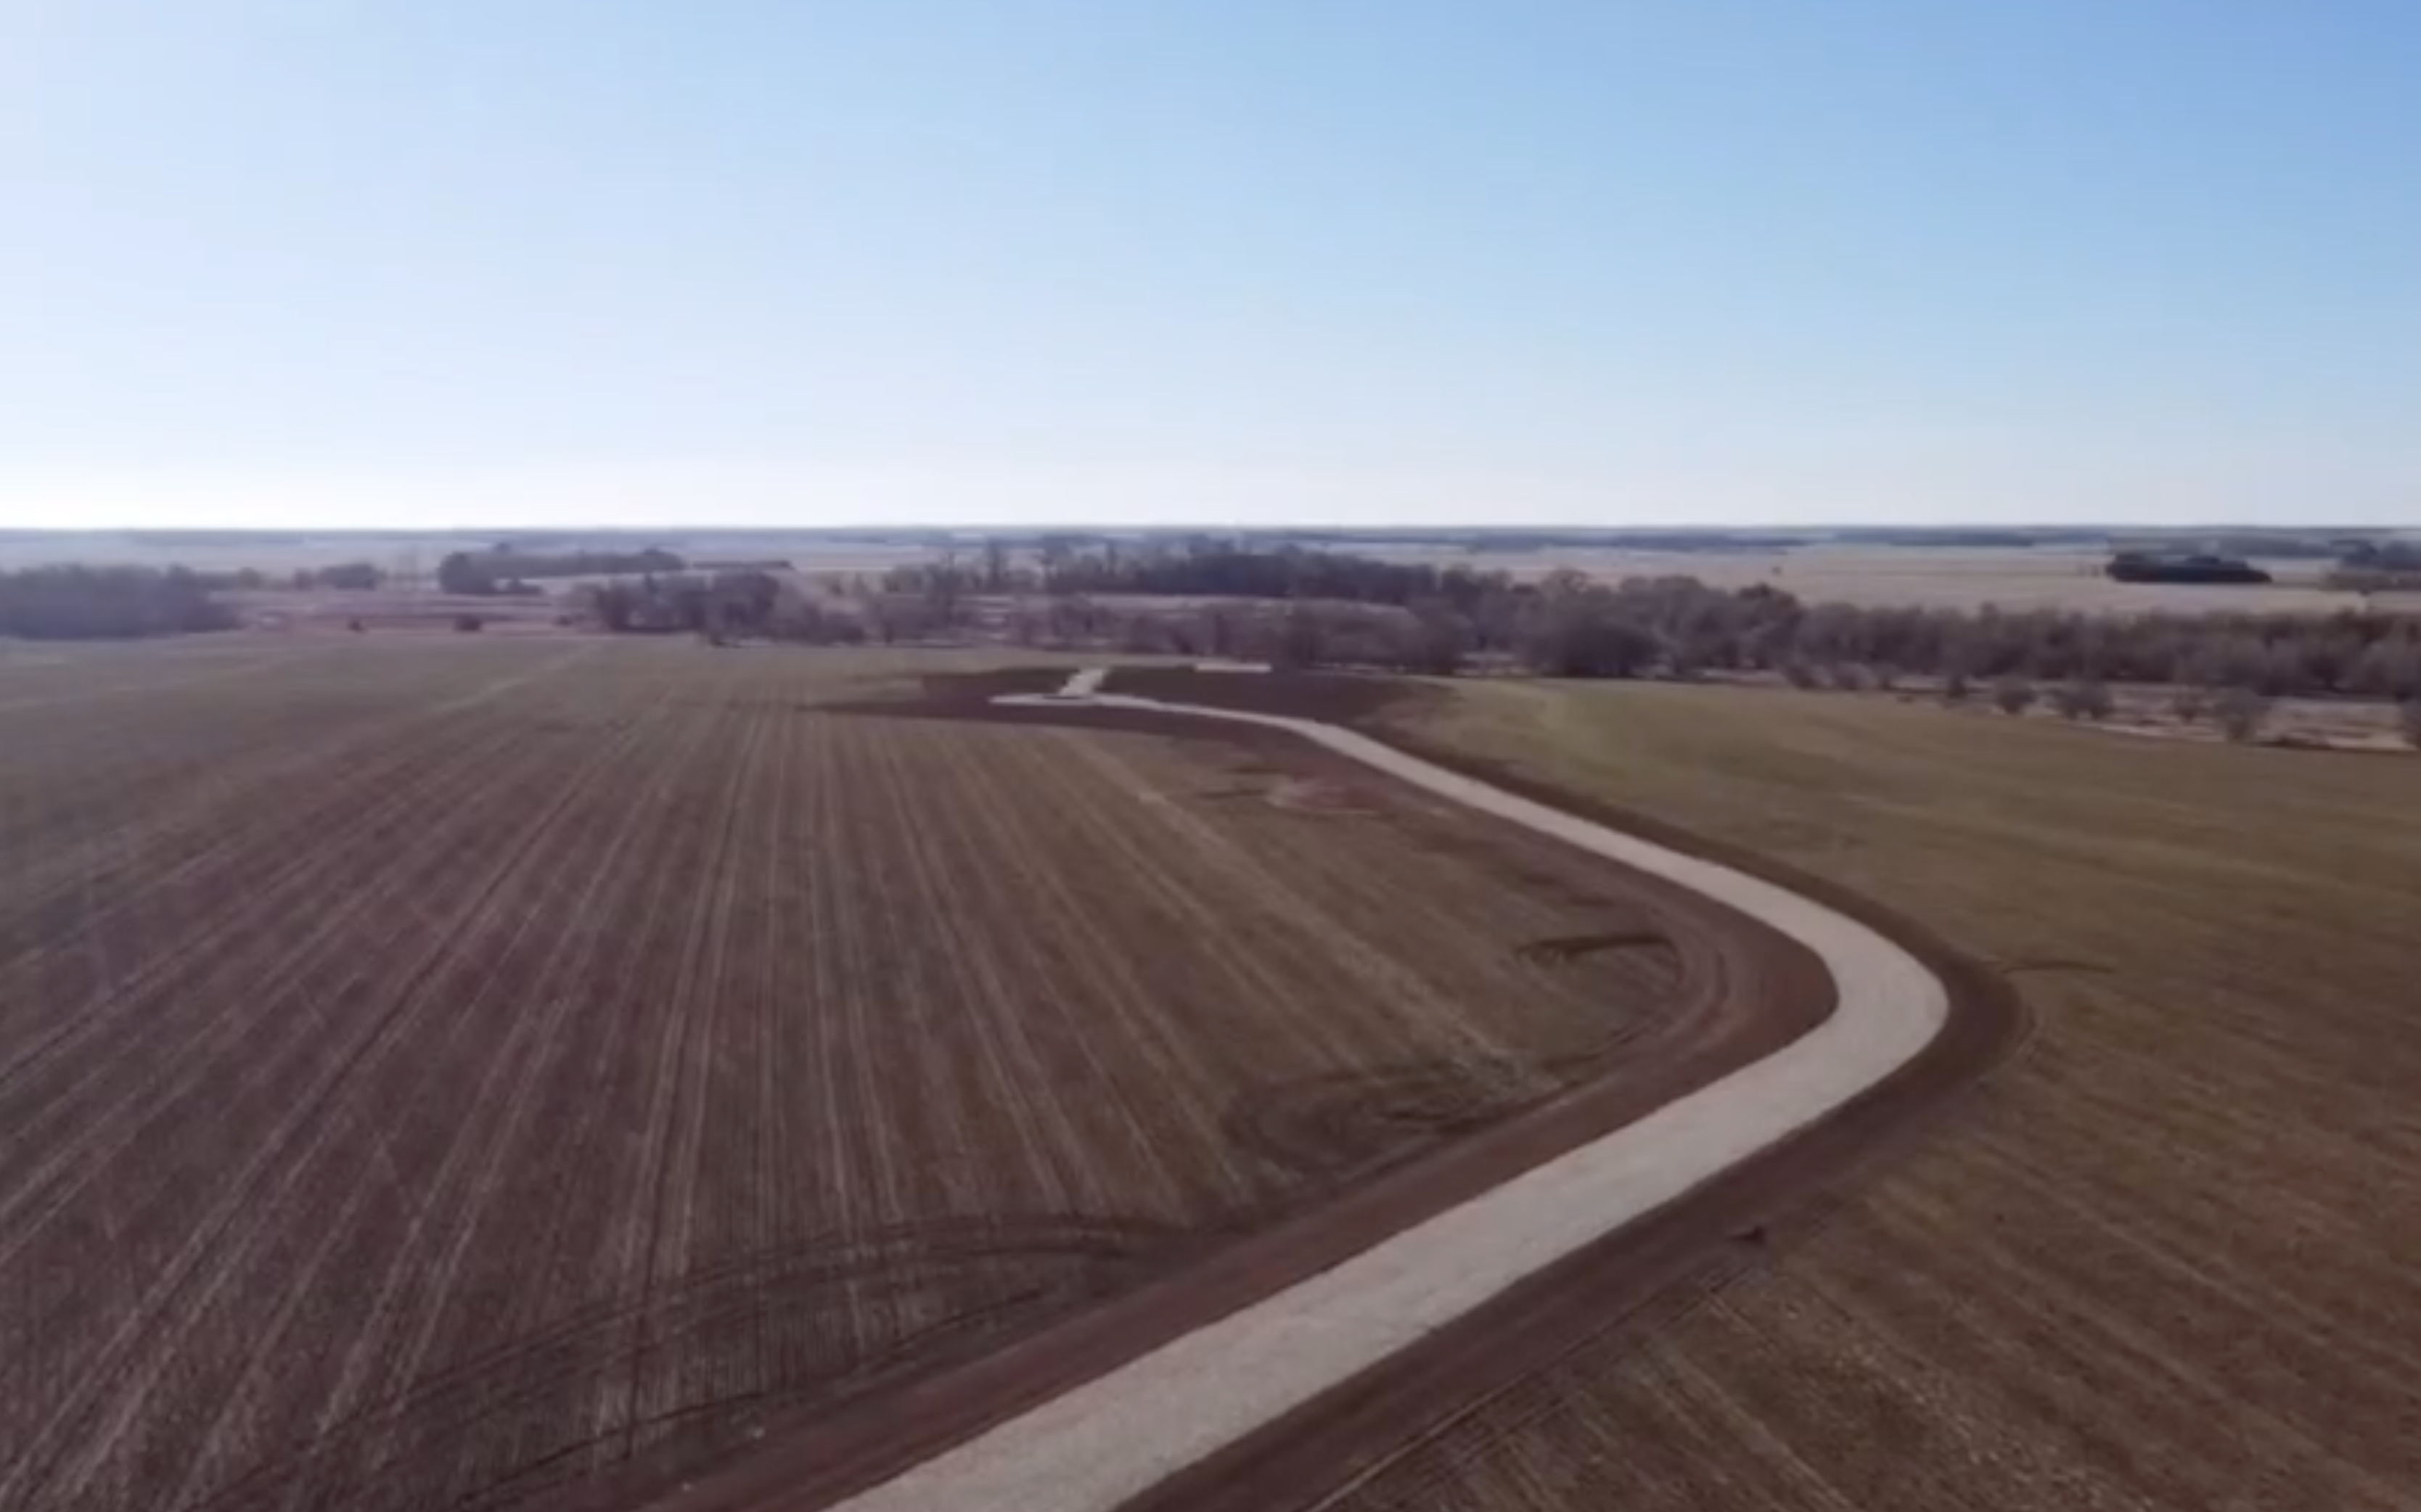
Aerial view.
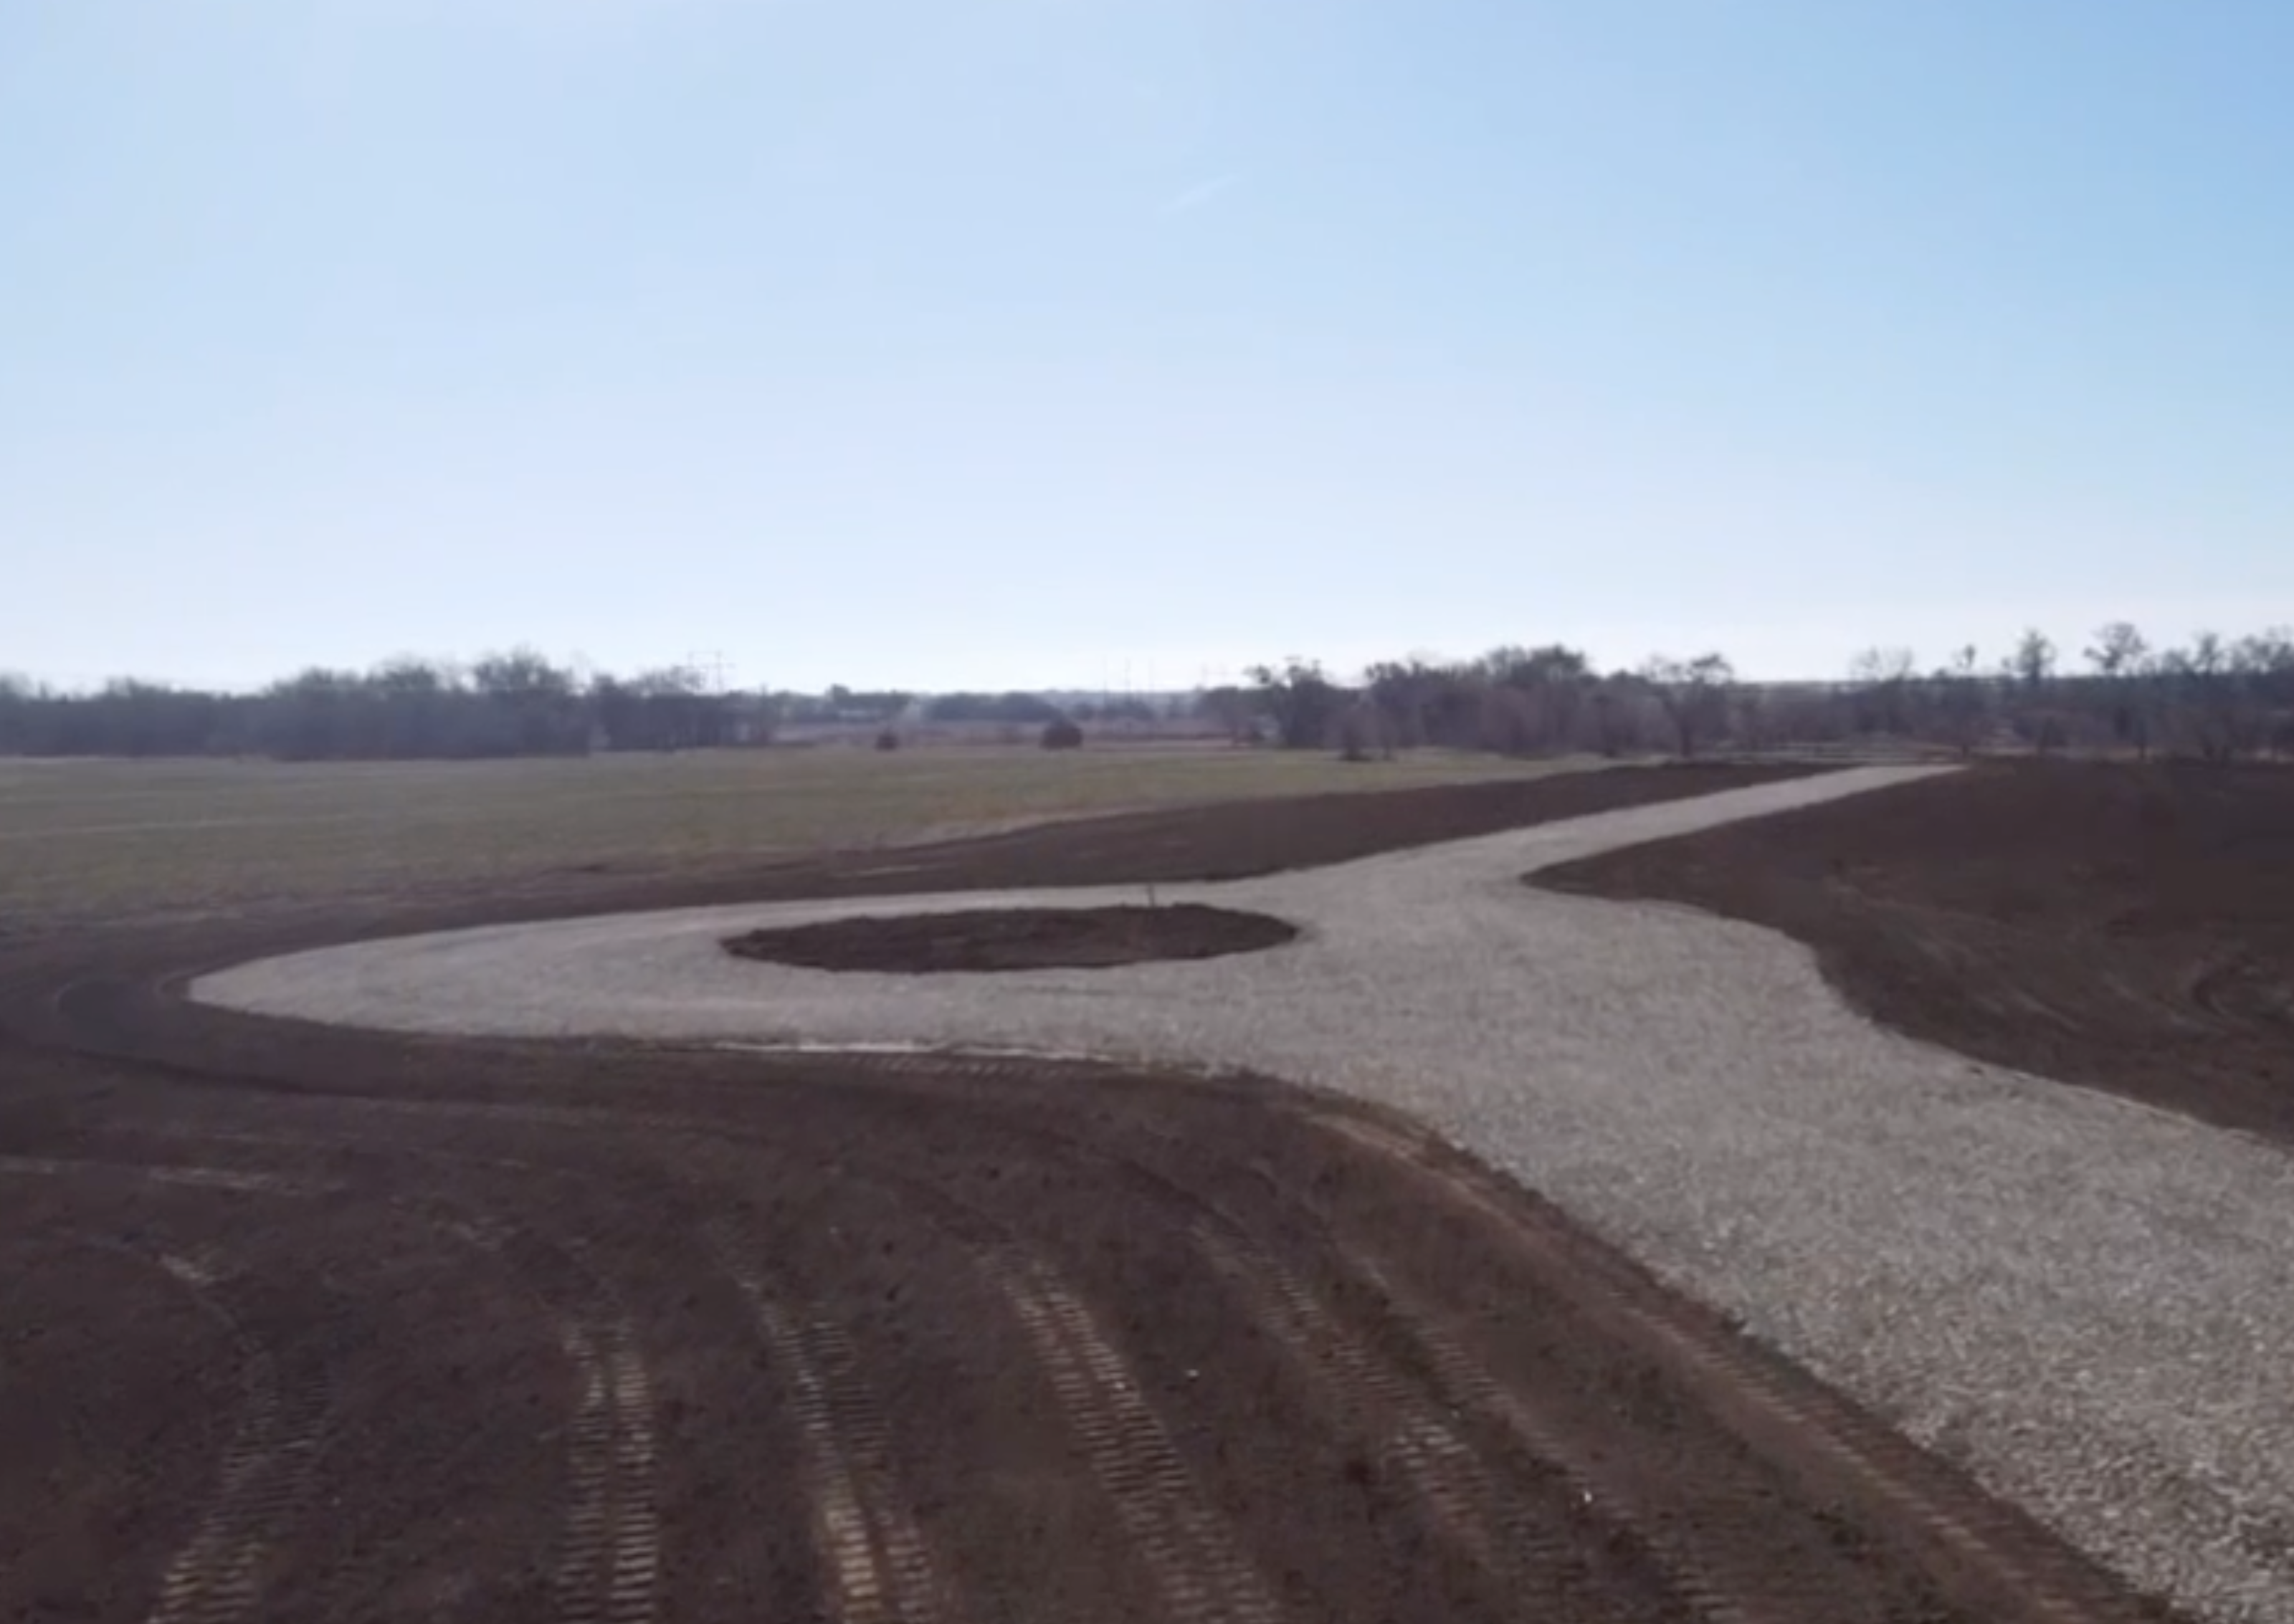
Approaching the circle.
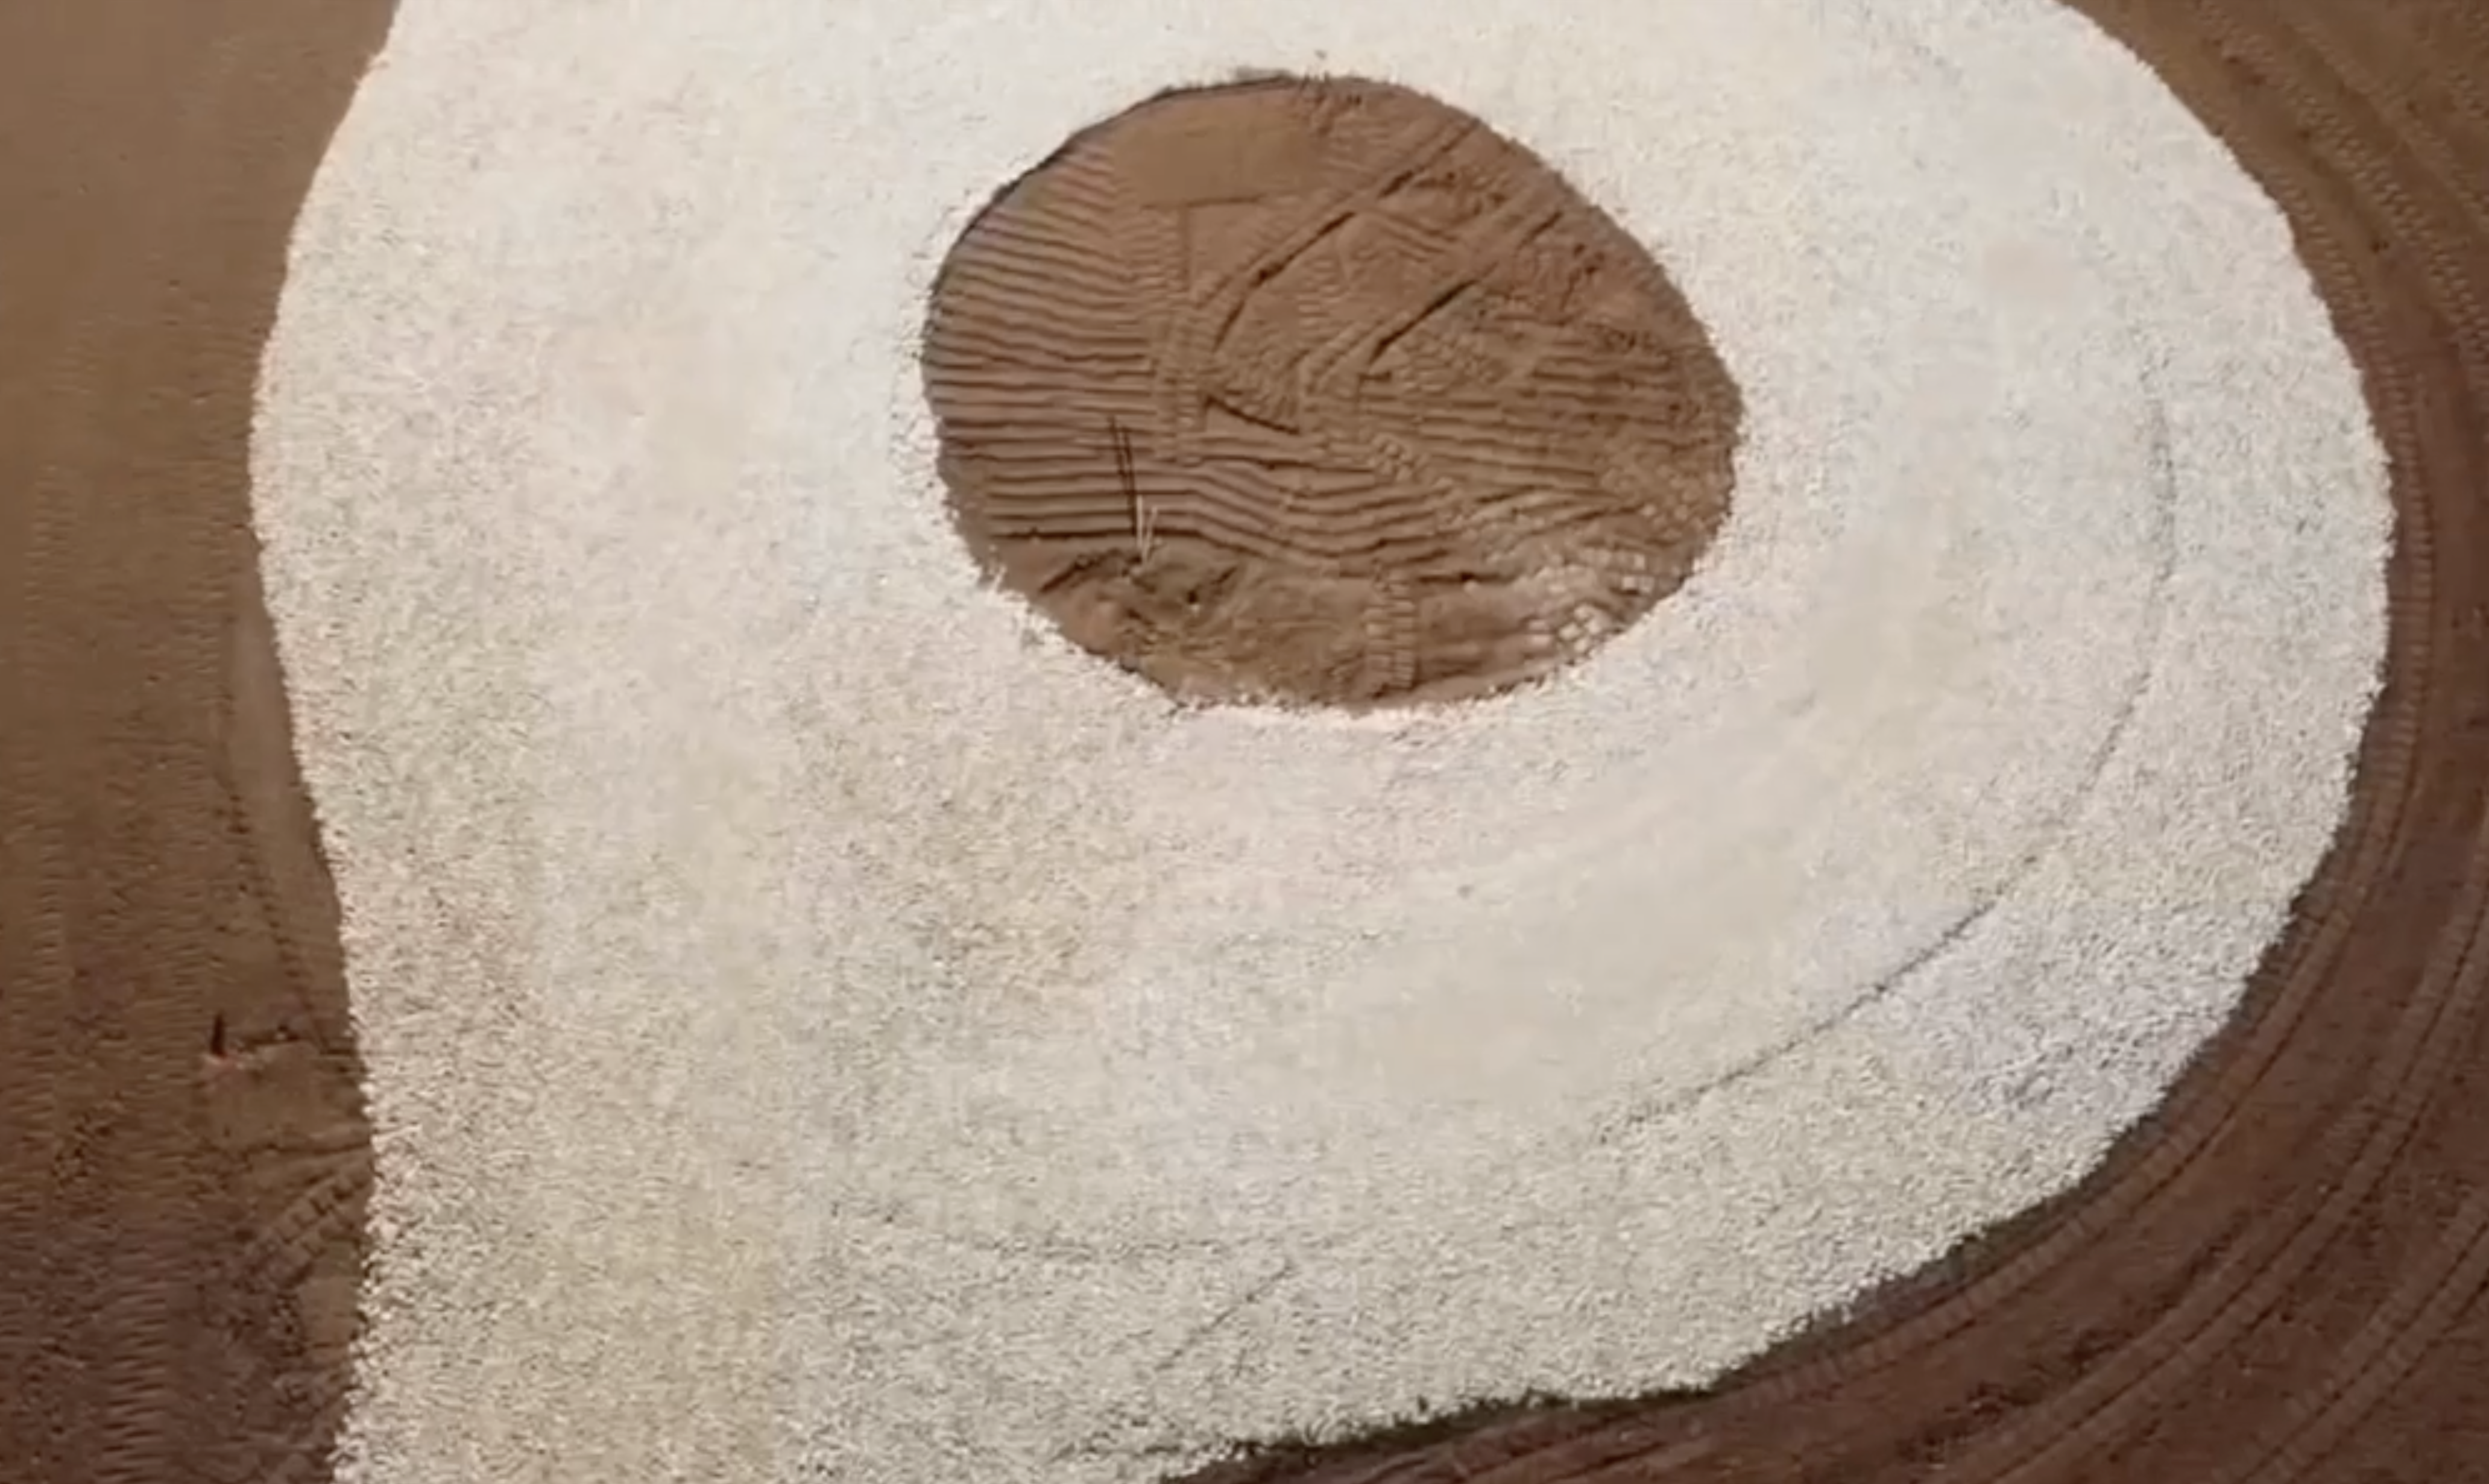
Aerial circle.
Approaching the house.