Framing feels like the true beginning of the build since we’re on our own. No contractor will be helping us out for awhile, so it’s on us to make a building that can stand on it’s own. More importantly, energy efficient details like 3 stud corners, insulated headers and 24" spacing will be a test run for us to see if we like them enough to use on the main house.
Planning
We didn’t have to overthink things too much because this is just a simle, rectanglar building. Exterior details like exterior insulation, rainscreen, and air sealing will be covered later on. That said, there were a few planning details worthy of consideration at this point.
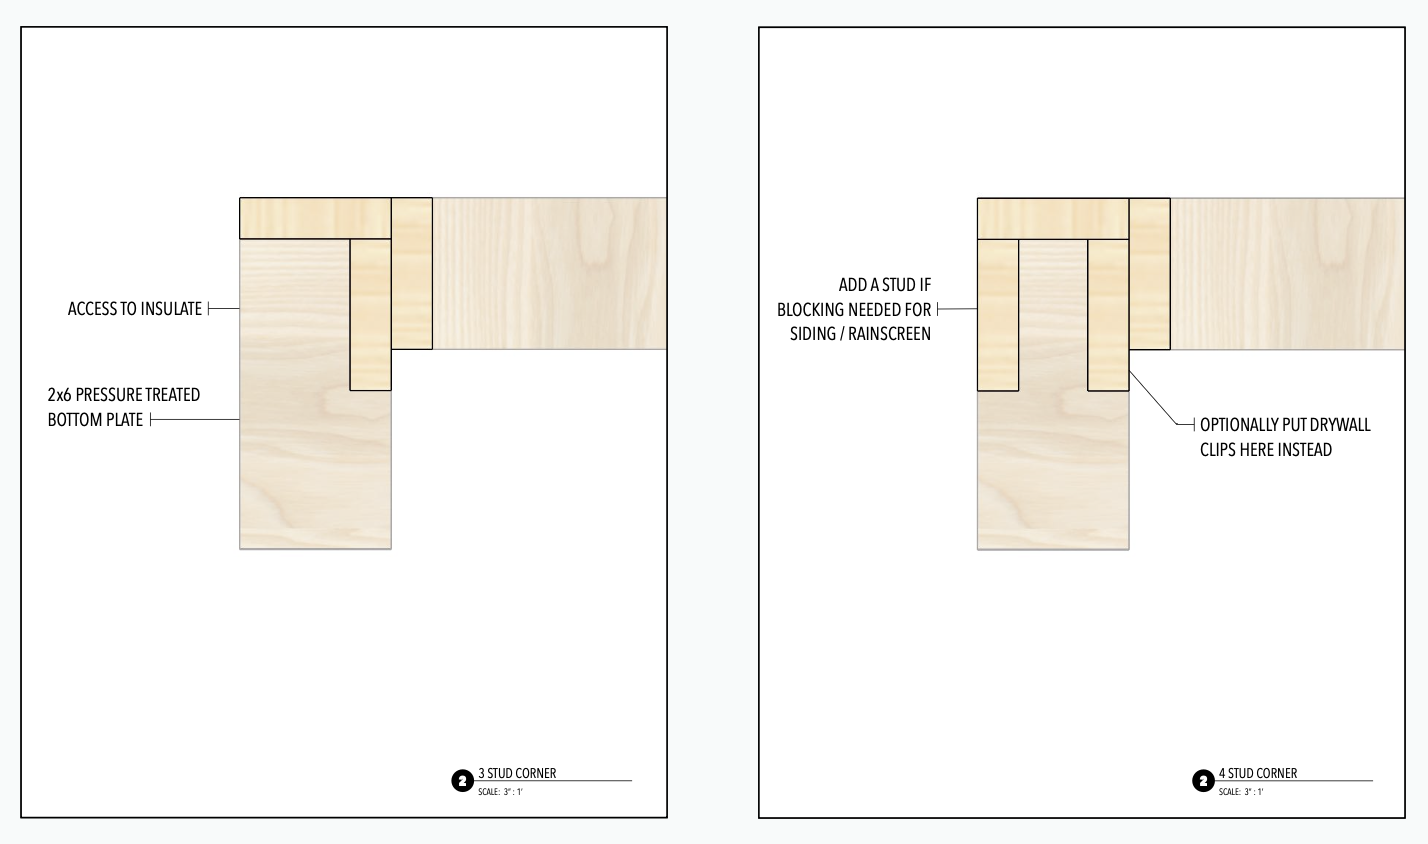
3 Stud vs 4 Stud Corners
I anticipate that the corner details will be tricky as we build out the exterior insulation. Ensuring the corner is plumb and looks good once it extends 3 inches from the building will be interesting. For that reason, I opted for the 4-stud corner, providing a more solid structure to attach to if needed.

A few framing details.
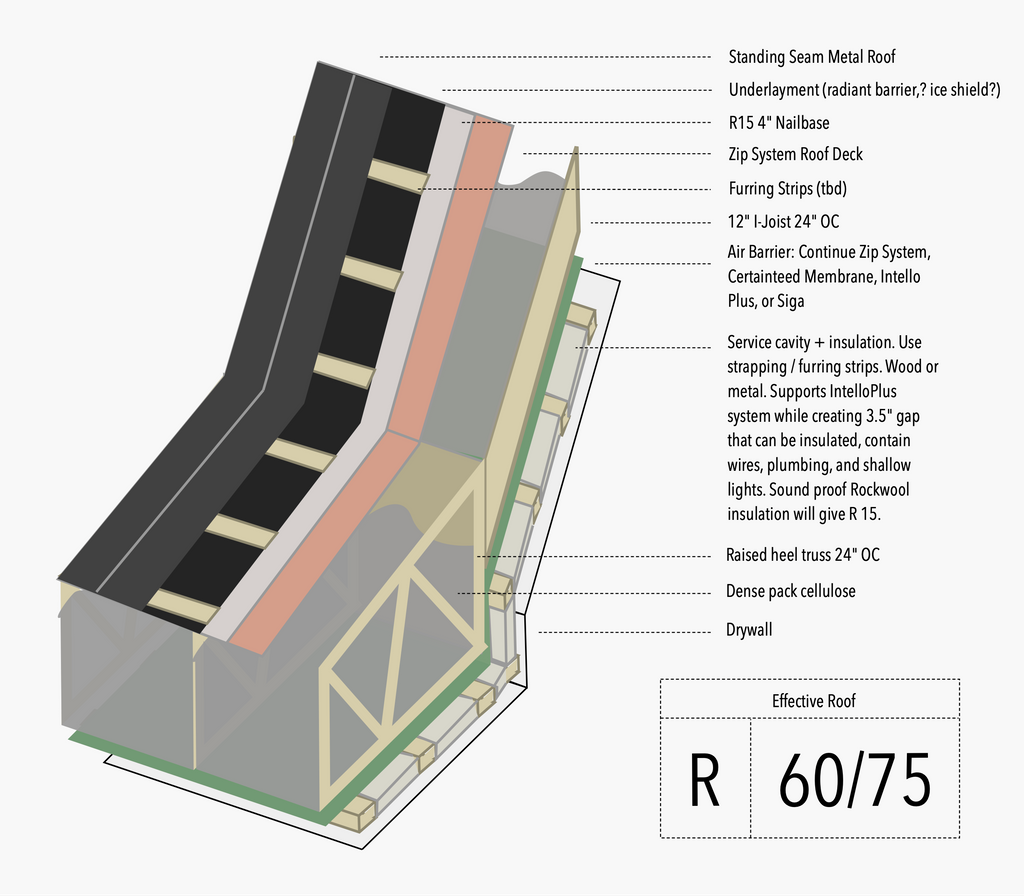
The drawings above show insulation coming up over the top of the stem wall. We originally planned for this to eliminate thermal bridging. This detail proved to be too hard to do for a simple barn workshop, so instead we just angled the insulation at the slab edge. Also notice that we were going to notch the concrete at the garage door openings to make the garage door sensor sit flush with the wall covering said insulation.
Note I went back and forth on nail sizing a bit, but code makes it clear now. Ended up using 3.25 inch, 0.131 nails because that is what is available locally.
Lastly, I wish I considered lining up the trusses to sit on top of the studs. Not for stabilitiy, but instead to align nailing surfaces. Because my sheathing overlapped up to the raised heel trusses, I had to adjust my nailing pattern. This carried through to the rainscreen as well. I’ll cover this more when I get to trusseses, but it’s worth considering when planning.
Sill Plate
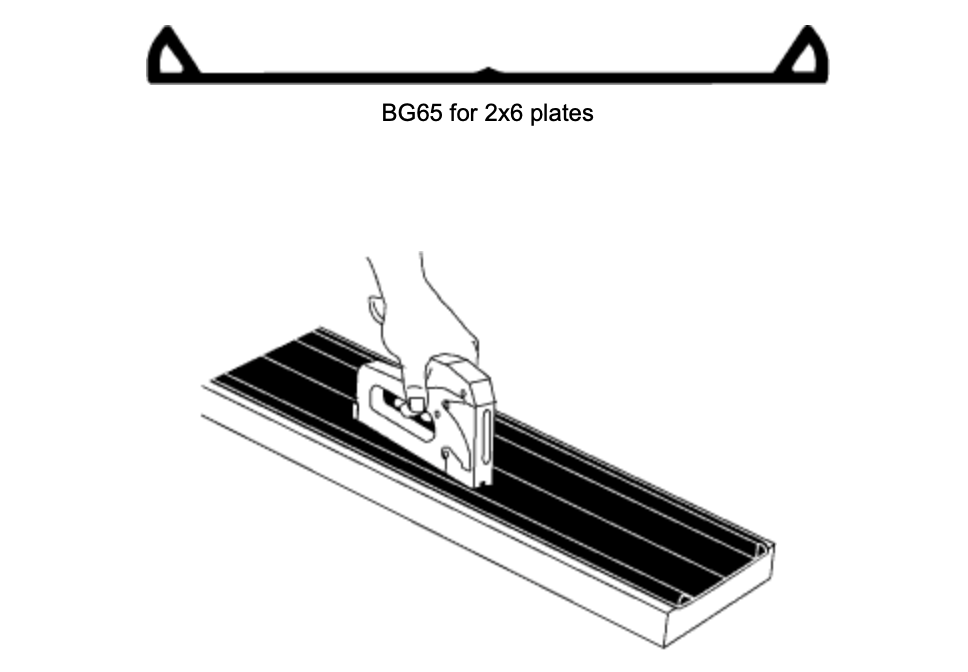
BG65.
There are plenty of good resources that cover how to measure and layout a sill plate, but I’d like to draw attention to our air sealing and capillary break detail. We went with the BG65 from Conservation Technologies. This product feels more substantial in every way than a pink foam roll. Despite their website’s dated appearance, the ordering process over email and phone was seamless.
One installation note – because we had to lift the walls 8" up on top of a stem wall, we found the stapling method to be problematic. We kept tearing the product when we moved the wall. Instead, we just placed the product down over the anchor bolts on top of the stem wall, and then set the wall on top.
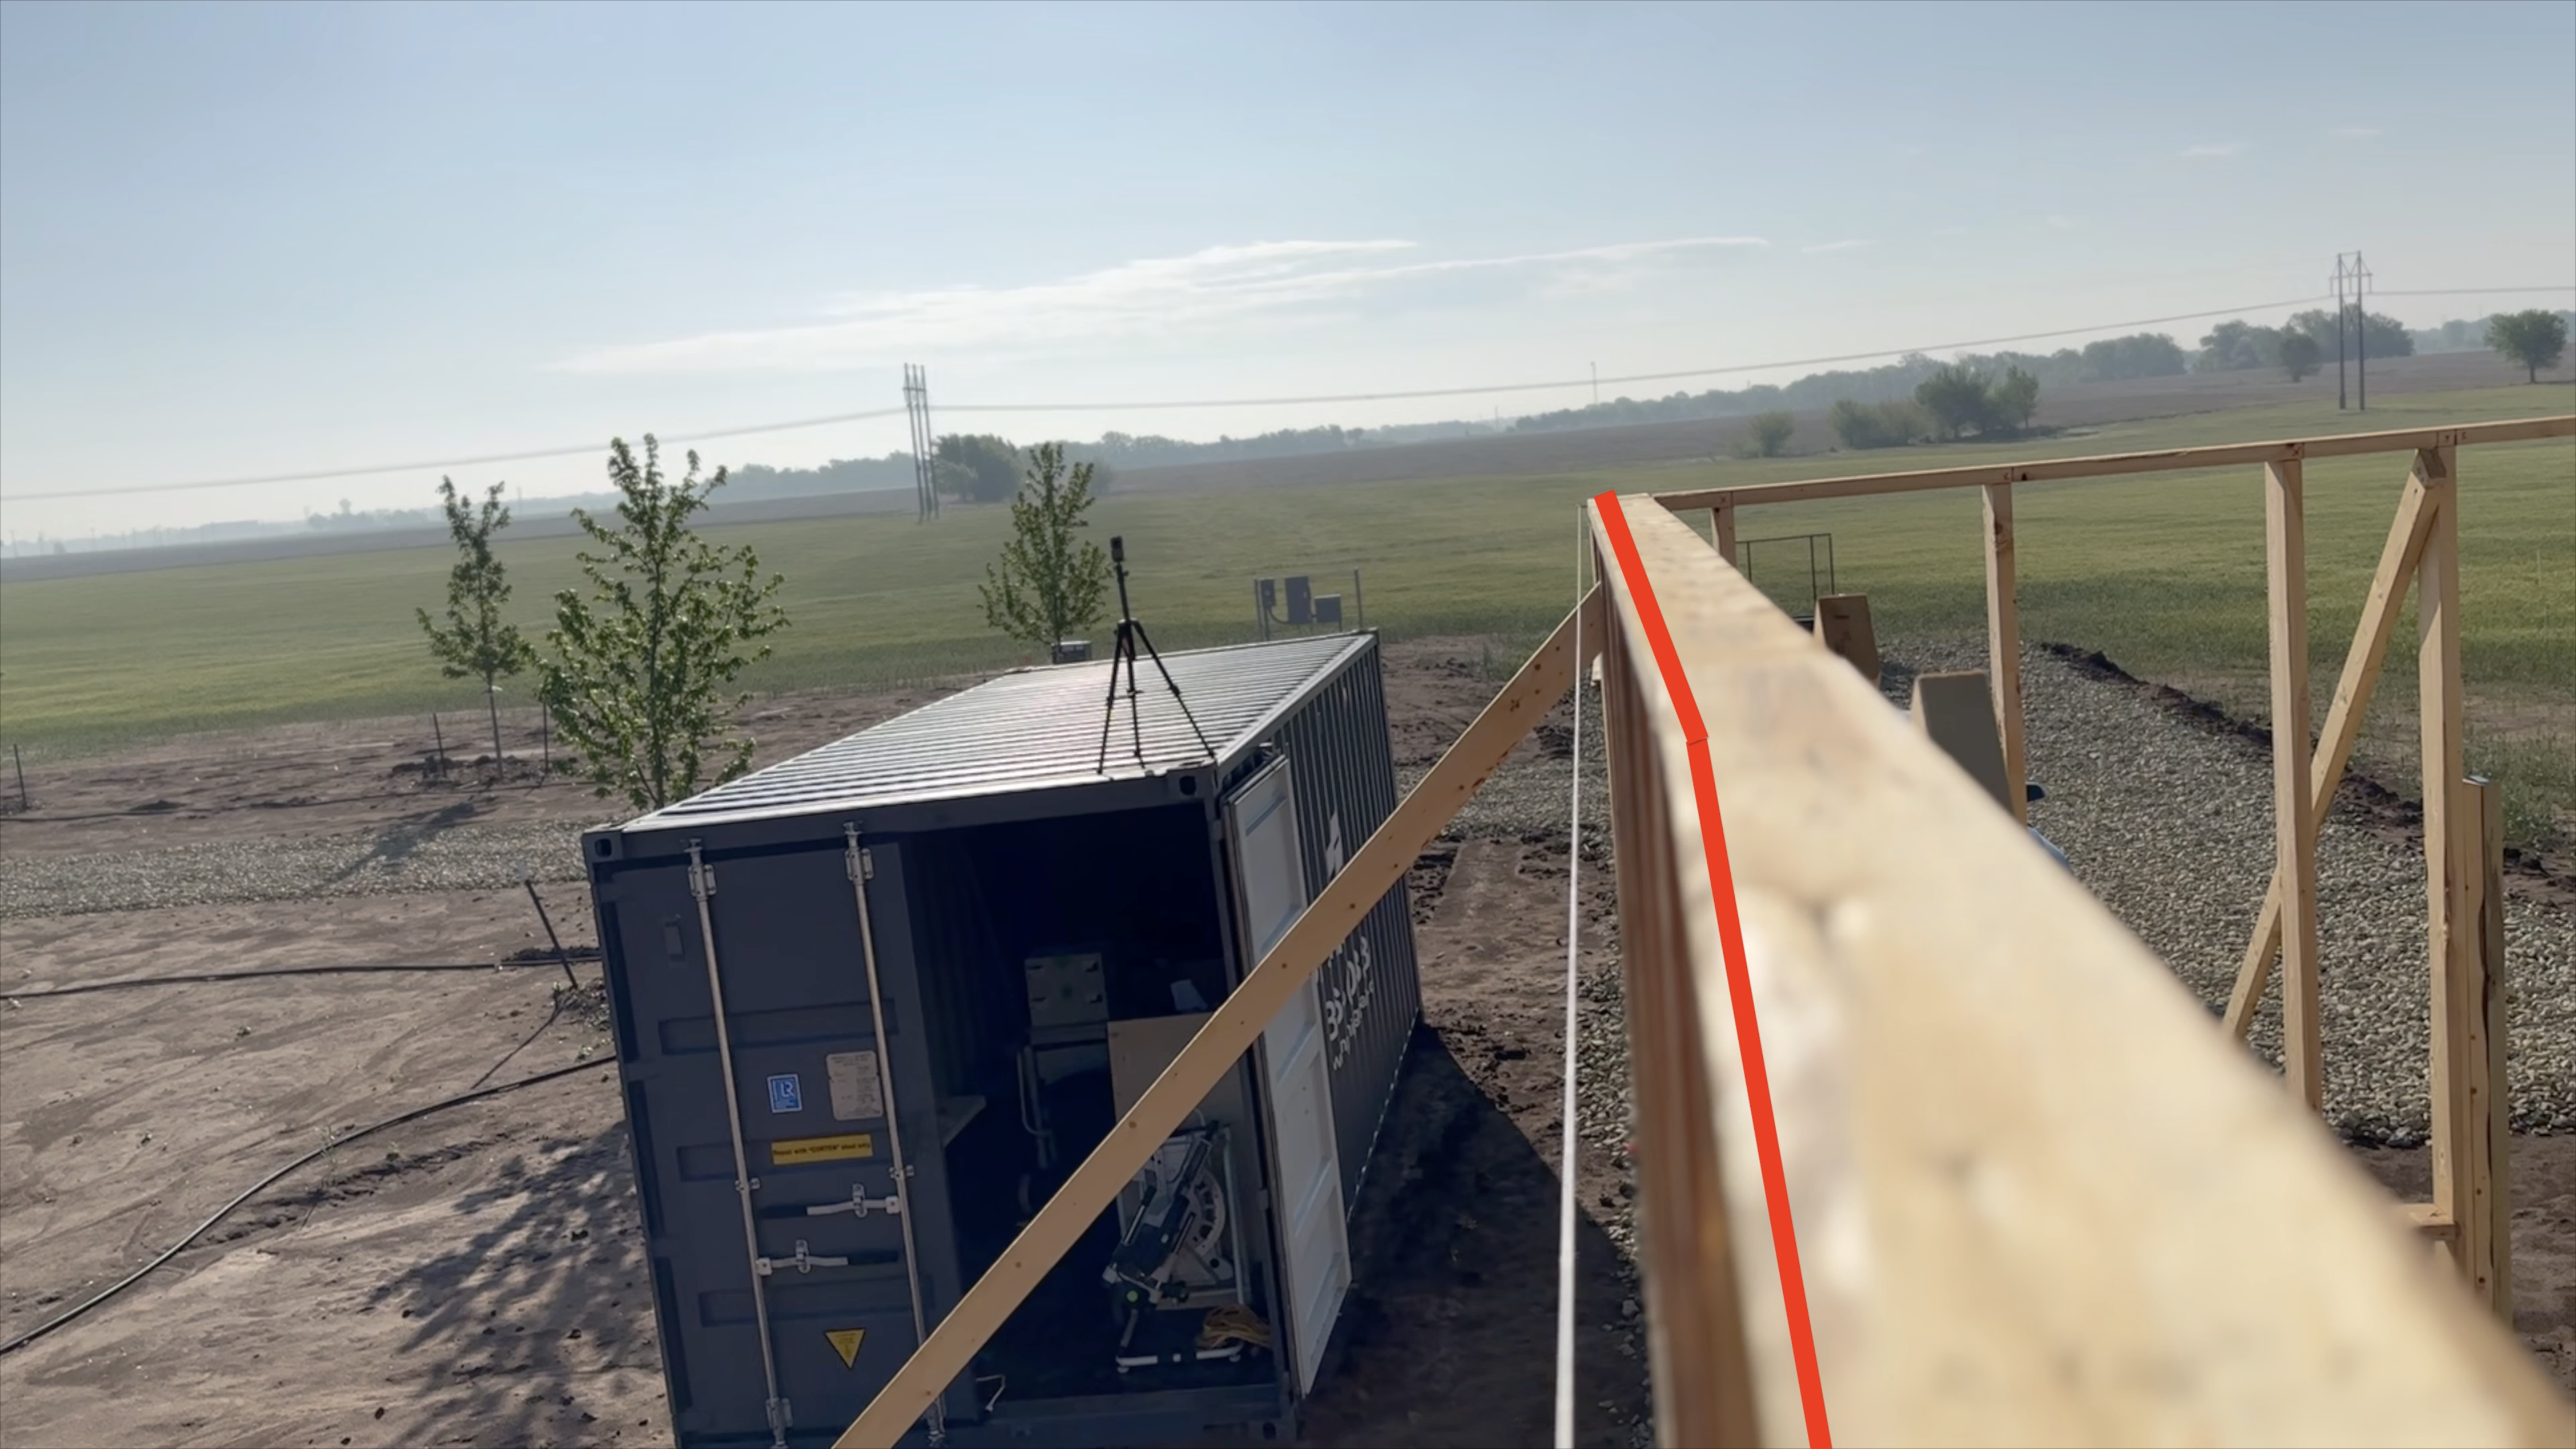
Lifting & Plumbing Walls
Important Seriously consider your wall height needs. We went with 10’ because why not, but that made everything harder along the way.
The process of lifting the walls turned out to be more challenging than I anticipated. When working with tall walls, their height tends to induce a tipping effect, making it necessary to lift and stabilize simultaneously. This task becomes even more demanding with an 8" stem wall. Despite experimenting with various bracing methods, the most effective solution in the end was having one person stabilize the wall while the other lifted carefully into place.

Stabilizing a wall.
The decision to use 2x6’s instead of 2x4’s, coupled with the added height and stem walls, resulted in our wall sections being shorter than desired. In an ideal scenario, we would have been able to lift 20’ wall sections. However, this choice posed a few challenges, like the need for additional anchor bolts into the concrete at the points where the wall broke. These joints in the wall also added added complexity to making the walls plumb. We ended up using concrete turnbuckles to brace the walls. Turning the buckle would then allow for small adjustments to the wall, which got us close to plumb.
Walls out of alignment
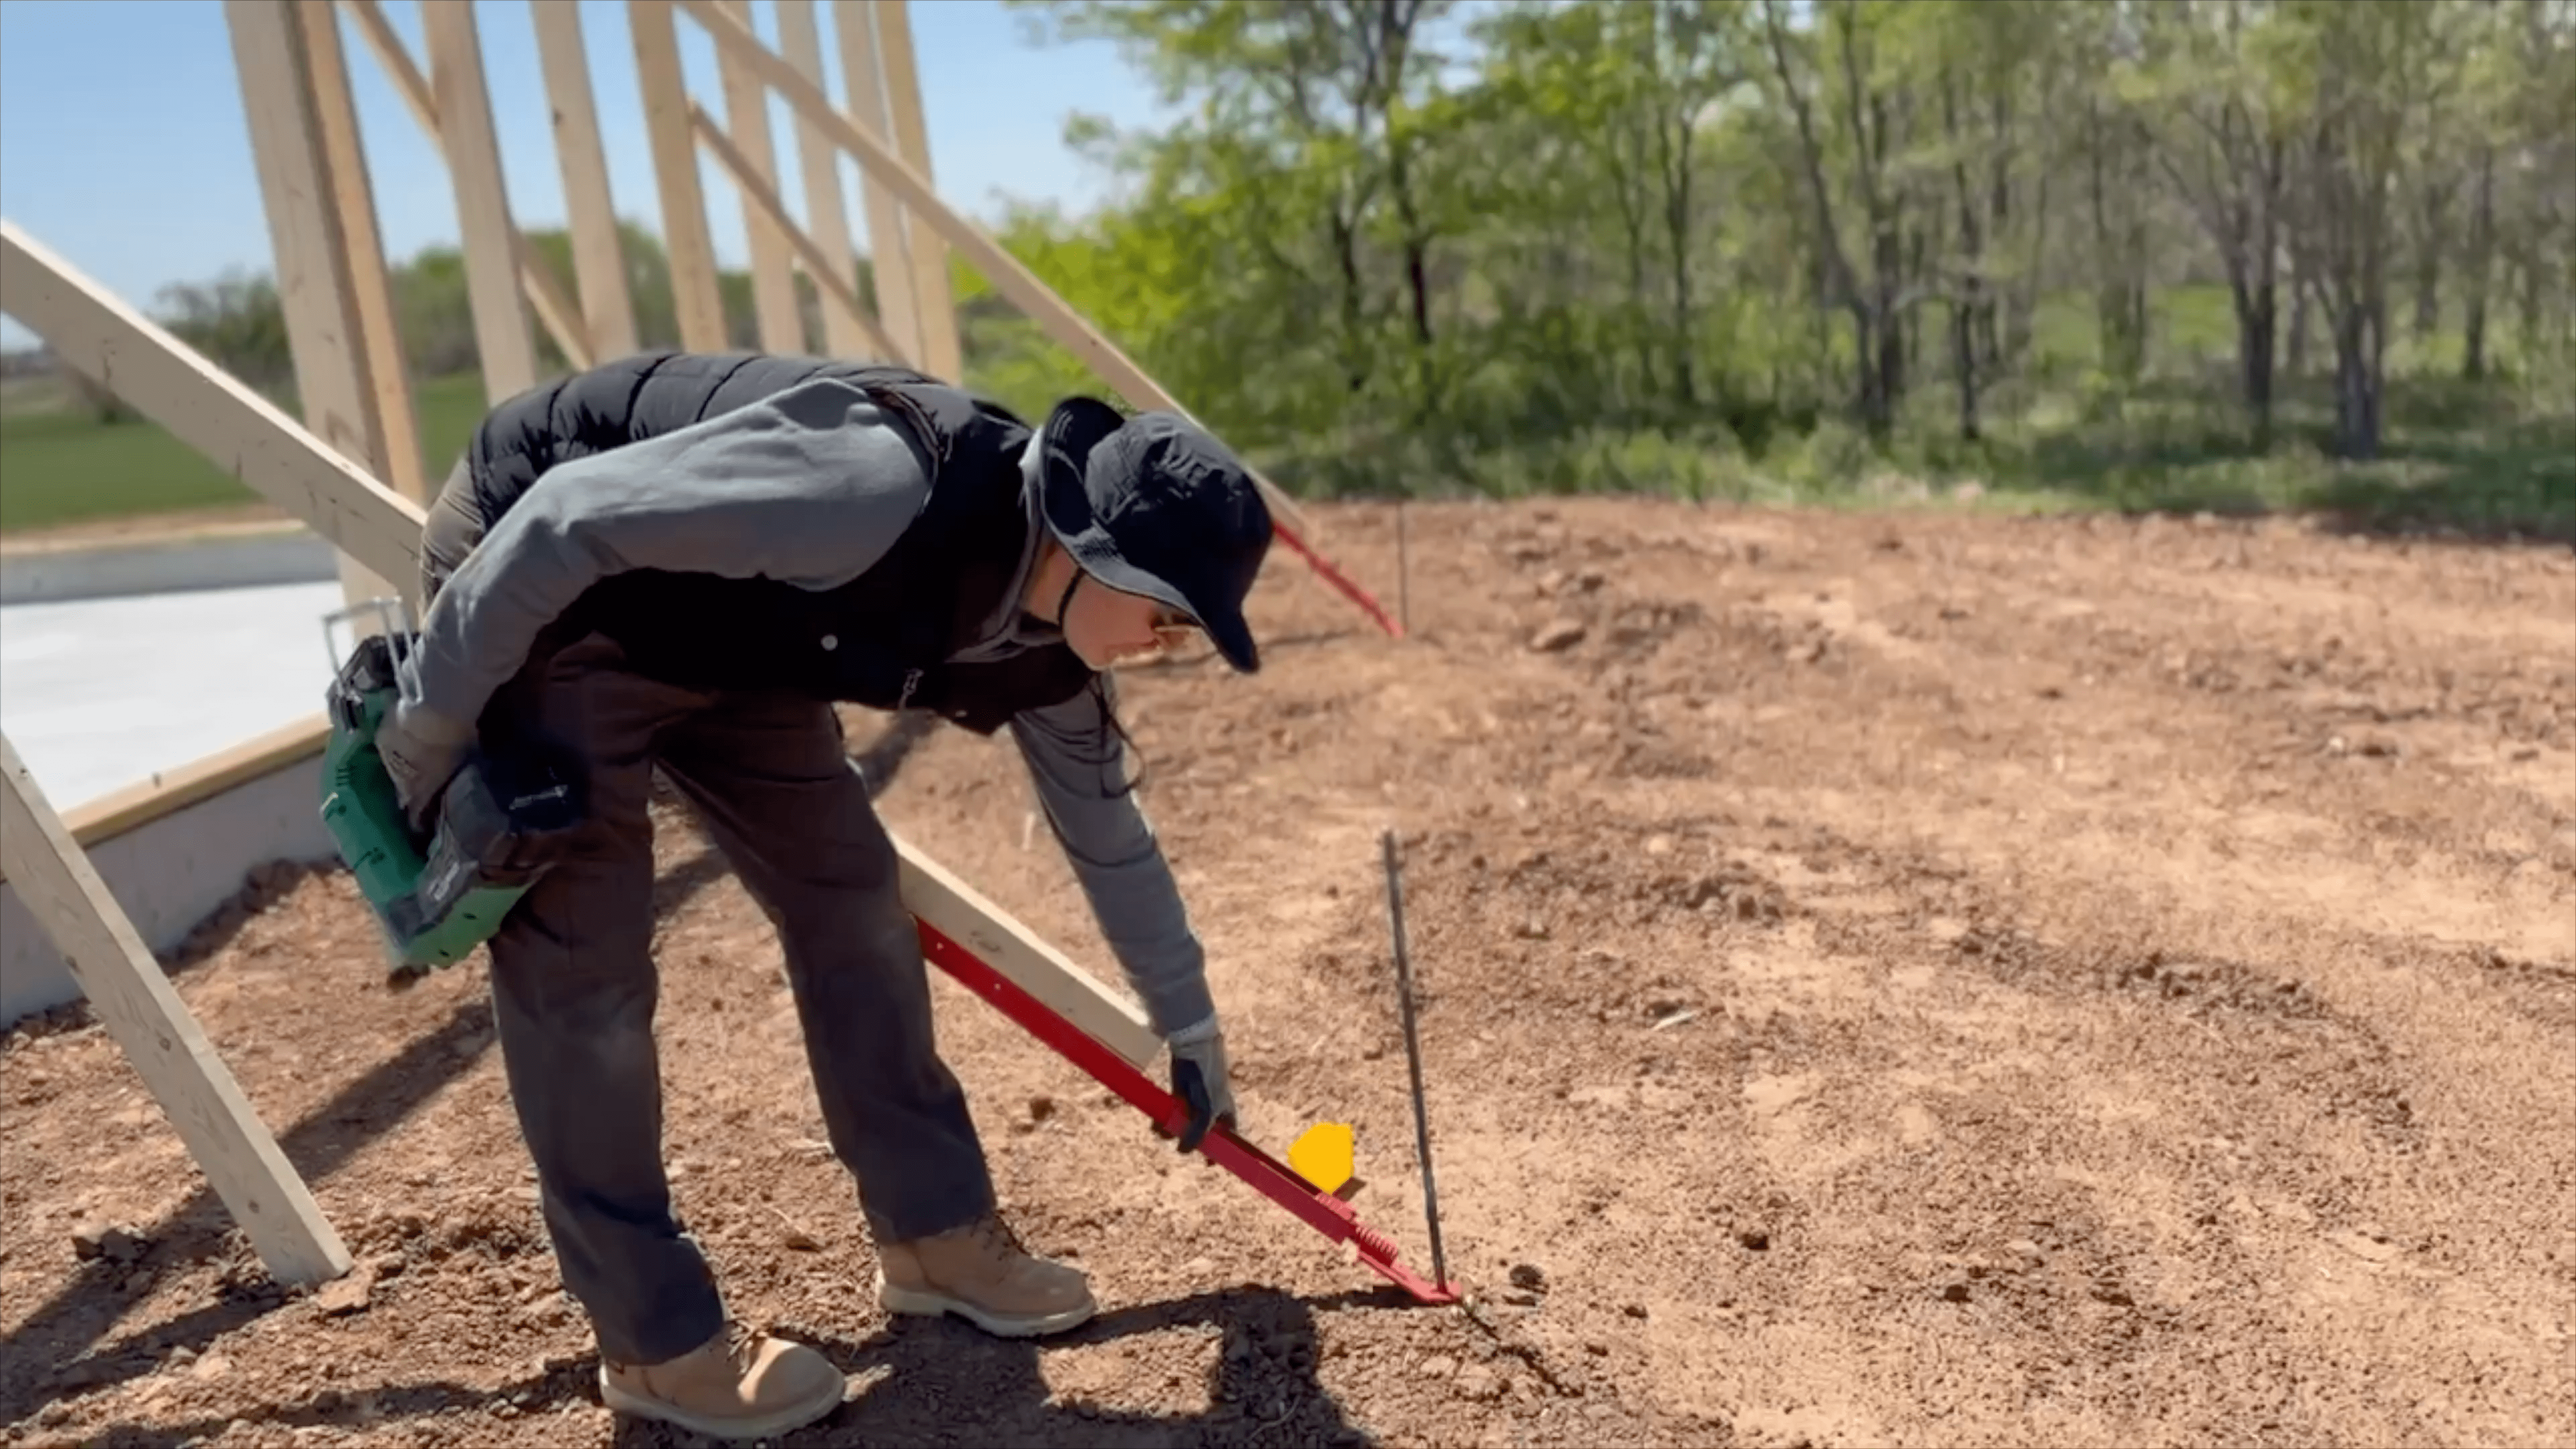
Turnbuckle brace.
Headers & Blocking
To my knowledge, blocking is not required by code for this build, but don’t quote me on that. We ended up adding blocking anyway for two reasons. Firstly, with nearly 12’ exterior walls, factoring in the raised heel trusses, we required multiple boards of sheathing. We placed the blocking at the joint of where the sheathing would meet to giv additional stability. Perhaps more importantly, we added blocking because the building felt extremely wobbly at this point in the build.
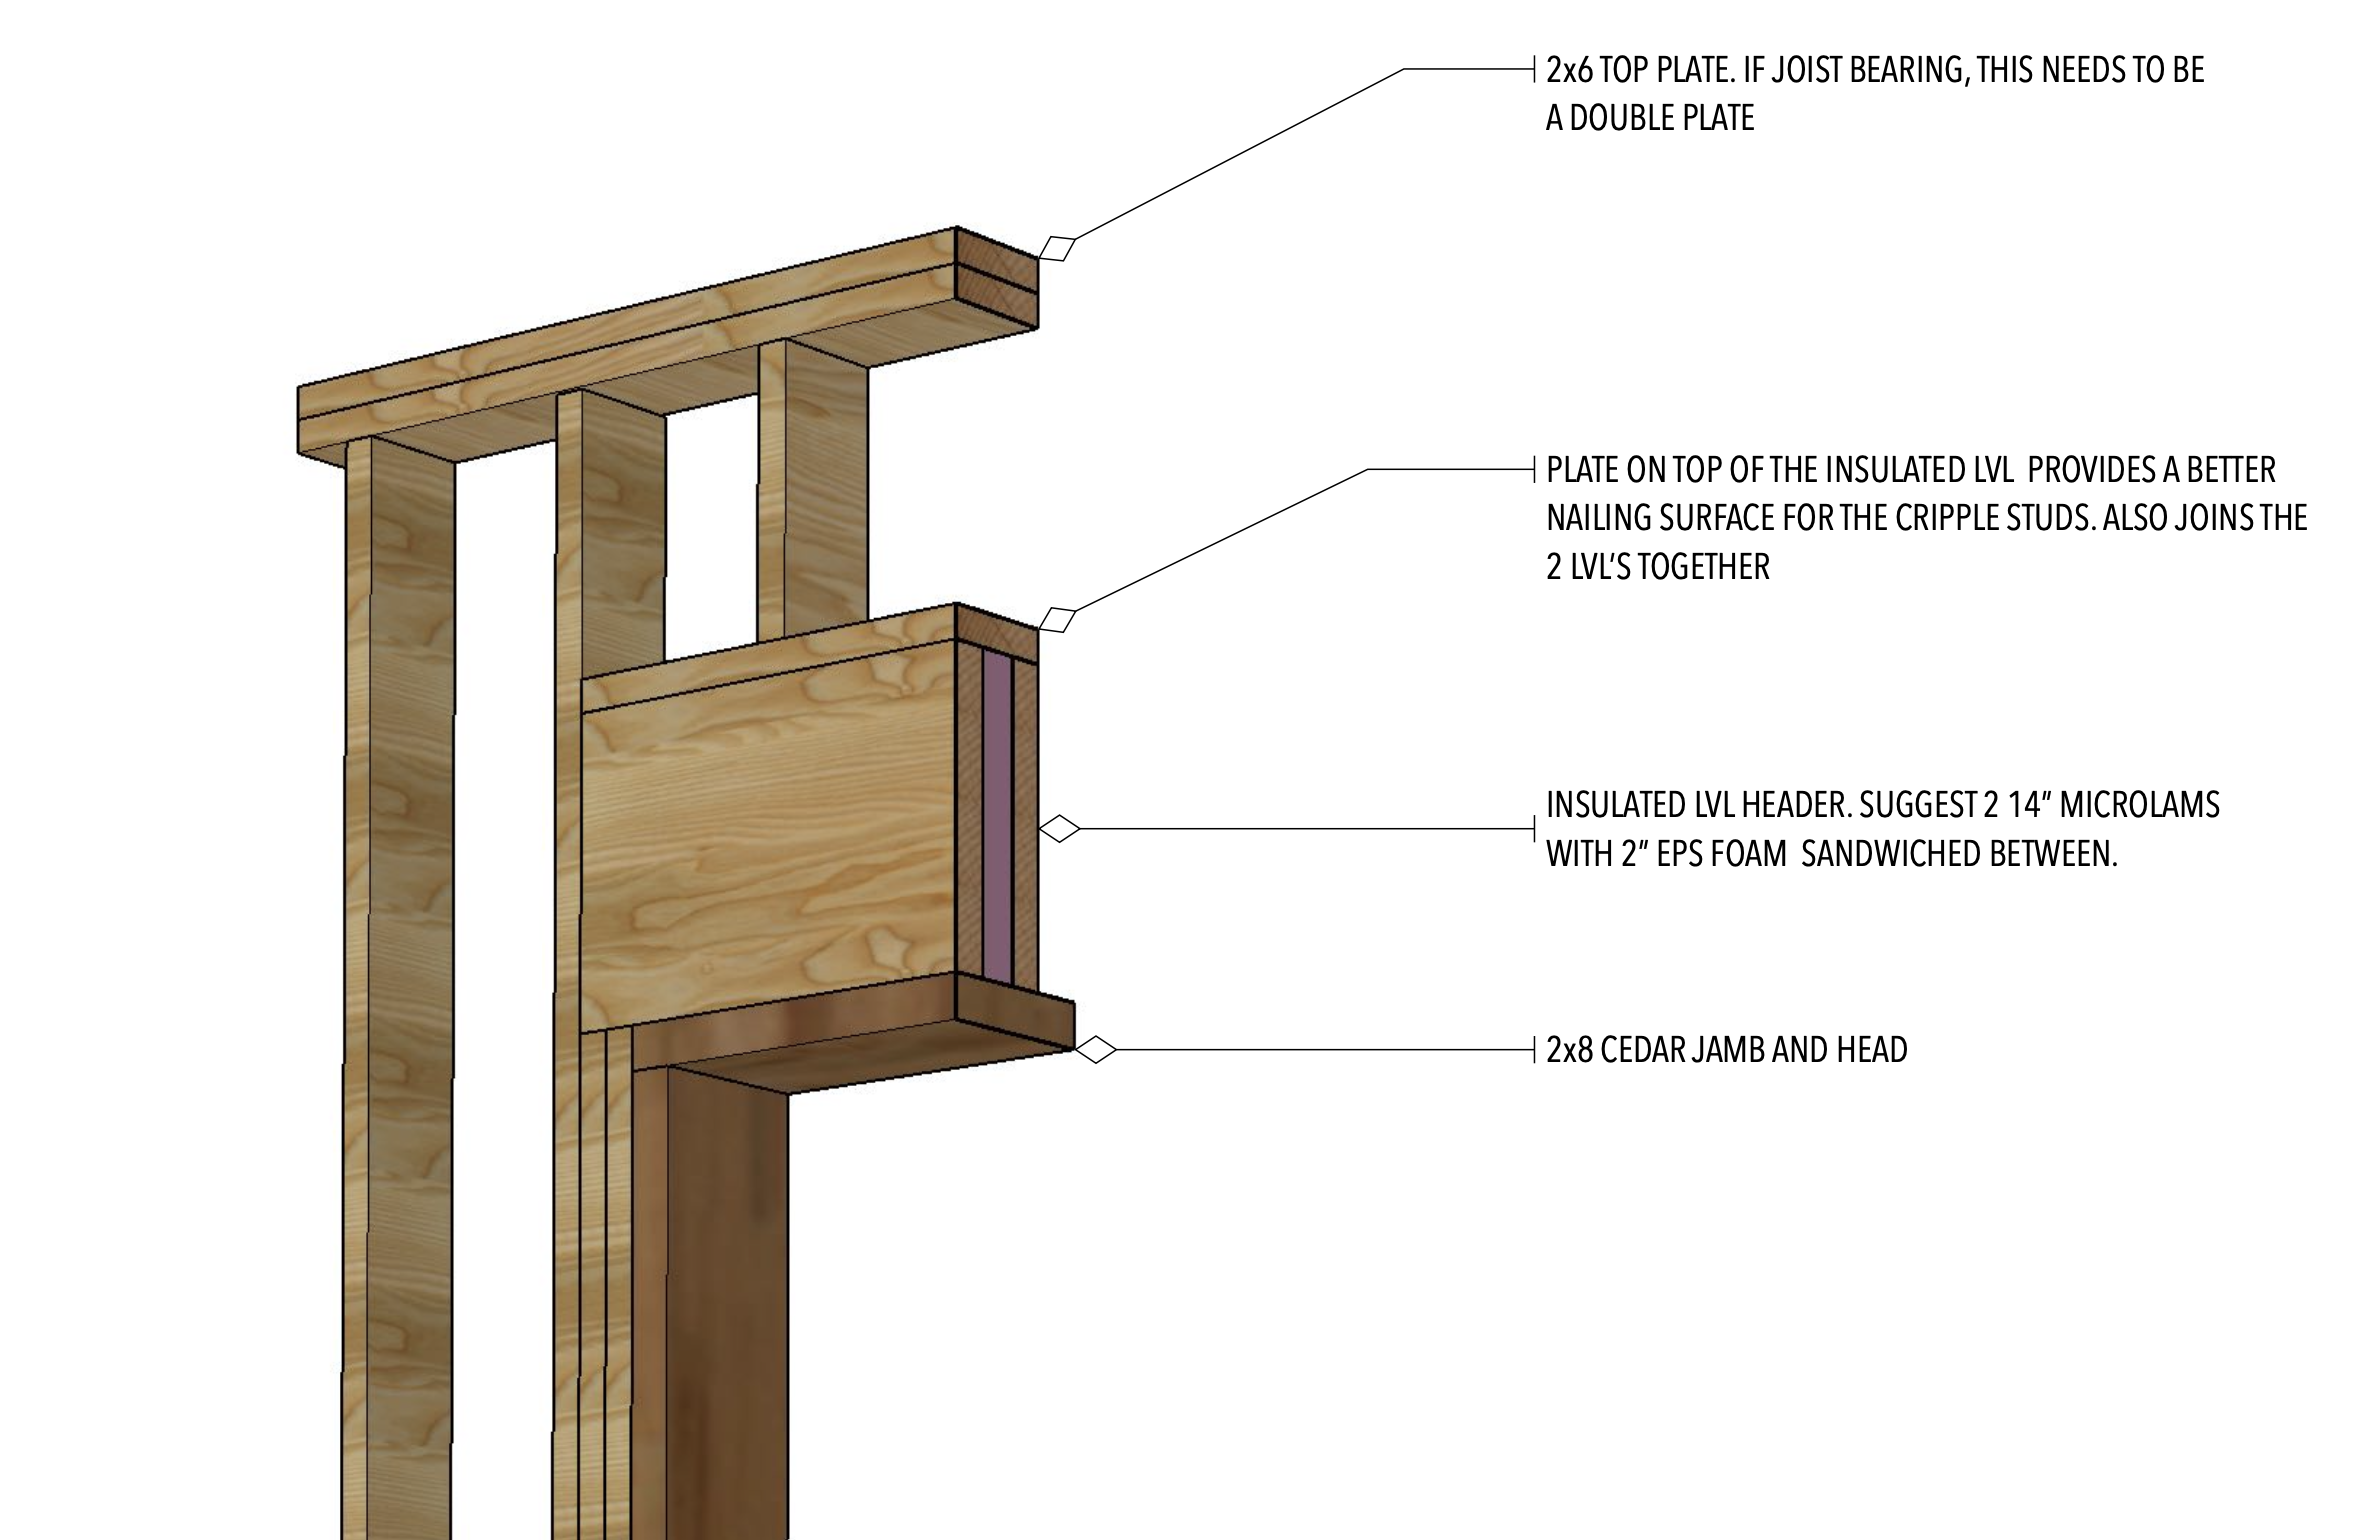
Insulated headers.
We also tackled insulated headers. A few tips or recommendations that we would pass on:
- Adding a bottom plate provided a surface to rest the heavy LVL on when getting into place.
- The top and bototm plate protected the insulation from the elements, and also gave an additional nailing surface.
- We kept the sandwich together with 5 inch timber screws in addition to nailing into the jack and king studs.
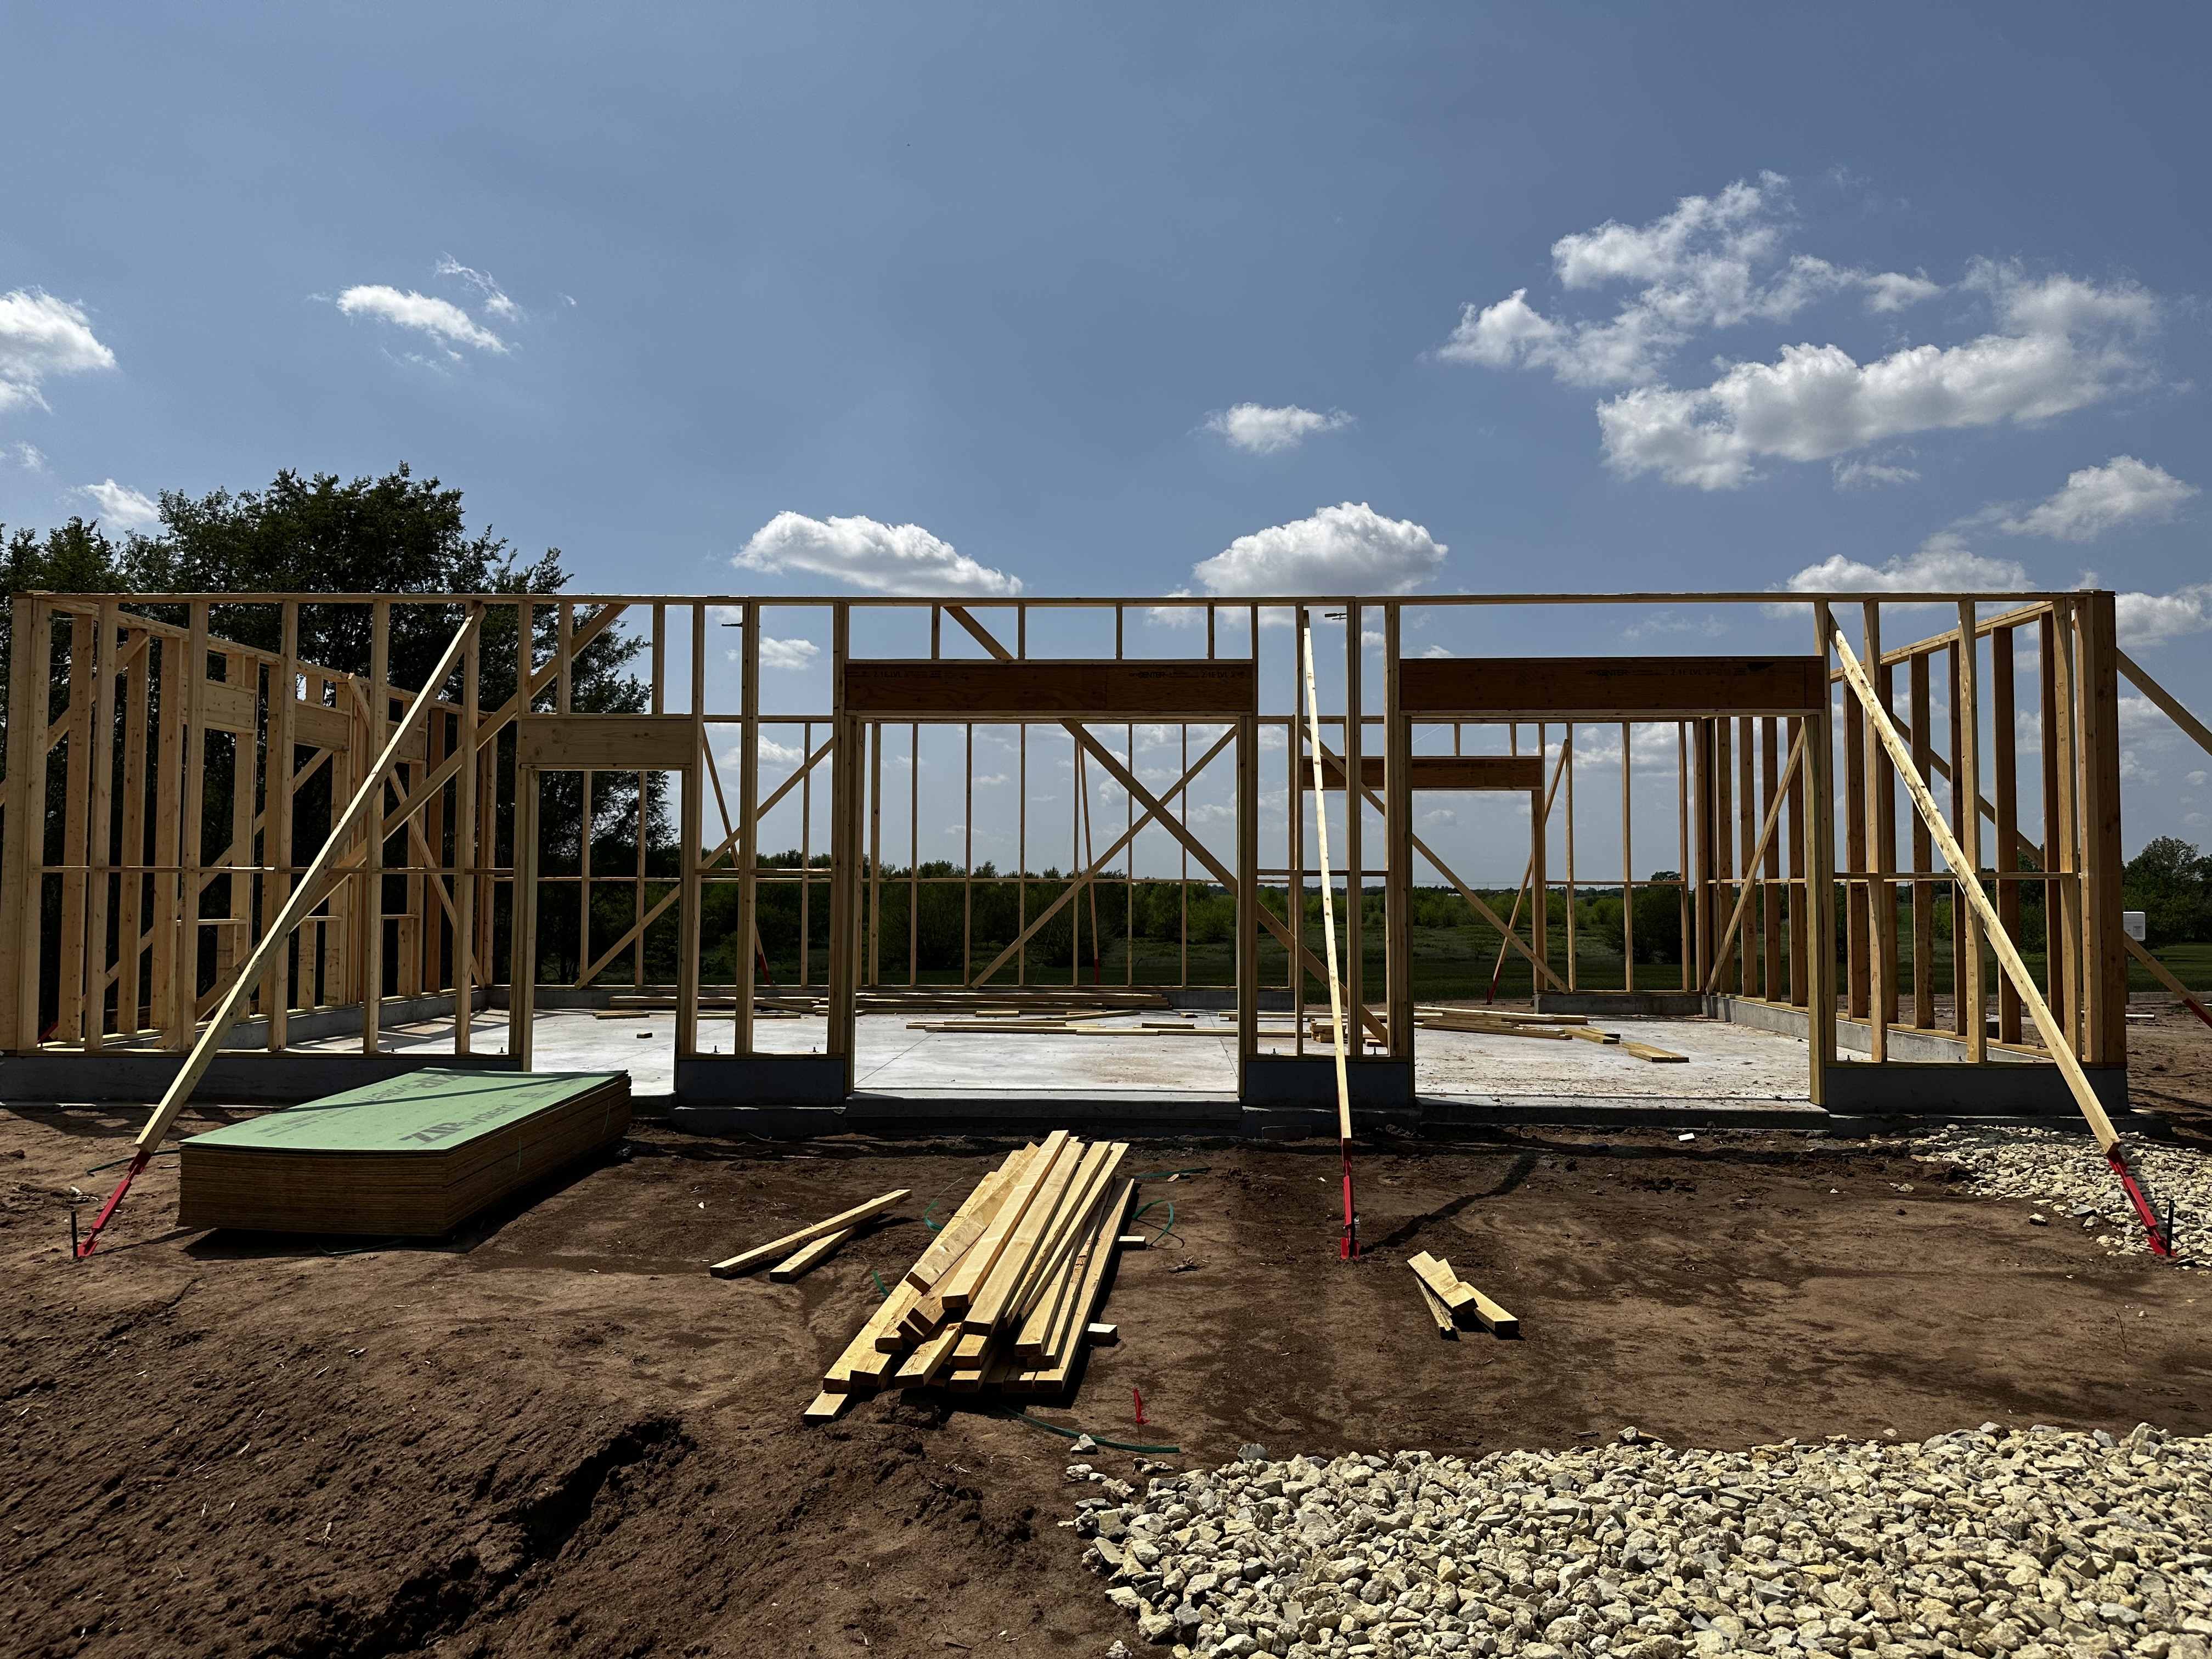
Completed wall framing.